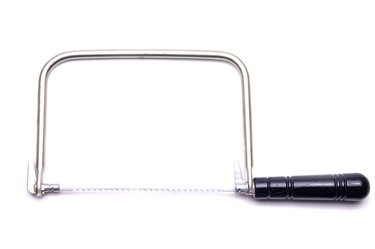
The purpose of a coping saw is to cut delicate curves in moderately thin lumber. Trim carpenters use it to shape the ends of cove molding -- a procedure called coping -- and cabinetmakers use it to cut inlay pieces, as well as for other purposes. The saw is shaped like a hacksaw, but it has a deeper well, and the blade thickness is measured in hundredths of an inch. This delicate blade must be properly tensioned to cut efficiently, and installing one properly is one of the safety issues you should consider when using this tool. Take care not to overtighten the blade to ensure safe operation.
Step 1
Remove the old blade by holding the frame with one hand and turning the handle counterclockwise with the other to release tension. After two or three complete rotations of the handle, the blade should pull freely away from the pins on each side of the frame.
Video of the Day
Step 2
Turn the handle through one or more complete rotations to ensure the pins are close enough together to allow you to fit the new blade easily.
Step 3
Arrange the blade with its teeth pointing toward the handle and hook one end into the pin on the side of the frame opposite the handle. Fit the other end of the blade into the pin connected to the handle and hold it there.
Step 4
Turn the handle clockwise to tighten the tension on the blade. Once the pins are far enough apart to for the blade to stay in place without the need for you to hold it, fine-tune the tension; it may take a complete clockwise rotation of the handle -- or more -- to stretch the blade tight enough to use, depending on the saw.
Tip
Some coping saws have levers that allow adjustment of the blade angle. To use them, release the blade tension, turn the levers in the direction you want the blade to face, then tighten the blade.
Other coping saws are designed so that you can squeeze the frame to release an old blade and install a new one. These saws automatically adjust the blade tension.
Warning
Avoid overtensioning the blade. It can snap while you're using the saw and give you a serious cut.
Video of the Day