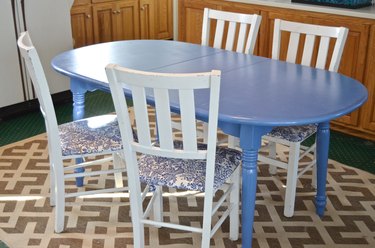
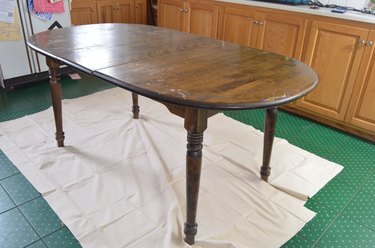
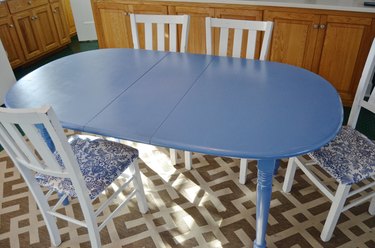
Transforming an inexpensive old table with chips and flaking finish is easier than you might think. With an afternoon and some attention to detail, a dreary eyesore can become a bright and cheerful centerpiece for your kitchen or dining room!
Things You'll Need
Sand paper: medium-grit and fine-grit
Dust mask
Liquid deglosser
Aluminum foil
Primer (look for one intended to cover laminate furniture)
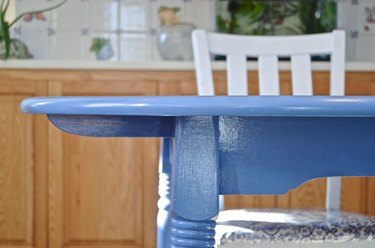
Latex paint (Semi-gloss or glossy finish will be easiest to clean. Table shown here has glossy paint.)
Foam roller
2-inch paint brush
Rags
Step 1: Sand, Sand and Sand Some More
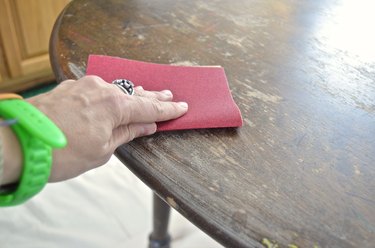
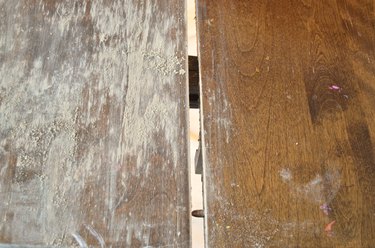
Start with medium-grit sandpaper and go over the entire surface of your table, being careful to remove any flaking or chipping pieces. Wear your dust mask to protect yourself from particles and other allergens that may be released from sanding.
Video of the Day
Warning
If table was painted any time from the early to mid-20th century, you should double check for lead paint before sanding.
Step 2: Clean the Table to Remove Excess Debris
Wipe down the table with deglosser to remove all dust and debris from the sanding.
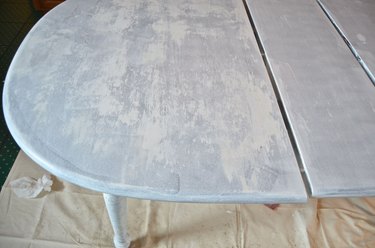
Step 3: Apply the First Coat of Primer
With foam roller, apply a first coat of primer. Follow the instructions on the primer label for specific dry time and re-coat time. For easier clean up, line the paint tray with aluminum foil.
Tip
Do not go back and forth over the paint too many times or you will begin to pull paint back off the surface.
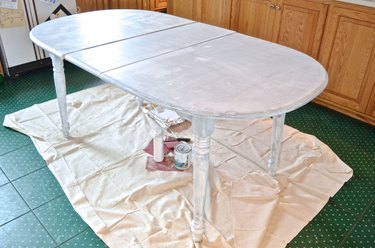
Step 4: Apply a Second Coat of Primer
Carefully apply a second coat of primer to the table.
Tip
For dark stained furniture, it may be necessary to use a shellac-based primer to prevent bleed through.
Step 5: Sand
With fine-grain sand paper, go over the table and wipe down any dust or debris.
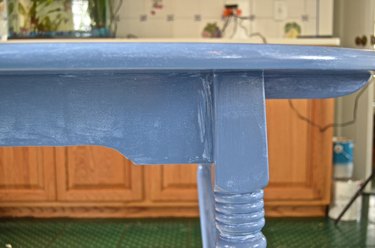
Step 6: Apply the First Coat of Latex Paint
With a foam roller, apply the first coat of latex paint. Be careful to watch for drips or brush marks. Follow the directions on the label for dry and re-coat time.
Step 7: Sand
With fine grain sand paper, go over the table and wipe down any dust or debris.

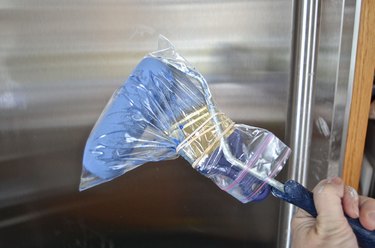
Tip
To store the roller and paintbrush between coats, wrap each one in a plastic bag and store in the refrigerator.
Step 8: Apply a Second Coat of Latex Paint
Apply a second coat of latex paint; depending upon the color, a third coat may be necessary. Look for irregularity in color or signs that the primer is still visible to determine whether a third coat is needed.
Tip
Allow paint to cure for a few days before heavy use.
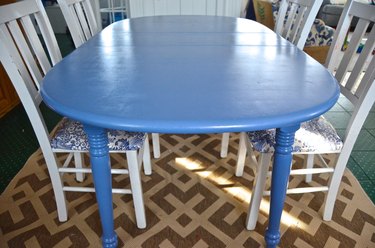
Never underestimate the power of paint. This inexpensive thrifted table went from scratched and faded to shiny and colorful with proper painting techniques and attention to detail.
Video of the Day