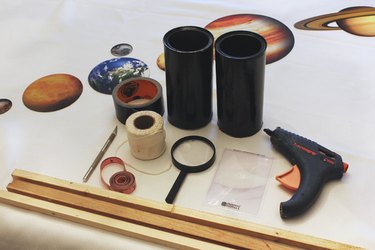
Things You'll Need
2 magnifying glasses, one with a handle and one without a handle
Measuring tape
Box cutter
Tissue paper (optional)
2 cardboard tubes, diameter wider than the lens on the magnifying glass with a handle
Duct tape
Glue gun
3 wooden dowels or sticks, approximately 3 1/2 feet
String
Decorative materials, such as stickers, paint, markers or colored tape
People have been using telescopes to explore our universe since the beginning of the seventeenth century. Today, most amateur astronomers use a refracting or reflecting telescope to take a peek at celestial objects close to home, but these can be expensive. You can easily build a simple and low-cost refracting telescope at home with kids so they can gaze upon the stars and explore our galactic backyard.
Step 1
Gather all of your supplies so everything is nearby when you begin making your telescope. You will need an assistant briefly for this project to help with measurements, so enlist the help of older kids, a friend or family member.
Video of the Day
Step 2
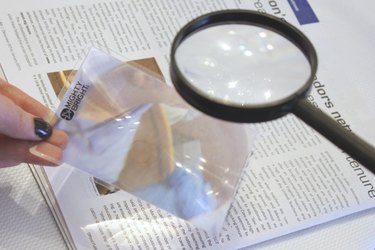
Find the focal length of your telescope, which is the distance between the primary lens and the point where the light rays come together in focus. To find the focal length, place an open book or newspaper onto a table. Hold the magnifying glass with a handle close to your eye and place the magnifying glass without a handle in front of the newspaper or book. Looking through both magnifying glasses, move the magnifying glass without a handle closer or farther away until the print on the paper comes into sharp focus. Using a tape measure, have an assistant measure the distance between the two magnifying glasses while the print is in focus. This distance is your focal length, so be sure to write it down.
Step 3
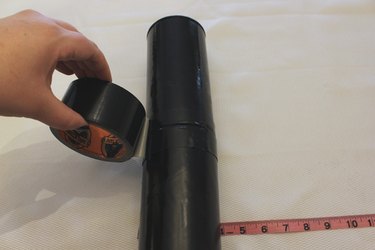
To determine the correct length of your telescope, add 4 inches to your focal length. If this measurement is longer than your tube, you will need to tape two tubes together.
Step 4
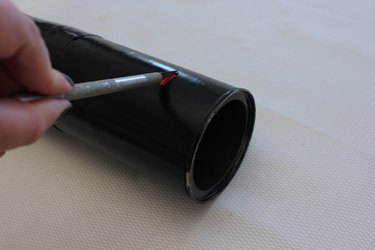
From one end of the tube, measure out the distance of your focal length and mark it on the tube. Add an extra 4 inches from this point, mark it and cut off the rest of the tube using a box cutter.
Step 5
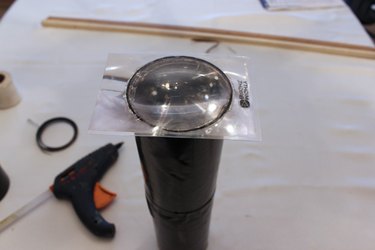
Glue the magnifying glass without a handle to one end of the tube. If the magnifying glass is too small to be glued inside the end of the tube, wrap tissue paper or duct tape around the outer edge of the magnifying glass until it's thick enough to fit snugly inside the end of the tube. If the magnifying glass is too large to fit inside the end of the tube, simply glue the magnifying glass to the end of the tube and allow the excess glass to be wider than the tube.
Step 6
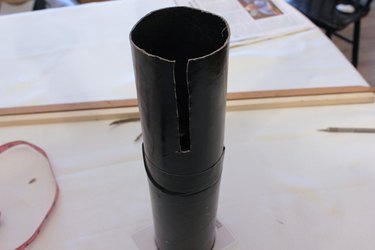
Create a slider on the other end of the tube so you can adjust the focus on your telescope. The focus will change depending on who is using it and the distance of the object you are observing. Cut out a small rectangle on the side of your tube that measures 4 inches in length from the end of the tube towards the center. Make sure the rectangle you cut out is wide enough for the handle on the magnifying glass to fit inside. This will allow you to slide the handle of your magnifying glass forward and backward to adjust the focus.
Step 7
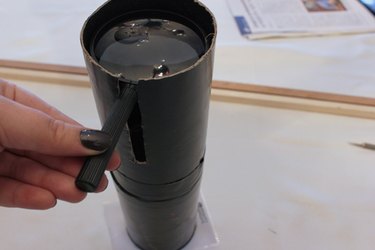
Place your magnifying glass inside the tube with the handle sticking out of the rectangular slider. If your magnifying glass is too small to rest inside the tube without falling, wrap tissue paper or duct tape around the outer edge until it is thick enough to fit snugly inside the tube but still able to slide forward and backward.
Step 8
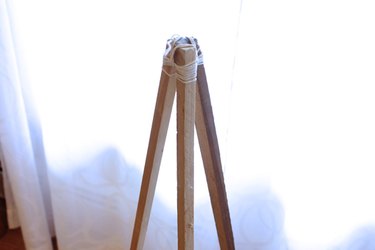
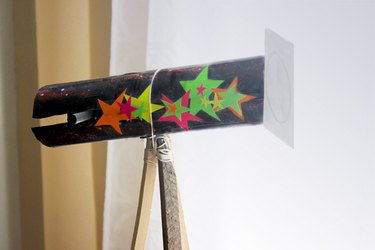
Create a simple tripod using three wooden dowels or sticks. All three legs must be the same length. Glue the tops of the legs together. Once the glue is completely dry, reinforce the top of the tripod by tightly tying string around the tops of the legs. Fan out the bottoms of the legs until the tripod is sturdy.
Step 9
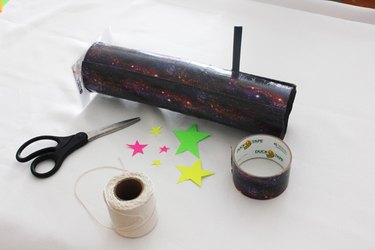
Enlist kids to help decorate the telescope using stickers, tape, paint, markers or any other decorative materials you have at home. This project used space-themed duct tape and colorful paper stars.
Step 10
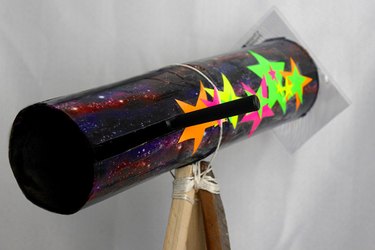
Tie your telescope tube to the top of your tripod using string, wait for the sun to set and bring your new telescope outside. Have kids look through the end of the telescope that has the slider to take a tour of their cosmic home.
Tip
The image in the telescope will appear upside down. An additional lens is required to flip the image, but most telescopes do not have an additional lens because there is no right side up in space.
You can paint the inside of the tube black to reduce reflected light.
Warning
Do not use your telescope to view the sun. Looking directly at the sun without a proper filter can cause permanent damage or blindness.
Use caution while using the box cutter and hot glue gun.
Video of the Day