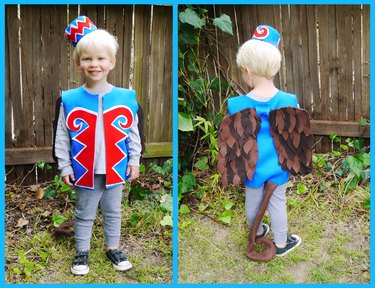
All it takes to become a flying monkey from the Wizard of Oz, whether toddler or adult, is some felt, glue, a pair of wings and a T-shirt to use as a template. With this homemade costume, your little one (or big one) will be the talk of the yellow brick road this Halloween.
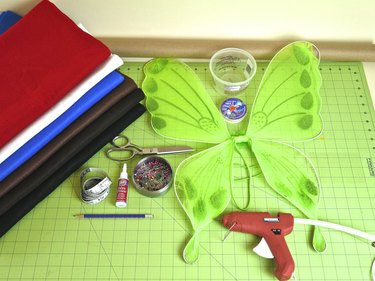
Things You'll Need
Wings (an old pair of butterfly, angel or fairy wings in any color)
Scissors
Brown felt in two different tones, 1/2 yard each color
Hot glue gun
Felt glue
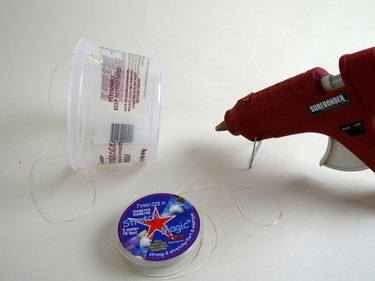
16-ounce plastic tub (a recycled salsa or hummus container will work)
Tailor's flexible measuring tape
Stretch cord
Royal blue felt, 1 yard (2 yards for an adult costume)
Brown kraft paper, 1 yard (2 yards for an adult costume)
Red felt, 1/2 yard
White felt, 1/2 yard
Straight pins
Sewing machine
Blue thread
Brown thread
Kitchen spoon or wooden dowel
T-shirt (the size you want the costume to be)
Section 1: Make the Wings
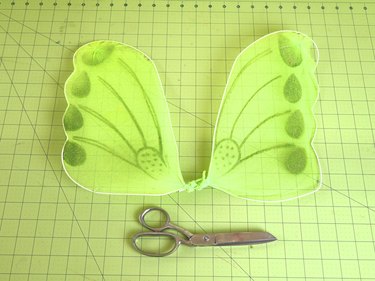
Step 1: Remove the Bottom Half of the Wings
An old pair of wings will work as a base for making the monkey wings. Most wings come in two sections. You want the top section only. Undo the middle connector between the two sections and discard the bottom part.
Video of the Day
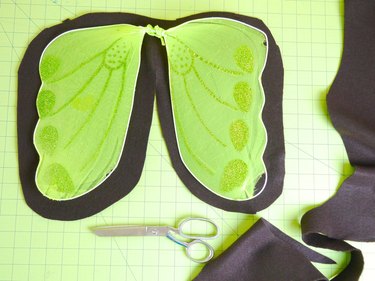
Step 2: Cut the Brown Felt
Turn the wings so the tips face down and place them flat onto brown felt (either tone). Cut the felt 1 inch bigger than the edge of the wings. Set the felt and wings aside.
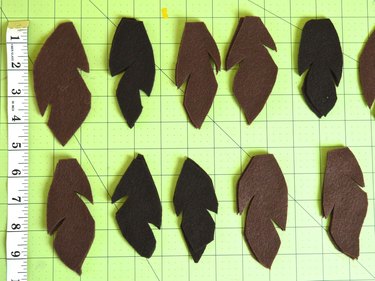
Step 3: Cut Feathers
Use two different tones of brown felt, and cut almond-shaped feathers roughly 5 inches long and 2 to 3 inches wide. Notch the sides of the feathers to add random detail. Don't worry about being exact here; the idea is to get several different shapes of feathers. You'll need 50 feathers.
Tip
Stack two or three layers of felt at a time to make multiple feathers at once.
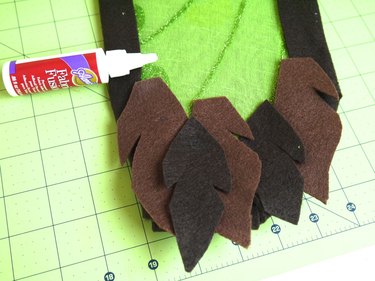
Step 4: Glue the Feathers in Place
Wrap the edge of the brown felt around the edge of the butterfly wings and secure it firmly with hot glue. Then use more hot glue or felt glue to tack the feathers in place. Begin at the bottom of the wings and work up, overlapping the feathers so the wing underneath is completely covered. Note: The solid brown felt should be on the opposite side of the wing.
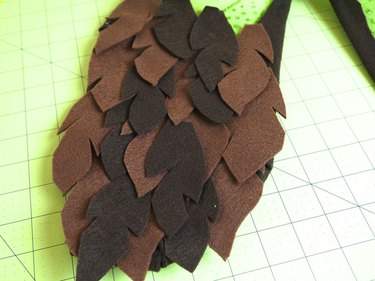
Step 5: Continue Adding Feathers
Work from the bottom of the wing up until you reach the top, placing the two tones of the brown feathers randomly.
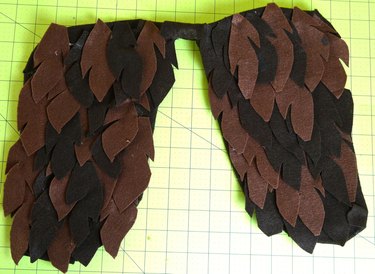
Step 6: Continue on the Other Wing
Continue overlapping and gluing feathers until both sides of the wings are covered. Glue a strip of brown felt over the bridge area between the two wings. Then, set the wings aside and make the hat.
Section 2: Make the Hat
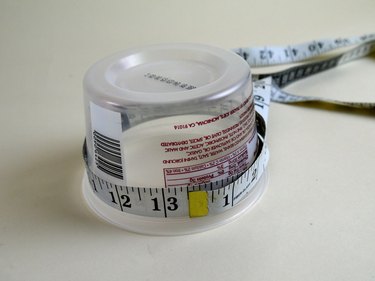
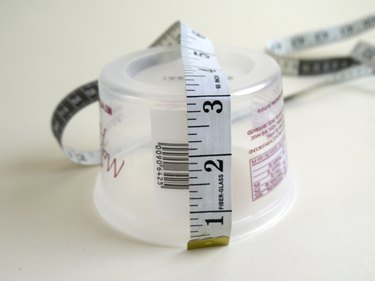
Step 1: Measure the Tub
Use a tailor's measuring tape to measure the circumference of the plastic tub. Then, measure the height and add 1 inch. For example, if the circumference of the tub is 13 inches and the height is 3 inches, the final measurement for the next step is 13 by 4 inches.
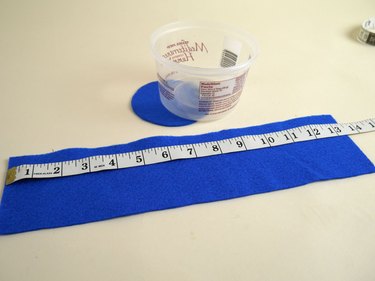
Step 2: Cut the Blue Felt
Trace the top of the tub onto blue felt and cut out the circle. Then, cut out a blue felt rectangle to match the circumference and the height of the tub (plus 1 inch). The measurement for this tub was 13 by 4 inches.
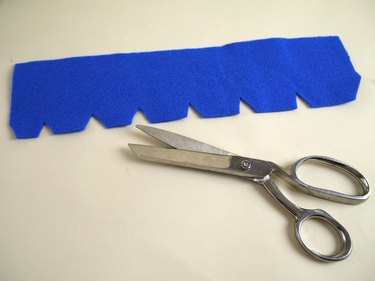
Step 3: Notch the Felt Rectangle
Use scissors to notch the blue felt rectangle. Cut small triangles about 1 to 1 1/2 inches apart down one long side of the felt rectangle. Set the felt circle and notched rectangle aside briefly.
Step 4: Make a Chin Strap
Measure from the top of one ear to the top of the other, going under the chin. Add 2 inches. Cut a piece of stretch cord to match this measurement, and secure it to the sides of the plastic tub with hot glue.
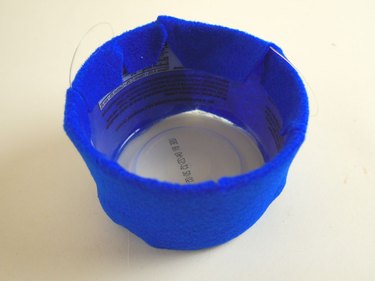
Step 5: Glue Felt Around the Tub
Line up the bottom of the long side of the felt rectangle with the bottom of the plastic tub. The notched side should overlap the opening of the tub. Wrap the felt around the tub, securing it with hot glue as you wrap. When the entire outside of the tub is covered in felt, fold the notches over the rim of the tub and glue them to the inside of the tub with more hot glue.
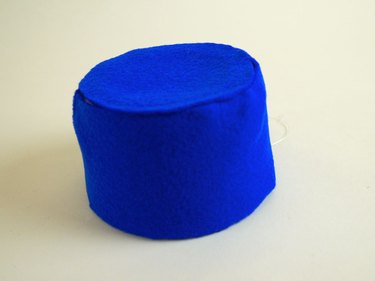
Step 6: Glue the Felt Circle
Flip the tub over and use hot glue to attach the blue felt circle to the bottom of the tub. Now you have the base for the monkey's cap.
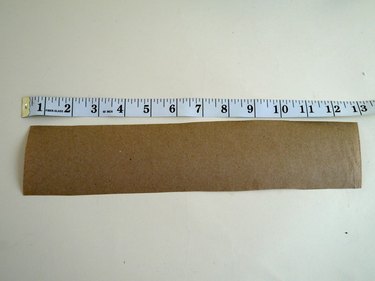
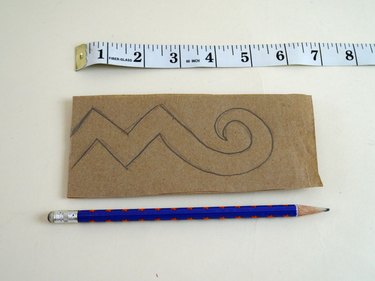
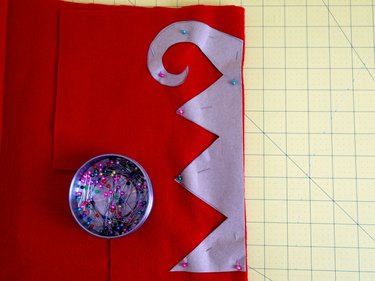
Step 7: Make a Template
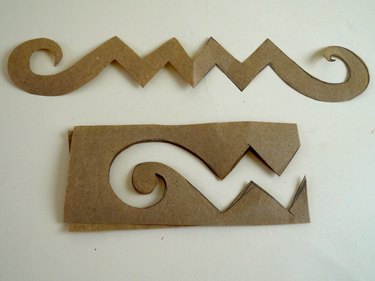
Use brown kraft paper to make a template for the design that goes on the hat. Cut out a rectangle measuring 13 by 2 inches, to match the circumference of the hat, and then fold the paper in half. Starting at the fold, draw a zigzag design with a curve at the end to match the design from the Wizard of Oz. The idea is to draw half of the design on the template and then cut it out. When opened, you will have a perfect zigzag design for the hat.
Step 8: Trace the Template Onto Felt
Trace the zigzag design onto a strip of red felt and then on a strip of white felt.
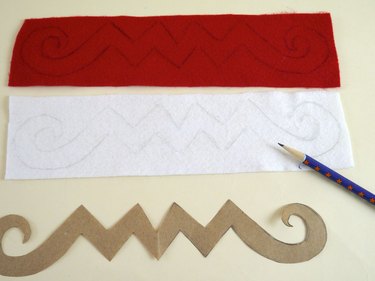
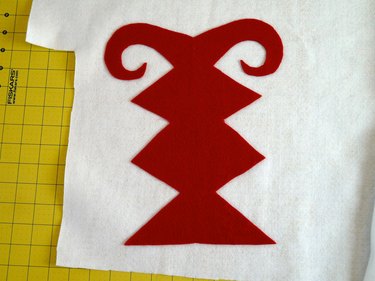
Step 9: Cut the Designs Out
On the red piece, cut out the design right on the pencil mark. On the white piece, cut the design 1/8 to 1/4 inch away from the pencil mark.

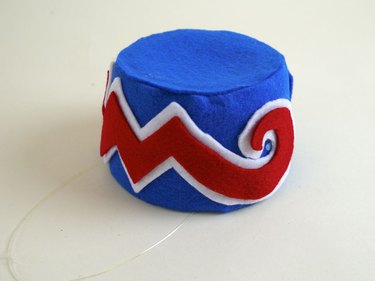
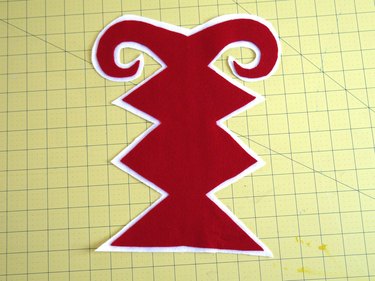
Step 10: Glue the Designs on the Hat
Turn both felt designs over so the pencil marks are on the back. Then use felt glue or hot glue to attach the white design to the side of the hat. Next, glue the red design on top of the white so the white makes a border around the red. Set the hat aside and make the tail next.
Section 3: Make the Tail
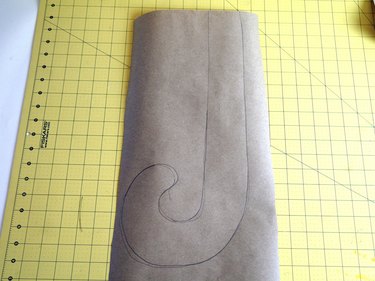
Step 1: Make a Template
Draw a "J" shape onto a strip of brown kraft paper to make a template for the tail. You can measure your toddler's lower back to the floor for the length. If you don't want the tail to touch the floor, make the J shape a few inches shorter than this measurement. The width should be 2 to 3 inches.
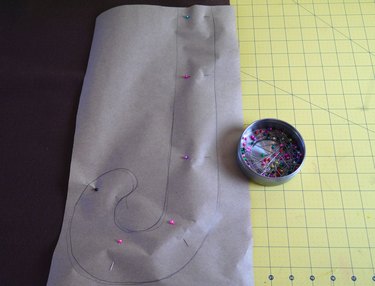
Step 2: Pin the Template to Felt
Fold a piece of brown felt in half, and pin the tail template to the folded felt. Place the pins down the center of the J, and then cut it out.
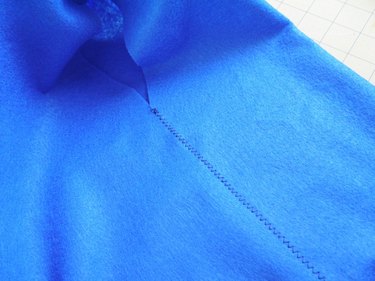
Step 3: Sew the Sides
Use a straight stitch on a sewing machine to sew the sides of the "J" about 1/8 inch away from the edge of the felt. Leave the top 2 inches of the tail open.


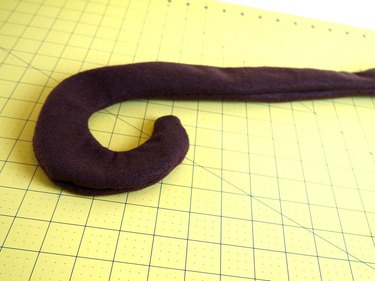
Step 4: Turn the Tail Inside Out
Now, turn the tail inside out so that the stitch is hidden on the inside. Place the rounded tip of the tail on the end of a wooden spoon or other long dowel. Push the tip into the tail's tube with the end of the wooden spoon. After the tip is inside the tail, you can scrunch the outside over the length of the wooden spoon. Eventually, the tip of the tail will come out the other end, and you can easily pull the tail inside out. When the tail is completely turned right-side out, set it aside with the hat and wings and make the vest.

Section 4: Make the Vest
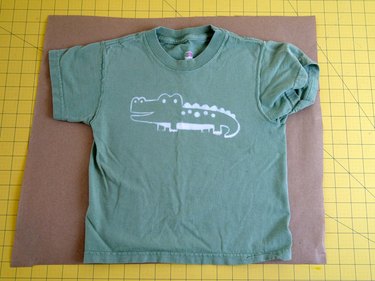
Step 1: Make a Template
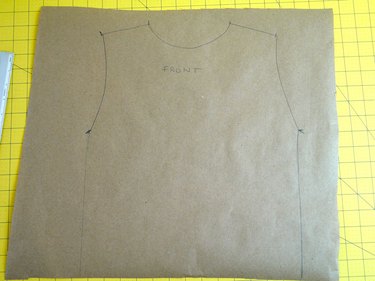
Place the T-shirt flat on a piece of brown kraft paper. Mark at the shoulders, the neck, and under the armpit.
Step 2: Trace the Shirt
Use a pencil to trace the top of the shoulders and then from the armpit down to the bottom of the shirt. Remove the shirt and draw in the curve of the neck between the shoulder marks. Connect the end of the shoulders to the armpit, making a vest shape on the paper. Turn the T-shirt over and repeat this process on a new piece of paper to make a template for the back of the vest.
Step 3: Pin the Templates
Pin the two templates onto blue felt.
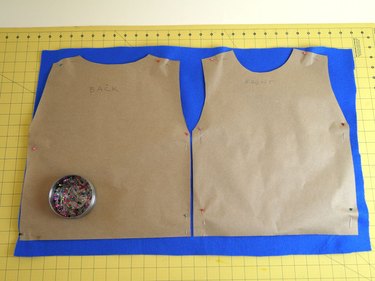
Step 4: Cut the Templates Out
Use scissors to cut out the two templates. Set the felt aside and remove the front template.
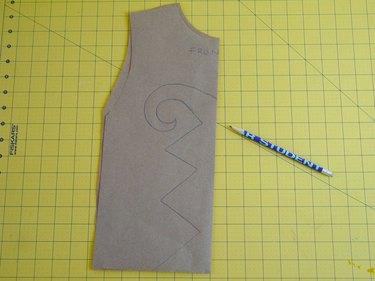
Step 5: Draw a Design on the Template
Fold the front template in half and draw a zigzag design along the fold similar to the design from the Wizard of Oz. Start at the bottom of the template and make three zigzags and then a curve at the top. The peaks of the zigzag should be about 3 inches high, and the valleys should be about 1 inch from the edge of the fold. Cut the template out.
Step 6: Pin and Cut
Fold a piece of red felt in half and pin the template to the felt so that the edge of the template lines up with the fold of the felt. Cut out the design.
Step 7: Glue the Design to White Felt
Open the red design and use felt glue or hot glue to attach it to white felt.
Step 8: Cut Out the Design
Cut out the white felt 1/8 to 1/4 inch away from the red design. Set the design aside temporarily.
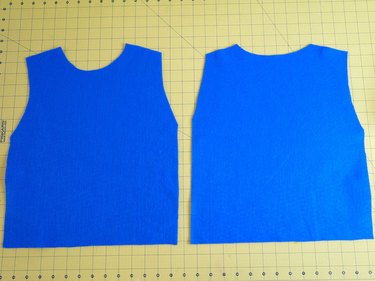
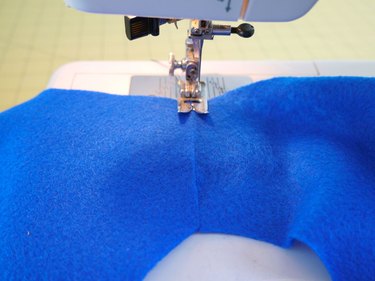
Step 9: Sew the Shoulders
Set your sewing machine to a zigzag stitch. Place the two blue pieces of the vest together. Load the shoulders into the machine. You don't need to overlap the felt; just line it up so it is touching. Sew a zigzag stitch along the shoulder seam. Do this to the opposite shoulder as well.
Step 10: Sew the Sides
When the shoulders are connected, sew the sides from the armpit down to the bottom with the same zigzag stitch, leaving the armholes open.
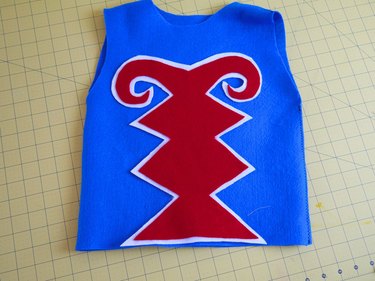
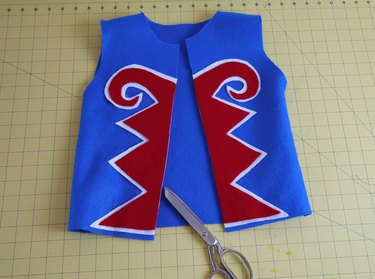
Step 11: Glue On the Design
Line up the center of the design to the center of the vest. Use hot glue or felt glue to glue it down. Then, use scissors to cut the front of the vest in half from the bottom up to the middle of the neck. Be careful not to cut through the back of the vest.
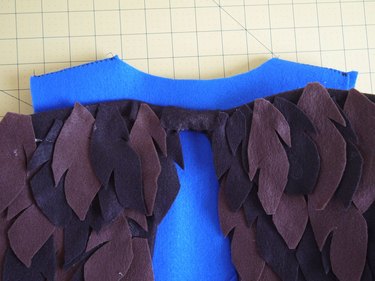
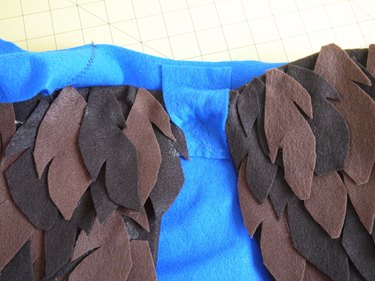
Step 12: Attach the Wings
Turn the vest over and use hot glue to attach the bridge on the wings to the back of the vest, just below the neck. Then hot glue a 2-by-3-inch strip of blue felt over the bridge of the wings.
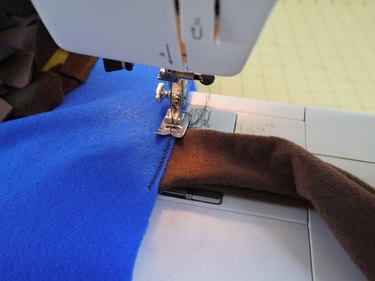
Step 13: Attach the Tail
Attach the tail to the bottom back of the vest with the sewing machine.
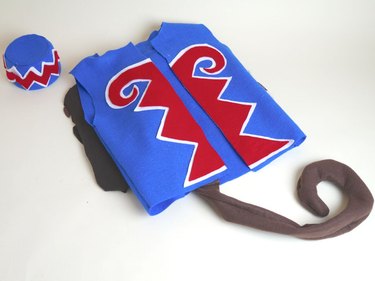
Put the Costume Together
Now the costume is ready to wear. Have your little one wear gray sweats underneath, and you're ready to take on the night. Happy Halloween!
Video of the Day