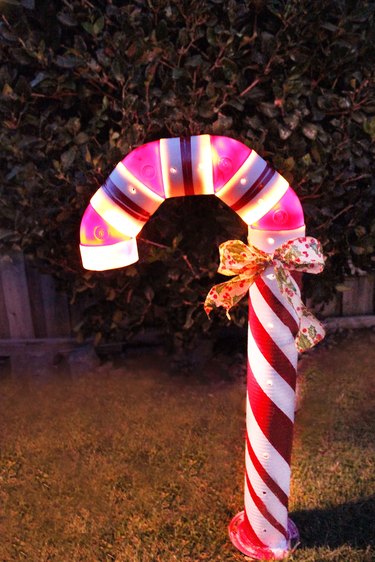
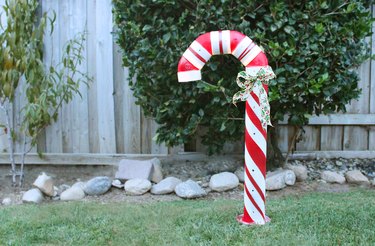
Festive lanes of lighted homes and trees make up a magical part of the Christmas tradition. This holiday season, incorporate a bit of peppermint into your outdoor lighting display with these lighted candy cane decorations. Made from PVC pipe, these affordable lights will delight neighbors and guests for many years to come.
Video of the Day
Things You'll Need
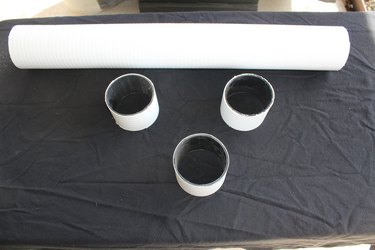
4-inch PVC pipe, 10 feet (unless you can find it in 4-foot lengths)
4-inch 45-degree angle PVC connectors, 4 pieces
4-inch flange
1-inch galvanized screws, 4
Red spray paint
White spray paint
Silver glitter spray paint
Painter's tape, 2-inch
Chop saw
Sandwich bags, 3
Sand
Clear PVC cement
Clear silicon sealant
LED strand light
Power drill
Ribbon
Step 1: Cut the PVC Pipe
Begin by cutting a piece of PVC pipe at 3 feet in length using the chop saw -- this will be the stem of the candy cane. Use a tape measure and pencil to measure and mark first. Now cut three PVC pieces at 3 inches each in length. These pieces will connect the angled PVC connectors to create the rounded top of the candy cane.
Video of the Day
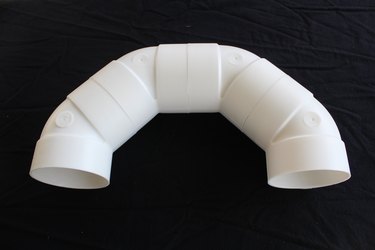
Step 2: Assemble the Candy Cane Top
Apply PVC cement to the outside of one of the 3-inch PVC pieces you just cut, covering about half. Now insert that piece into a 45-degree PVC angle. Cover the other half of the 3-inch piece with cement and connect it to another 45-degree angle, essentially connecting the two 45-degree angles together.
Apply PVC cement to another 3-inch PVC piece and insert it into one of the 45-degree angles that is already attached. Cover the other half of the 3-inch piece in cement and connect it to another 45-degree PVC angle. Attach the last 45-degree angle the same way you attached the others, and you have completed the top of the candy cane.
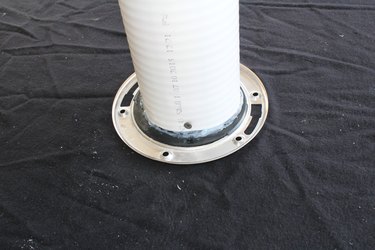
Step 3: Connect the Stem to the Base
Place the 3-foot PVC pipe vertically over the flange. Mark with a pencil where the pipe lies on the flange, and then take the pipe off. Apply a liberal amount of sealant where the pipe will sit on the flange. Stand the pipe up and place the flange upside down on the top of the pipe, pressing the sealant firmly to the pipe. Let it dry for at least an hour.
Now drill four 1-inch screws through the pipe into the flange to secure the two pieces together, placing each screw equally spaced around the base from each other.
Step 4: Paint the Candy Cane White
In a well-ventilated area or outside, spray paint the candy cane stem and top white, covering any marks that may have been made for a nice clean look. Let the paint fully dry.
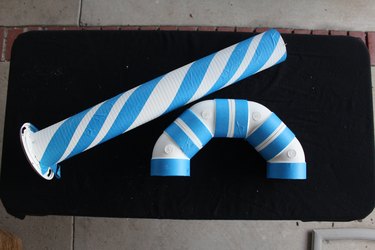
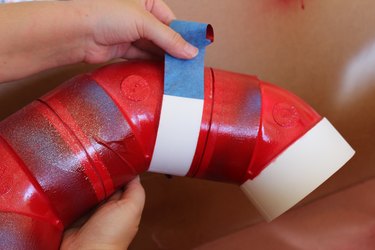
Step 5: Tape the Candy Cane
Starting at the base of the candy cane stem, wrap painter's tape around the PVC pipe all the way to the top, creating a striped pattern that swirls around the candy cane. Be sure to tape off the candy cane top, too.
Tip
You can use different sized painter's tape to give it a more whimsical effect, creating some thicker stripes and some thinner stripes.
Step 6: Paint the Candy Cane Red
Use the red spray paint to completely cover the candy cane in red paint. Let the paint fully dry. Now use the silver glitter spray paint and spray from a farther distance, so the candy cane doesn't get completely drowned in glitter. Keep adding light layers until you feel you have enough glitter. Let dry completely.
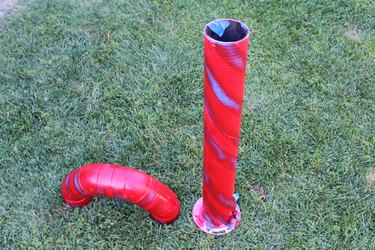
Step 7: Remove the Tape
Carefully remove the tape from the pipe. Be careful not to peel off any red paint surrounding the tape.
Step 8: Drill Holes for Light
Use a 3/8-drill bit to drill holes into the white parts of the candy cane along the front side. This is where the light will escape from within. You can also drill more holes wherever you would like more light to pour out.

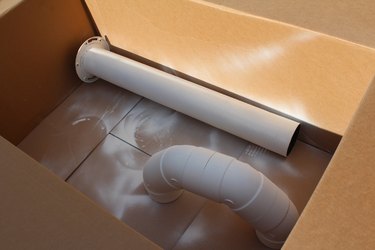
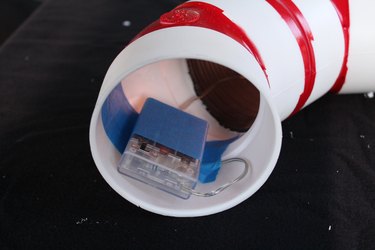
Step 9: Place LED Lights Inside Candy Cane
Place the top of the candy cane on the stem (you do not need to glue this on). Feed the LED light string through the top and stem of the candy cane. Tape the LED light box to the inside of the candy cane top for easy on/off access.
Tip
Not gluing the top of the candy cane to the stem helps with storing it later and getting the sand bags out if needed.
Step 10: Insert Sand Bags
Fill and seal three sandwich bags with sand. Place the bags into the 3-foot PVC pipe. This will keep the candy cane from tipping over when the top is set in place.
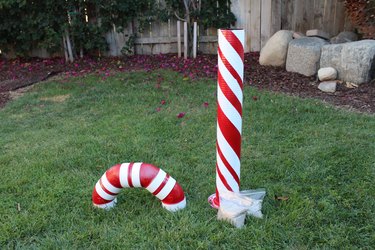
Step 11: Display
To finish it all off, tie some ribbon to the top of the candy cane for some extra holiday pizzazz, and put it on display!