Whether you're throwing a kid's birthday party, a backyard barbecue or even a wedding, milk and cookies are always a crowd-pleaser. So why not shake up this traditional dessert and surprise your party guests with these edible milk and cookie shot glasses! They are easy to make and a fun craft to create with kids. Not to mention, they are a much hipper dessert to include in a teenage birthday party or wedding.
Video of the Day
Things You'll Need
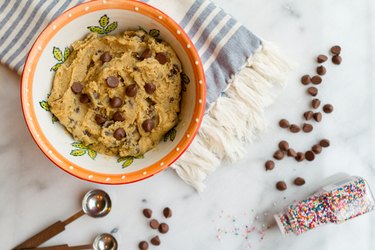
Chocolate chip cookie dough (prepackaged or made from scratch)
Chocolate chips
Sprinkles
Silicone shot glass mold
Step 1
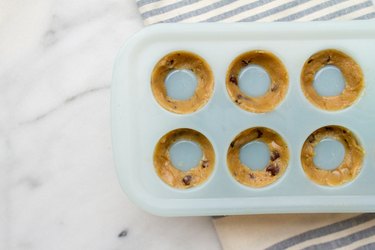
Preheat your oven while you mix up your cookie dough and spoon into your silicone mold. There is no need to spray the mold beforehand as the silicone is non-stick. Make sure to push the dough deep into the mold covering all spaces. Leave the tops of your glasses open as shown in the image below. As the cookie dough bakes it will fill in this space, creating an even base to your cookie glasses.
Video of the Day
Tip
Pop your filled mold into the fridge for about 10 minutes before baking. This helps the dough conform to the glass shape.
Step 2
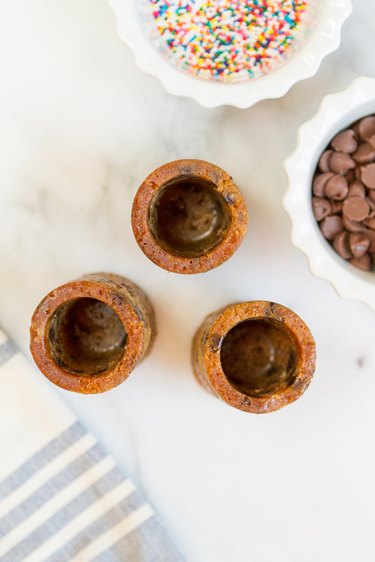
Bake your cookies according to the recipe or package directions. As the mold is quite deep it can often take a few more minutes than typical sheet cookies. Let the mold cool completely before removing the cookies. The cookie shots are very fragile at this stage and need to be removed slowly.
Step 3
Once your cookies have cooled, it is time to seal them so that they can hold milk without becoming mushy. Melt a bowl of chocolate chips in the microwave. Using a small spoon, drop a dollop of melted chocolate into the center of each cookie glass. Then use your finger to spread the chocolate to cover the base and interior sides of the cookie. Pop your cookies into the fridge for about ten minutes or until the chocolate hardens.
Step 4
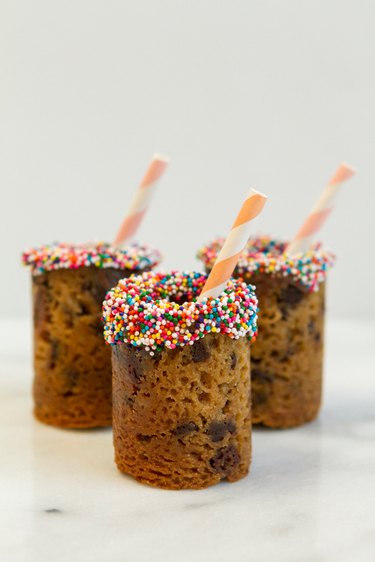
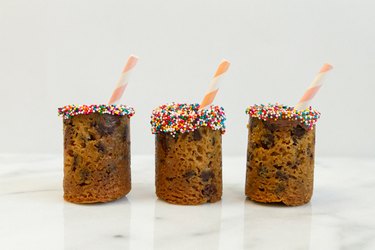
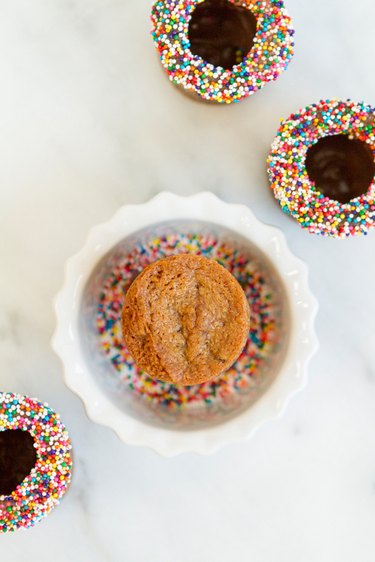
Now it's time to decorate your cookies! Adding sprinkles or crushed nuts will add a bit of color and will mask any cracks or uneven surfaces on your shot glasses. Melt the remaining chocolate chips in the microwave. Using your finger, spread a small amount on the rim of your glasses. Then, carefully dip the rim into a bowl of sprinkles.
Step 5
At this point, your cookie glasses are finished and ready to be enjoyed. Watch your guests light up with joy when they are greeted with this unique and yummy dessert! If you are expecting guests with allergies, you can even mark the cookie glasses with different colored straws to represent different types of milk. Mix it up and add almond, soy or even cashew milk to your glasses for a fun twist.