Things You'll Need
Excavator
Shovel
Wheelbarrow
Measuring tape
Chalk
Hammer
Chisel
Masonry grinder
Sandpaper (60-grit)
Orbital sander
Steel-framed door
Drill with diamond or masonry bit
Concrete anchor screws
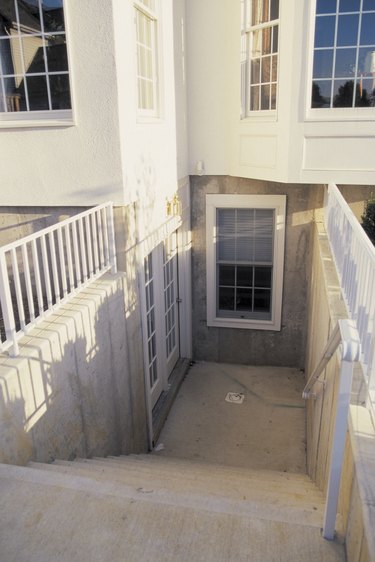
Transforming a buried basement to a walk-out adds convenience and an element of safety to a home. Basements often have only one entrance, coming from the main level of the home. A walk-out basement includes an exit to the exterior of the home, allowing persons to enter or exit through the basement, bypassing the upstairs. For homes built on a flat surface, this project may include the assistance of professional landscapers, depending on the soil type surrounding the home.
Excavation
Step 1
Call 811 or contact local utility companies to locate buried pipes and lines in the yard area to be excavated. Any electrical or water lines may require relocation prior to beginning the project.
Video of the Day
Step 2
Consult with a professional landscaping company concerning the type of soil present in the area to be excavated. The type of soil determines whether excavation can be a do-it-yourself project or require professional assistance.
Step 3
Use a backhoe, excavator or shovel to remove black dirt, clay or other hard soils from the area. If the soil is sand, silt or other shifting or soft soil, contact a professional landscaping business to shore up or create walls to hold back the soil from the area.
Install a Door
Step 1
Chalk mark around a steel-framed door on the interior wall. Select a steel-framed door the depth of the exterior wall. Place the frame against the wall and trace around with chalk.
Step 2
Shrink the drawing of the frame by 3/4-inches. Use a measuring tape to make the drawing smaller by 3/4-inches on each side and down from the top.
Step 3
Place a chisel along the interior edge of the marked line and hit with a hammer to create a hole. Repeat this action multiple times around the interior of the drawn frame.
Step 4
Cut along the chalk line with a masonry grinder. Work slowly and stay to the interior side of the line.
Step 5
Remove the remaining masonry with a hammer. Hit the interior of wall to knock out any remaining material.
Step 6
Sand the frame using an orbital sander with 60-grit paper. Smooth the interior frame with the sander.
Step 7
Place the steel-frame for the door in the opening and drill the holes for the screws. Use a drill with a diamond or masonry bit. Drill through the screw hole openings of the steel frame.
Step 8
Screw the frame into the opening using concrete anchor screws. Be sure the anchor screws are the same size as the screw that came with the door from the manufacturer.
Tip
For less excavation, consider digging a sloping, open tunnel for the entrance instead or removing the entire area or yard.
Warning
Dust and flying debris are a hazard during this project. Wear gloves, goggles and a respirator during the installation of the door.
Video of the Day