Things You'll Need
Sponge
Wood cleaner
Cloth
Hammer
Nail set
Safety goggles
Face mask
Random orbital sander
Sandpaper, 60-, 100-, 150-, 220-grit
Masking tape
Masking paper
Hardwood floor stain
Foam applicator
Polyurethane finish
Paintbrush
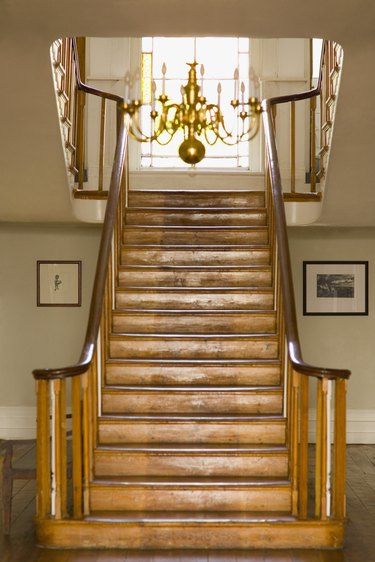
Hardwood stair treads add the look of elegance to any stairway, along with a warm natural feel that goes well with any decorating decisions in your home. Over time, though, consistent stair use will scratch the stair treads, making them appear dull and dirty. Having the stairs refinished by a professional can restore the original look of the stairs, but the cost for doing so can be a high one. Instead, you can go the DIY route by sanding and staining the stair treads yourself. It can be messy, and there's a good deal of labor involved. Done well, however, the job will leave your stairs refreshed and protected for a few more years of use.
Step 1
Clear away any dirt from the stairs, using a sponge and wood cleaner. Start at the top and work down, using enough liquid to clean the stairs without saturating the wood. Wash both the stair treads and the risers. Rinse each stair with clean water and use a piece of cloth to pat the stair dry before moving on to the next one.
Video of the Day
Step 2
Examine each tread for any nails protruding above the stair's surface. Hammer the nail until flush with the stair. Place the point of a nail set onto the nail head and strike the head of the set to drive the nail into the tread slightly.
Step 3
Put on a pair of safety goggles and a face mask to protect your eyes and lungs from sawdust during sanding. Attach 60-grit sandpaper to a random orbital sander containing a dust extraction port attached to a vacuum to collect as much of the sanding dust as possible. Sand each stair tread to remove the existing stain from the wood. Use a sanding block with a 60-grit sheet to sand the edges or corners of the tread where the orbital sander can't reach.
Step 4
Switch the sandpaper to 100-grit and go over the treads, removing the scratches left in the wood from the 60-grit. Change the sandpaper to 150-grit and sand again, smoothing out the treads even more. Use 220-grit sandpaper to remove any minor scratches or imperfections remaining. Wipe off the treads after each sanding pass with a tack cloth.
Step 5
Clean the stair treads with the wood cleaner again, using the same process as in the first cleaning.
Step 6
Place a strip of masking tape onto the wall edging the treads and cover the risers with masking paper secured with a strip of tape. This will protect the surfaces from the stain used on the treads.
Step 7
Spread a layer of wood stain over each tread, using a foam applicator. Start with the top step and move down. Follow the wood grain with the applicator, keeping the coverage on each tread as even as possible. Use a piece of cloth to wipe off any excess stain from the treads. Spread three layers of the wood stain onto the stair treads, waiting an hour between each one. Let the last layer dry overnight.
Step 8
Cover the stain with a layer of polyurethane finish to add a wear layer of protection over the stained steps. Use a paintbrush for the polyurethane application, brushing along the grain of the wood as well as moving from top to bottom on the staircase. Allow the polyurethane 72 hours to dry to a stage at which it's safe to walk. Remove the masking tape and wait a total of three weeks for the polyurethane to cure completely before making heavy use of the stairs.
Tip
Use water-based wood stains for faster drying times.
Warning
Open nearby windows and doors to increase the stairway’s ventilation when using the stain and finish.
Video of the Day