Spring is finally upon us, meaning it's time to flex your green thumb. Start with this DIY project for homemade seed bombs, which are easy and beautiful to boot. Simply scatter them across your yard or garden bed (or plant them in pots), water them well, and watch your flowers bloom.
If you're unfamiliar with seed bombs, they're essentially balls of all-natural, nontoxic clay wrapped around soil and flower seeds. They're designed to be placed in soil and watered, and they'll break down over time. This will let the seeds root and germinate wherever they land, making it easy to plant seeds in large and small spaces alike.
Video of the Day
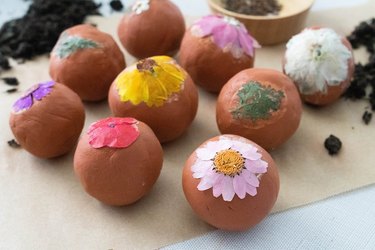
To make these seed bombs extra charming, we added pressed flowers using all-natural glue. The glue, which is made of water and cornstarch or flour, is totally biodegradable. The result is a set of eco-friendly orbs that are pretty enough to gift!
Video: Dried Flower Seed Bombs
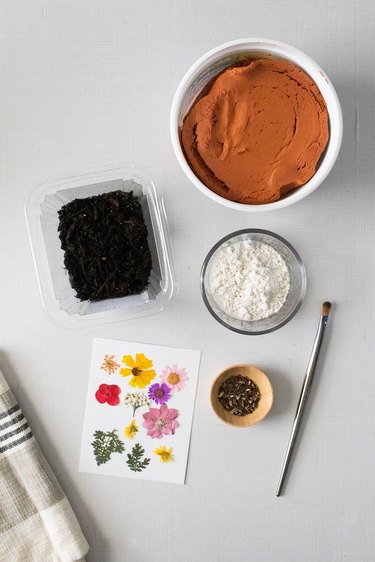
Things You'll Need
Nontoxic air-dry clay (terra cotta or white)
Pressed dried flowers
Flower seeds
Soil
All-purpose flour
Water
Paintbrush
Tip
The flour or cornstarch glue will not dry clear. If you want the glue to be less visible, use white air-dry clay.
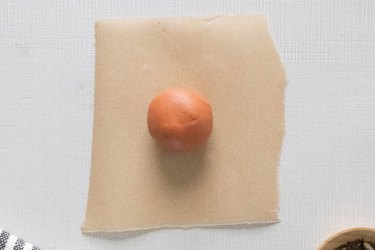
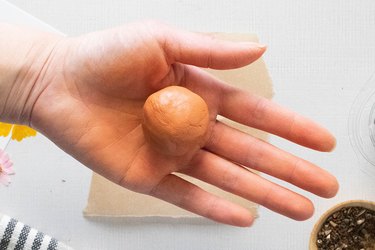
1. Prepare the clay
Form the clay into a 1 1/2-inch ball.
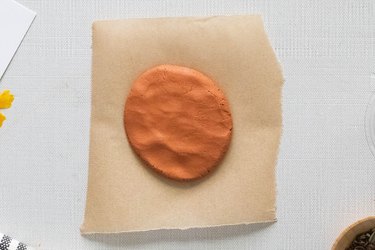
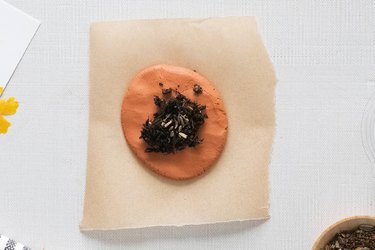
2. Add soil and seeds
Place a small amount of soil in the center of the disc. Scoop or sprinkle seeds on top of the soil.
Tip
If you plan to plant these seed bombs in the ground, be sure to use flower seeds that are native to your area. You can use a mix of varieties or one type.
3. Roll the clay
Pinch the edges of the clay upward so they cover the soil.
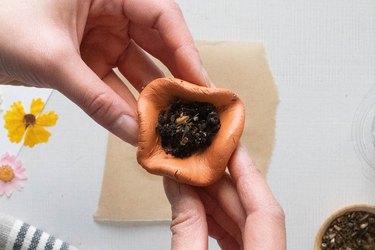
Glide your fingers across the seams to join them together.

Reroll the clay into a ball.
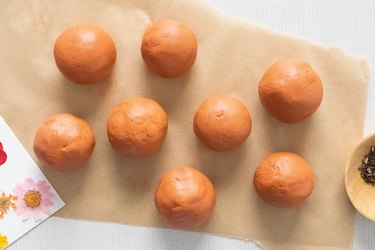
Repeat until you've made your desired number of seed bombs. Let them dry for 24 hours or until the clay is dry to the touch.
4. Attach the pressed flowers
In a small container, combine 1 tablespoon all-purpose flour or cornstarch and 1 tablespoon water. Mix to form an all-natural paste.
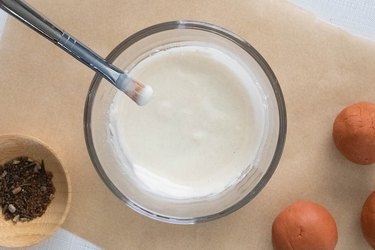
Using a paintbrush, add a thin layer of paste to the clay.

Tip
Avoid adding too much paste. A little goes a long way!
Carefully place a pressed flower on the paste, pressing lightly to adhere it. Repeat with the remaining clay balls.
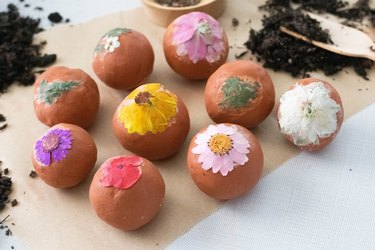
Let them sit for another 24 to 36 hours or until the clay is completely dry.
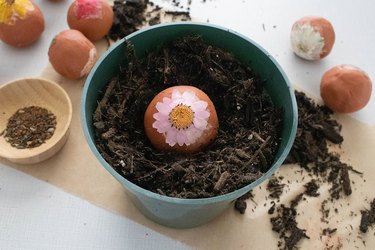
5. Plant the seed bombs
To plant the seed bombs, simply scatter them in your yard or garden bed and water them well. You can also place them in pots full of moist soil. Be sure to use one seed bomb per pot to give the seeds space to grow.
Happy planting!