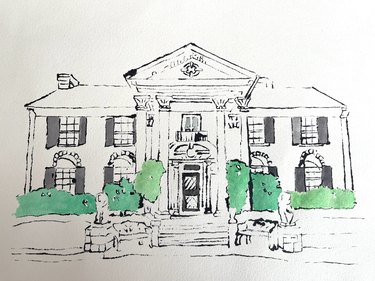
Looking for the perfect housewarming gift or sentimental project to get your creative juices flowing? We've got just the fix. With our Andy Warhol–inspired blotted line drawing tutorial, you'll learn how to create a whimsical keepsake art piece depicting a loved one's house, your own abode, a historic building or—in the case of our tutorial—an iconic celebrity home like Graceland, aka the home of Elvis Presley. The best part? Blotted line art is accessible and achievable (even for true beginners), so you don't need tons of training to embrace the method.
But first...what is "blotted line" art? It's a simple printmaking technique that Warhol used to replicate commercial products easily. The mix of hand drawing and minimalist lines combined with the unpredictability of the material and process gave the finished work a dynamic fine art look.
Video of the Day
Video of the Day
Andy Warhol's Blotted Line Art
Before Andy Warhol became outrageously famous for Pop Art screen prints of soup cans and celebrities, he was an in-demand commercial illustrator. His signature line drawings captivated advertisers with their modern yet personal hand-drawn look. The style is now considered a trademark of his drawings: some thin lines, some broken, accented with occasional thick ink blots, bright watercolor inks and occasional gold leaf that make the images pop against crisp white backgrounds.
In this step-by-step tutorial, you'll learn how to employ Warhol's simple, absorbing blotted line technique to create an artistic and realistic architectural drawing. So grab your materials and let's rock!
Things You'll Need
Source photo
Transparent tape
Masking tape
Pencil
Pen and pen nibs
High-quality absorbent paper
Scrap paper
Paper towel
Black permanent marker
Light board for tracing (optional)
Watercolor paints or alcohol inks (optional)
Charcoal/pastel fixative (optional)
Tip
You’ll want to stay away from ultra fine point pen nibs since they won’t hold enough ink to transfer. Wide calligraphy nibs will slop too much ink around, so stick to fine or medium. As for paper, watercolor or printmaking paper work well. Warhol used Arches 88 or Coventry Rag paper. For the purposes of this tutorial, we used a Rives Lightweight paper.
How to make a Blotted Line Drawing:
1. Prepare source photo
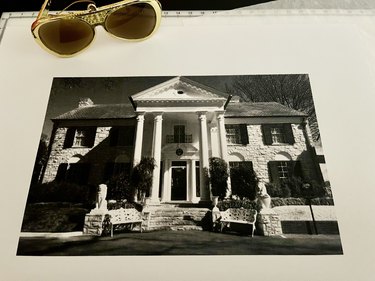
Your finished house drawing will be the same size as your source photo. We recommend keeping your first blotted line drawing between 5 x 7 in. and 8 x 10 in. for the sake of manageability. The source photo, tracing paper and watercolor paper should all be the same size. You can trim to adjust, but it's preferable to have a generous border since you'll be using tape along the edges.
Tips for Working with Source Photos
The blotted line drawing technique works well for all kinds of locations, from well-known houses to cityscapes. Use your personal photos, or look to magazines for printable options. The blotted line technique will simplify the overall look of the building, so you’ll want a clear view of the complete exterior. Look for photos without major obstructions, such as cars or tall trees.
For easier tracing, print a black-and-white copy or adjust color in a photo editing program before printing, changing contrast or brightness to clarify the structure's lines.
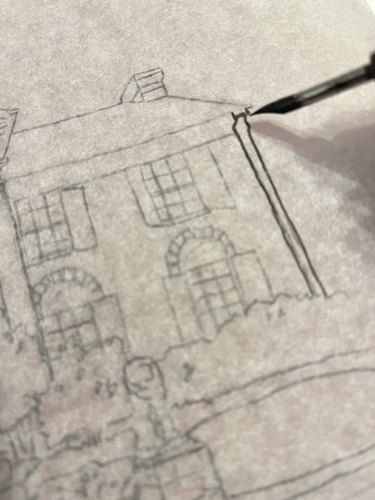
2. Create house sketch
Lay source photo on a flat surface and cover with tracing paper. Secure edges of paper with masking tape to avoid annoying slips. Then use a pencil to trace over source photo—this will be your template for the blotted line art print.
Tip
A lighted drawing board is helpful here but not necessary. You'll also want to simplify any intricate details on the house exterior since they won't translate well with the tracing and inking technique.
When you're done, you'll have a pencil drawing of the building or house's essential lines. To avoid smudges and smears on pencil marks, either trace over pencil drawing with thin black permanent marker or lightly spray with charcoal/pastel fixative.
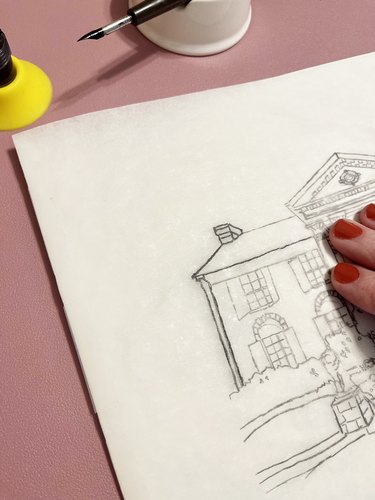
3. Attach sketch to printing paper
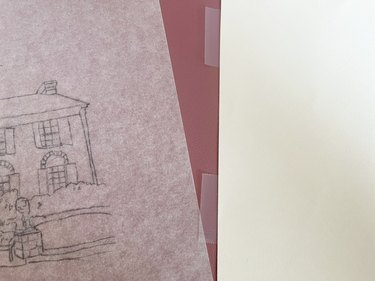
Create a hinge using transparent tape to secure one edge of tracing paper to watercolor or printmaking paper. Since you'll be transferring the image by inking it in on the reverse side, tracing paper should be on top with pencil drawing side up when you combine both papers.
Tip
Take some time with this step to ensure tracing paper opens and closes easily and that the edges of paper match. Crease edges of the tape for extra ease.
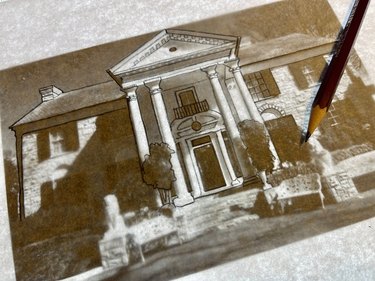
4. Ink and print drawing

This step is the crux of blotted line art! You'll ink the reverse side of your traced house drawing and press tracing paper into watercolor paper, then repeat the process until the entire image is transferred. Start by dipping pen in ink, then blot nib on paper or paper towel and trace a small (2- to 3-in.) section of reverse side of house drawing on tracing paper.
You'll want to keep a tester sheet close by throughout the process. Always blot and test your pen after you dip it in ink and before you draw on the tracing paper.
Tip
It's important to set up your workspace for success. Once you open a bottle of black ink, you won’t want anything nearby that could knock it over. It’s convenient to have something to rest your pen on when you are transferring the ink from the tracing paper. We recommend DIY-ing a pen holder by folding a piece of cardboard or heavy card stock into a triangle and cutting a V-shape to make a notch for pen handle to rest.
Pen and ink is really fun to work with. It can also be messy and tricky for beginners. But it's nothing a few quick line and doodle tests can’t remedy. Select a pen nib you’re comfortable with, and test ink flow to see how it feels on the paper. Avoid really fine nibs: They won’t hold enough ink to transfer the lines of your house drawing to the watercolor or printmaking paper.
Carefully lift tracing paper to close it over watercolor paper, then gently press inked area for a few seconds before lifting tracing paper. Like fine art magic, you'll see the ink transferred onto paper.
Tip
Expect inked lines to vary. Dabbling and blotches are part of the blotted line look. But if you really think your lines are too light, you can repeat the ink-and-press process in the same area. If you’re seeing a lot of ink bleeding or blotches, use paper towel or scrap paper to draw out excess ink before drawing on the tracing paper. You can also try switching to a finer pen nib.
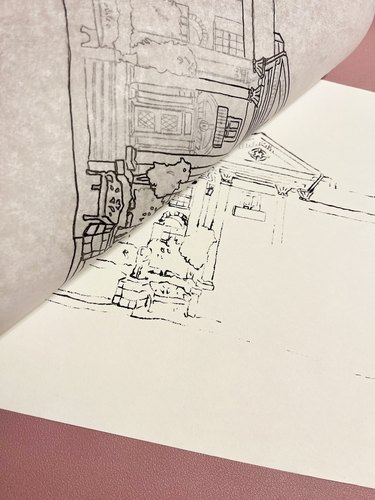
Repeat process in small sections, one at a time, until you've completed inking and printing entire traced image onto watercolor or printmaking paper.
5. Add finishing touches
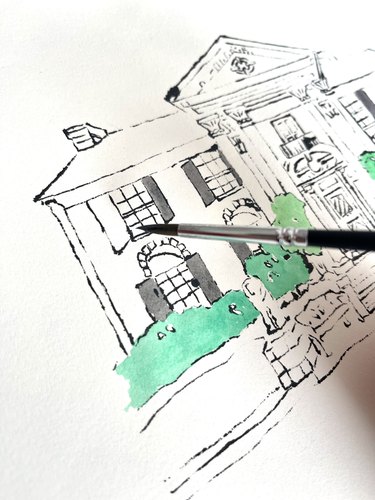
The beauty of the blotted line drawing technique is found in its idiosyncrasies. Take a step back to marvel at and review your work. If you see idiosyncrasies you'd rather not have, re-ink and transfer certain portions that were too light or go back and add details.
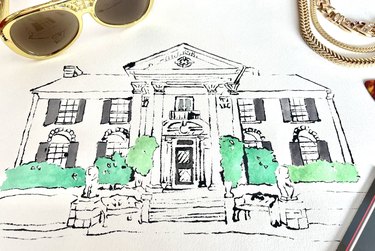
When you're satisfied with your ink print, carefully remove transparent tape and separate tracing paper from print. For added visual interest, use watercolors or alcohol inks to accent sections with color.
Voilà! You've created a work of art that's one-of-a-kind and certainly destined for more than fifteen minutes of fame. Whether you're showing some love for your favorite singer's mansion (here's to you, Elvis!) or tracing an old photo of Grandma's cottage, the results are sure to impress.