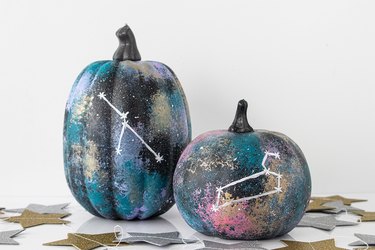
If you're looking for an easy Halloween pumpkin project that's out of this world, try your hand at this galaxy constellation version. Not only does this DIY offer a unique take on pumpkin decorating, but it's also really hard to mess up—seriously! All you need to do is dab different colors of acrylic paint on a black pumpkin to create a painted galaxy. That being said, it's an excellent pumpkin craft for makers of all ages and skill levels.
What's more, like many other homemade pumpkin ideas, you can customize the colors based on your preferences and the supplies you have on hand. For example, if you're all about sparkles, try adding layers of glitter paint. Or if you like shiny finishes, opt for metallic paints in the color palette of your choice. You could even shake on actual glitter or glue sparkly confetti to your pumpkin.
Video of the Day
Video of the Day
No matter your style, we think you'll love adding this galaxy painted pumpkin to your fall decor lineup. Read on for the full step-by-step tutorial, plus tips for making it your own.
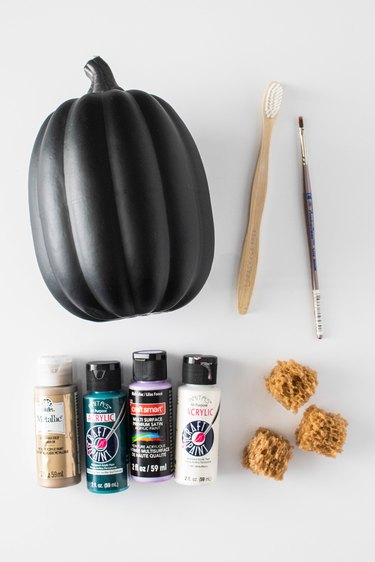
Things You'll Need
Black pumpkin (a real one painted black or a foam one from a craft store)
Newspaper or scrap paper to cover work surface
Acrylic, metallic and/or glitter paint in colors of choice
Sponge or sponge brush
Old toothbrush
Thin paintbrush or white paint pen
Tip
You can find black foam pumpkins at the craft store or retailers like Target, Walmart or Amazon. If you’re unable to find one with a black finish, you can coat a foam pumpkin with black paint. We recommend using matte black paint, which clings well to surfaces, or black spray paint. Make sure the pumpkin is completely dry before starting the project.
1. Paint galaxies on your pumpkin
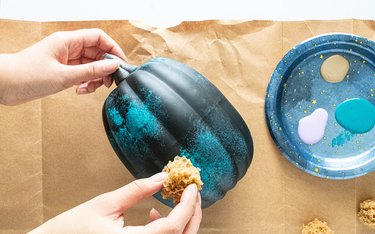
Before starting, protect your work surface with newspaper or scrap paper. Pick two or three paint colors for your galaxies. For our constellation pumpkin, we used dark teal, light purple and metallic gold acrylic paint.
Prepare the paints on a paper plate or paint palette. Using a sponge, dab the first color onto the pumpkin in randomly placed groups. Try not to overthink the placement: Remember that galaxies are irregular and random!
Tip
If you’re using a glitter paint, consider adding it last. This will ensure it’s visible and on top of the other colors.
Use the same sponge to layer the second color on top. Be sure to dab, not swipe. This will create a speckled starry look.
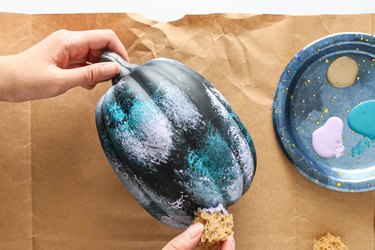
Finally, add the last color. Don't be afraid to apply paint beyond the "perimeter" of the first color, as this will mimic the appearance of stars spreading across the sky.

Tip
If you accidentally add too much paint and want more black to show through, simply use a sponge to dab black paint onto the pumpkin. This technique is also useful for adding more texture.
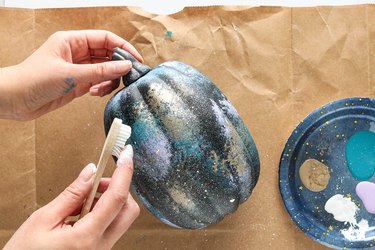
2. Add stars with white paint
Dip an old toothbrush into white paint. Then "flick" the bristles so that the paint splatters onto the pumpkin. This will create the illusion of stars.
Tip
You can also use a stiff-bristled brush for this step.
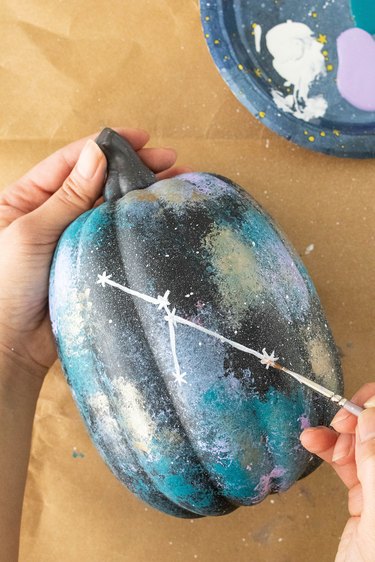
3. Paint a zodiac constellation
If you'd like to customize your galaxy pumpkin, add your zodiac constellation using white paint and a thin paintbrush. You can also use a paint pen.
Alternatively, if you don't want to draw the zodiac constellation by hand, consider using thin washi tape and star stickers instead.
Tip
Practice the zodiac drawing on scrap paper before trying the real thing. But if you mess up, don’t worry! You can apply black paint over the constellation and repaint galaxies on top. The new galaxies will blend seamlessly with the existing ones.
4. Display your dreamy DIY galaxy pumpkins
Once the paint has dried, your galaxy-themed Halloween decor is ready for the season. How's that for a stellar decorating idea?