They say you can't judge a book by its cover, but you can judge a book by its book nook. Book nook shelf inserts help bring a book to life—even before you open its pages. Sitting in a bookcase nestled between the books, a book nook is a diorama of a scene from one of your favorite stories. Because it appears to be a miniature, magical world within itself, book nooks lend themselves to fantasy books, like Harry Potter, the chronicles of Narnia, Star Wars and Lord of the Rings series. Premade book nooks are available on Etsy or Amazon, but they are quite expensive. You can also purchase DIY book nook kits, but even they are pricey, and they usually only consist of the outside box.
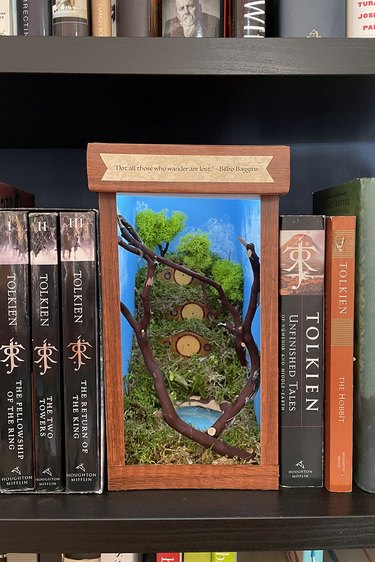
You can make your own book nook with this simple tutorial and create a bookshelf diorama that captures your imagination. This tutorial is for a Lord of the Rings book nook bookshelf insert, complete with a diorama of the Shire with hobbit holes. So, if you're looking for an enchanting Lord of the Rings craft to celebrate the Lord of the Rings TV show, The Lord of the Rings: The Rings of Power, you've come to the right place!
Video of the Day
Video of the Day
That said, if, say, the Harry Potter books are more your style, you can make a Hogwarts or Diagon Alley book nook. This would make a great gift or home decor item for book lovers of all ages.
So, let's get crafting!
Things You'll Need
Foam core
Shoe box lid
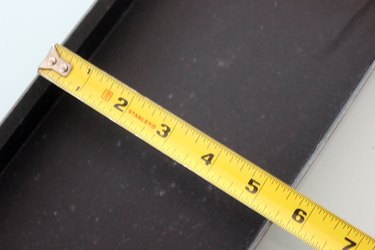
Tape measure
Hobby knife
Hot glue gun
Blue poster paper
White acrylic paint
Craft glue
Craft board
Scissors
1-inch circle punch
1/4-inch circle punch
Brown acrylic paint
Yellow acrylic paint
Red acrylic paint
Black marker
Clear plastic
Tape
Sheet moss
Twigs
Reindeer moss
Jar lid
Polymer clay
Branches
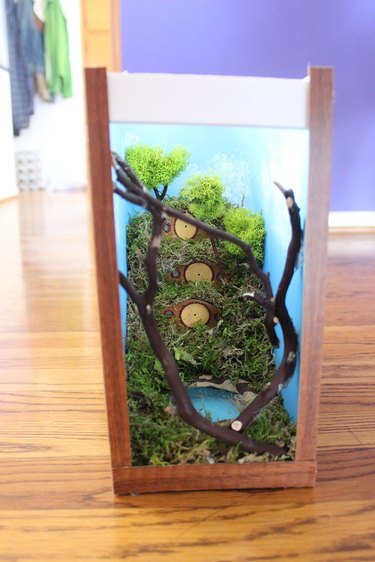
1. Thinking outside the box—by making a box!
Once you've mastered making the book nook outer box, you're set. Like I said, there are book nook shelf insert kits you can buy, but making your own costs a fraction of the price. Plus, you can make it the exact size you want and not be constrained by what's already available.
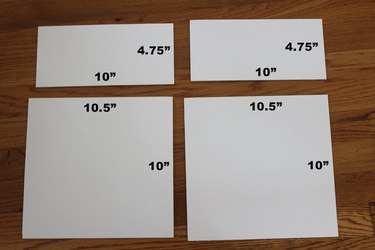
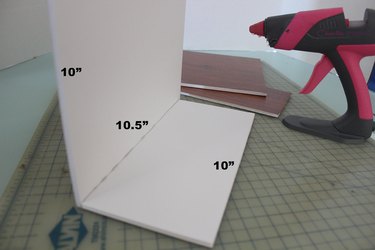
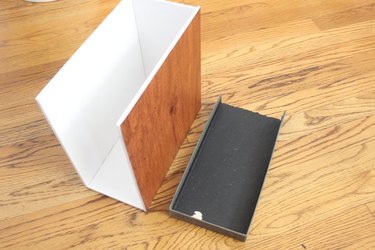
For the box, we're using a sheet of foam core, which you can find at craft stores and even dollar stores. Foam core has a rigid construction that makes your book nook sturdy, yet it's lightweight and easy to cut. The first thing to decide is how wide you want your book nook to be. Most book nooks are between 4 and 6 inches wide. You don't want them any bigger because you want them to blend in with the surrounding books. For the top of the book nook, I cap it with a shoebox lid, so I actually let that determine the final size of my book nook. This shoebox lid has a width of 5 inches, so the width of the book nook should be about 4.75 inches.
Cut four pieces of foam core: two for the side walls, one for the base and one for the back wall. Again, the top will be the shoebox lid, and of course the front is open. The side walls are 10 inches high, which is usually just taller than most books, and 10 inches deep to accommodate the depth of my bookcase. I recommend cutting the side walls so that the depth is .25 inches longer than you want. This will help the pieces fit better, as you'll see later. The dimensions I used are listed on the photo.
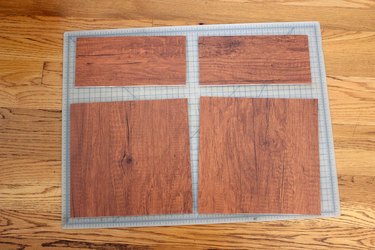
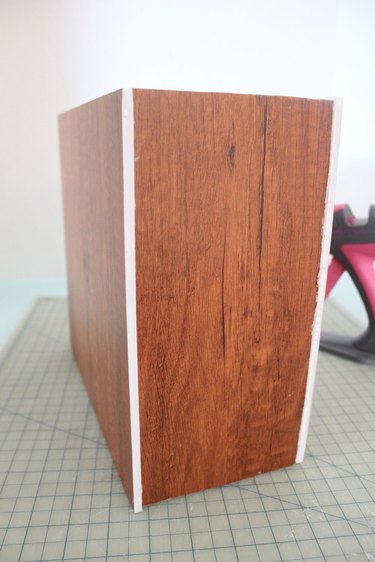
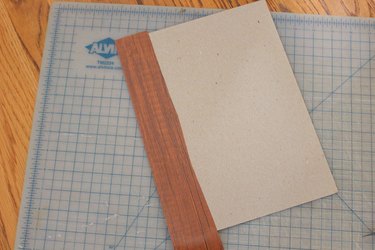
Cover each piece of foam core with adhesive wood grain contact paper. The easiest way to do this is to cut a piece of contact paper that is larger than the foam core, adhere it to the foam core and then trim the excess with a hobby knife. It now looks like you have four wood panels.
Using a hot glue gun, glue one of the side walls to the base. Line up the pieces in the front so that the extra quarter inch on the side panel extends past the base in the back.
Then, glue the second side wall to the base.
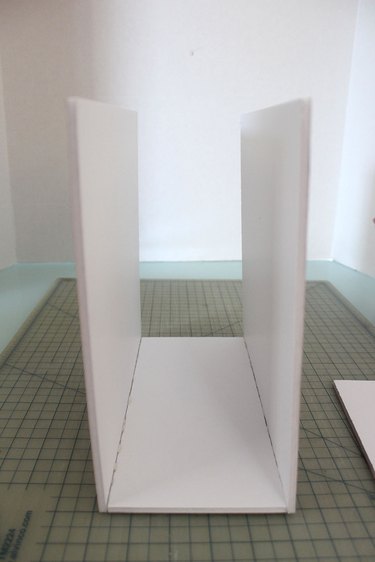
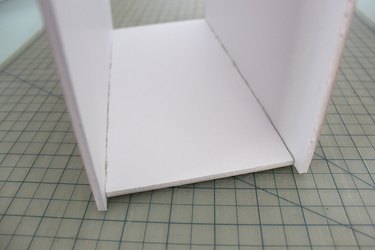
As you can see, in the back, the side walls extend past the base by a quarter inch.
Now, glue the back panel to the two side walls and the base panel, applying hot glue to the three edges. Because the side walls are extended, this back panel can nestle in and have a stronger adherence to all three panels.
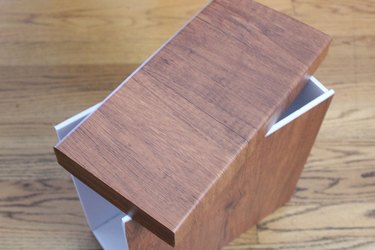
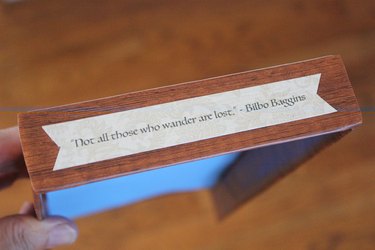
I haven't forgotten about the top. Trim the shoe box lid so it is the same depth as the book nook.
Cover the lid with the wood grain contact paper.
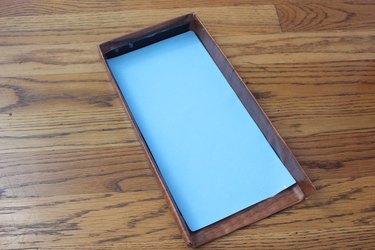
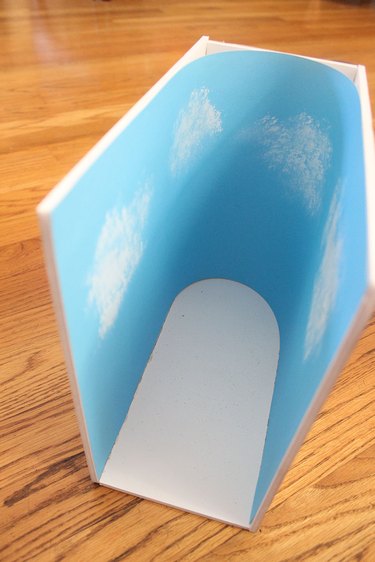
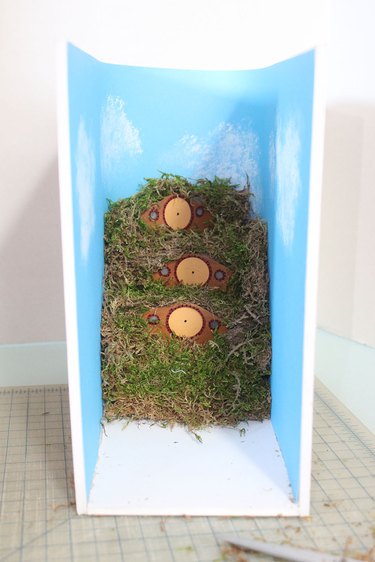
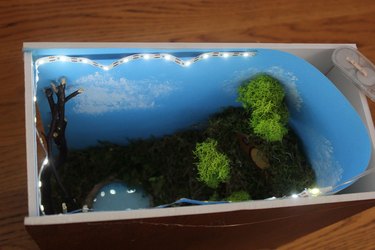
Cut a piece of blue poster paper to fit on the inside of the shoe box lid and glue it into place with craft glue. The blue paper depicts the blue sky.
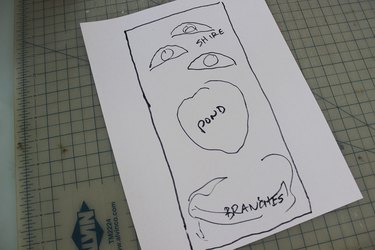
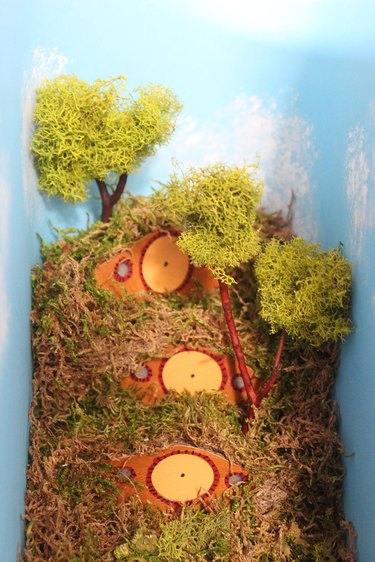
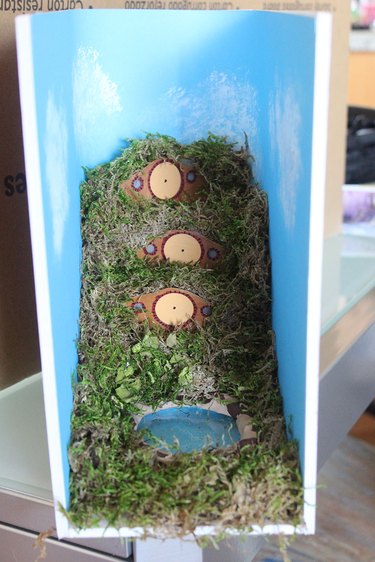
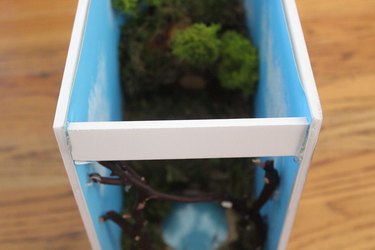
This is the foundation of the book nook. Now, it's up to your imagination how you want to decorate it. To help plan out the space, draw a diagram to the same measurements as the book nook and map out where you want to place the different elements. In my case, I am devoting the back third to the hobbit holes, which are the homes of the hobbits. In the middle will be a pond. The front will have gnarly branches representing the forest.
2. The sky’s the limit...
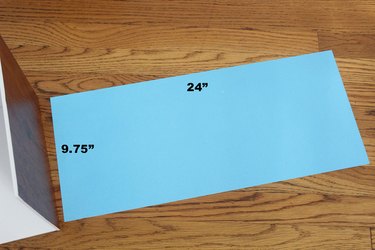
Let's create an endless sky for this hobbit diorama. Cut a piece of blue poster paper that will cover the two side walls and back. I cut mine to 9.75 by 24 inches.
Paint some clouds on the blue paper with white acrylic paint.
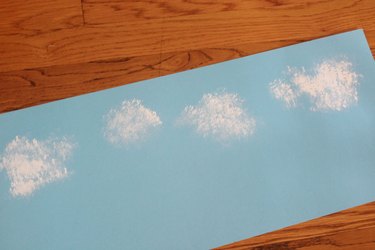
Glue it to the inside of the book nook with craft glue. Notice that the back is curved and not squared off. This creates the illusion of an endless sky. Square corners would ruin that illusion.
3. Let’s build a home where the hobbits can roam
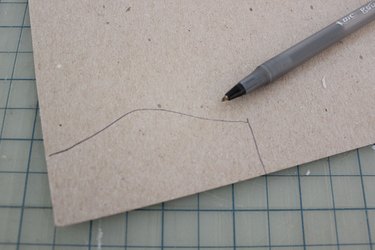
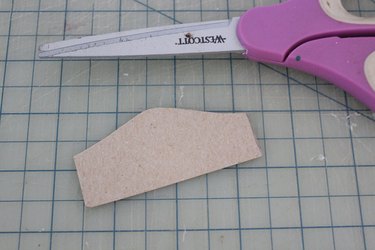
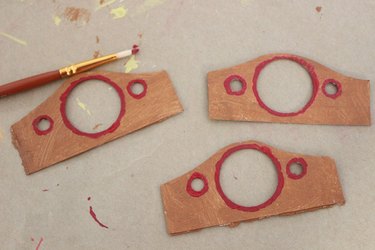
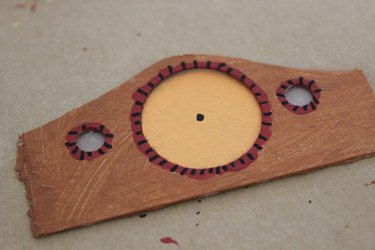
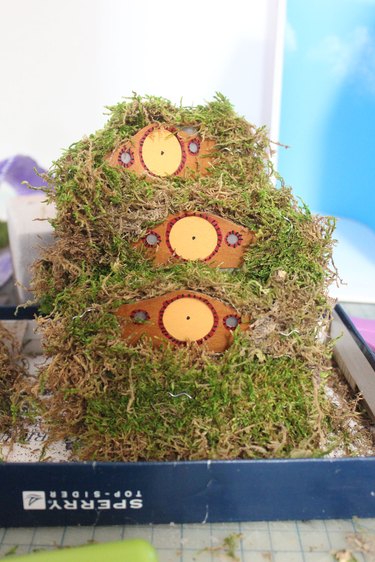
Hobbit holes are built into the hillside. They have a domed facade that blends in with the rolling hills. To create a hobbit hole facade, draw a domed shape on a piece of craft board. Craft board is like cardstock, only thicker and offering more support.
Cut out the facades. I made three for this hobbit village.
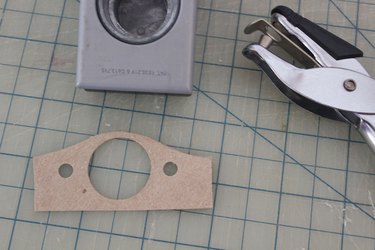
For the door, cut a hole in the center with a 1-inch circle punch. (And be sure to save the holes you punched out. We'll use them for the doors.) For the two windows, cut out holes with a quarter-inch hole punch.
Paint the fronts with brown acrylic paint.
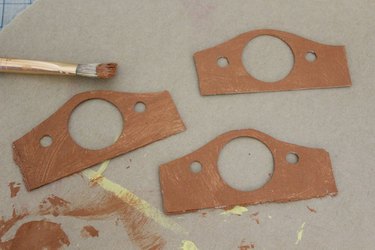
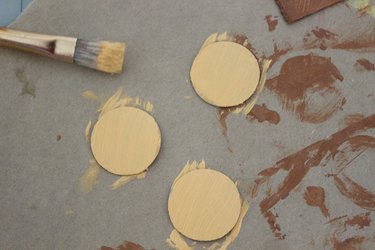
Paint the 1-inch circles with yellow acrylic paint or any color of your choice.
To give the suggestion of bricks, apply red acrylic paint around the edges of the holes you've punched.
Once the paint is dry, use a black marker to draw lines extending from the holes. They distinguish the brick shapes.
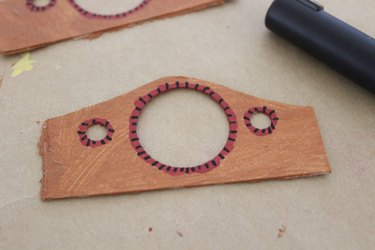
Flip the hobbit hole facade upside down. Place the door upside down on top of the middle hole. Cut two small pieces of clear plastic (I used some discarded plastic packaging) and position it on top of the windows.
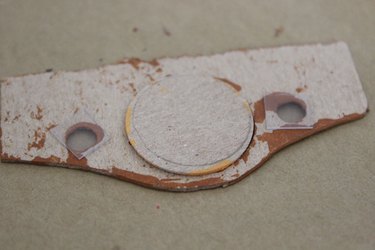
Tape the pieces down onto the facade.
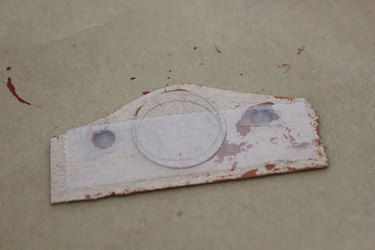
Flip the hobbit hole right side up. Draw a black dot in the middle of the door for the doorknob.
4. The hills are alive with hobbit holes
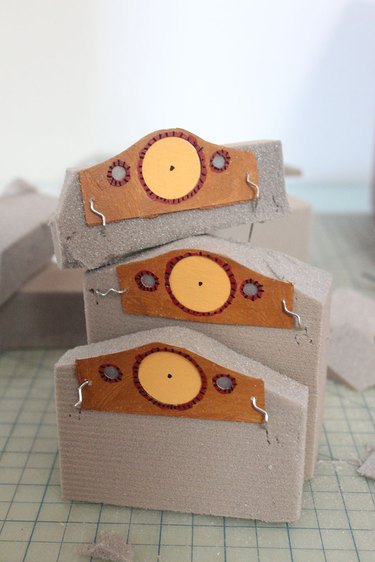
To create the hillside that the hobbit holes are built into, I used carving foam, which is a craft foam similar to floral foam. It cuts very easily with a knife, so it's easy to work with. I wanted the hobbit holes at three different heights, so I carved the foam to different heights and made the top curved to match the curve of the hobbit hole facade.
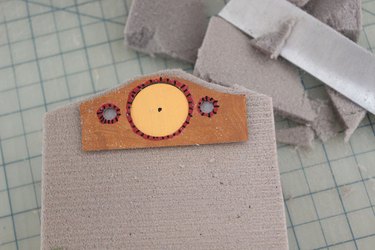
To attach the facades to the foam, make a small hole with the tip of a hobby knife on the far left and right sides and insert one end of a greening pin through both sides.

Pin the facades to the foam, lining up the curves at the top. You can also use the greening pins to attach the pieces of foam to each other.
Cover the foam with sheet moss, attaching the moss with greening pins.
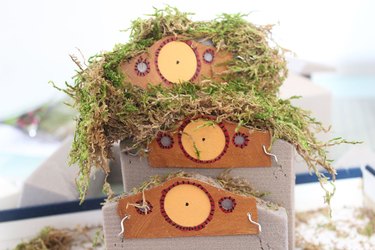
Tear off a small piece of sheet moss at a time and cover the foam in sections until the entire "hillside" is covered with moss.
Slide the hobbit holes to the back of the book nook. Mine fit snugly, so it did not need any adhesive, but you can add a drop of hot glue to the bottom of the foam if necessary.
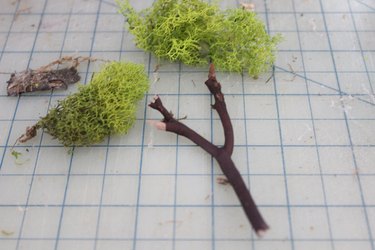
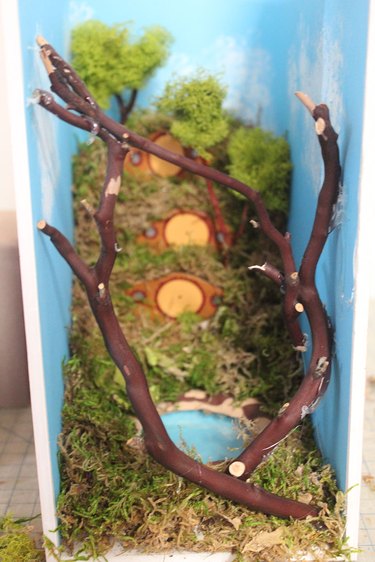
4. Plant a tree or two
A few trees add to the landscape of the book nook and help create a more realistic tableau. Start with a twig with at least two offshoots. It looks just like a miniature tree trunk. For the greenery of the tree, reindeer moss does the trick.
You can just hook the reindeer moss to the twig, but a little dab of hot glue or craft glue will lock it in place.
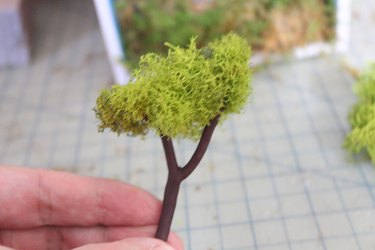
Insert the base of the tree into the foam, which will hold it in place.
5. Create a magical little pond
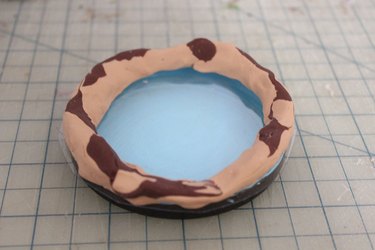
This little community of hobbits really needs a refreshing pond for relaxation. After all, battling Sauron is exhausting work. To create an artificial pool of water, we'll use a lid from a jar and a piece of clear plastic. You can upcycle a piece of plastic from discarded plastic packaging.
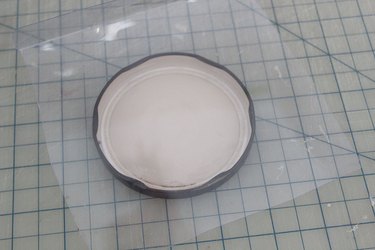
Paint the jar lid with blue acrylic paint.
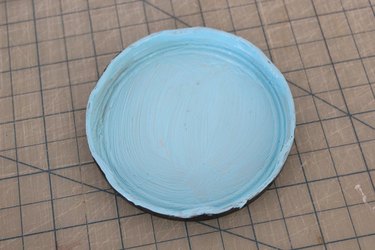
Cut a piece of plastic that is just larger than the lid and glue it around the edges.
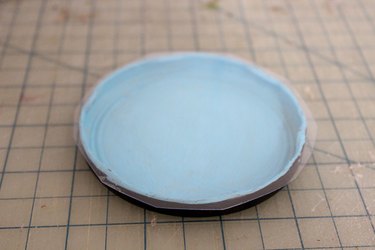
We need to surround the pond with a bank, i.e., the dirt shoreline. To create this, combine some tan polymer clay with specks of brown polymer clay.
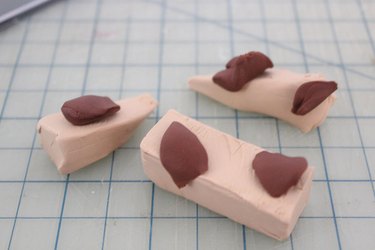
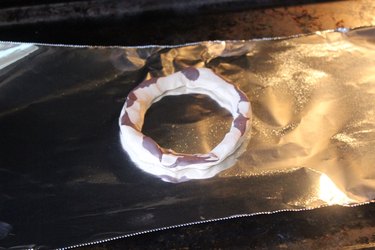
Flatten the clay and shape it into a donut that is the same circumference as the jar lid. Bake it in the oven according to the instructions on the package.
Glue it on top of the plastic and jar lid.
Place the pond in front of the hobbit holes and hot glue the bottom of it in place.
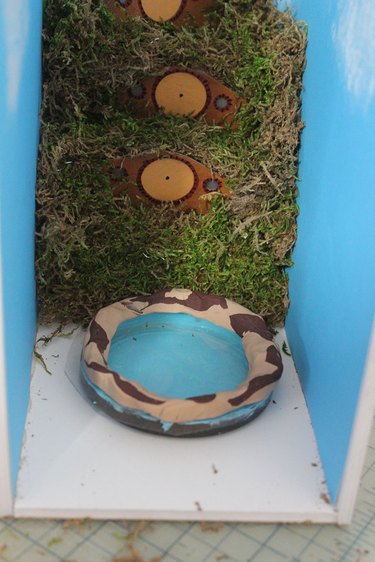
Surround the pond with more sheet moss. Just by squeezing the moss into place, you will secure it without needing additional adhesive.
6. Make an entrance with branches
For the front of the book nook, a circle of branches creates a dramatic entrance to the tableau. It is as if the hobbits have returned from Mordor and are seeing their peaceful shire through a clearing in the forest. Hot glue some curved branches into a circular or oval opening in the front opening of the nook.
7. Let there be LED lights
Lighting is absolutely essential for the book nook, not only for dramatic purposes but because the inside is cavelike and would not be seen on the bookcase. For lighting, the magic ingredient is a battery-operated LED light strip. It is just over 1 1/2 feet long and has enough light to give the hobbit shire everlasting sunshine, at least until it's time to change the batteries.
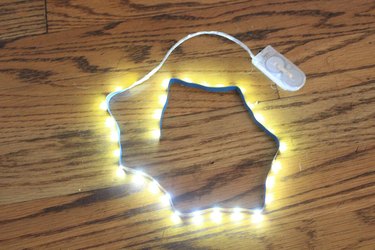
Cut a 1-inch-wide piece of foam core that is the width of the book nook and hot glue it to the top. This front support piece, while adding additional structure to the book nook, will also be used to hold the LED light strip.
Wrap the LED lights around the sides and front support of the book nook, hot gluing it every 2 to 3 inches at the top. Extend the cord and battery pack behind the book nook.
8. Add some finishing touches
Our magical bookshelf decor already looks amazing, but a few finishing touches makes it "my precious." The front needs a clean framing, so start by covering some craft board in the wood grain contact paper.
Cut three strips—two that are 10 by 1/2 inches and one that is 5 by 3/4 inches.
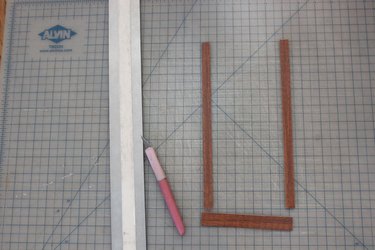
Hot glue these around the sides and bottom of the front to create a frame. The top isn't covered yet, as the shoe box lid will perform that function.
Choose your favorite quotation from the Lord of the Rings or whichever tome you're making a book nook for and print it on a piece of paper.

Cut out the quote and trim the sides to make it look like a banner.
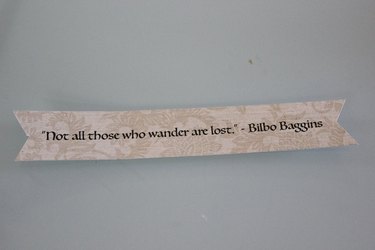
Then, hot glue it to the front of the shoe box lid.
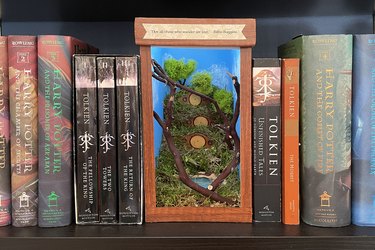
Place the lid on the book nook, insert the diorama on the shelf between some books and turn on the lights. You'll want to miniaturize yourself to live in this imaginary world come to life. It's like the ultimate dollhouse for bookworms.
Happy reading!