Contrary to popular belief, you don't need to be a woodworking pro to make a DIY lazy Susan. Thanks to this easy tutorial, you can learn how to build a lazy Susan with minimal crafting skills. What's more, it calls for basic and inexpensive supplies, most of which you can find at the dollar store. It's a DIYer's dream come true.
The best way to make a DIY lazy Susan without tools like a screwdriver or drill bit is to use round cake pans and marbles. Simply glue one of the pans to a large, decorative charger plate and then fill the second pan with marbles. Place the first pan on top of the marbles and you'll be able to rotate the plate like a turntable.
Video of the Day
Video of the Day
Like all DIY projects, you can easily customize this project. Charger plates are lightweight and large, but you can also use plastic trays. Alternatively, if you want to make a wooden lazy Susan, use a round cutting board or scrap wood. Wood rounds from the craft store, dollar store, or Amazon work just as well. If you choose to use a wooden piece, don't forget to use wood glue instead.
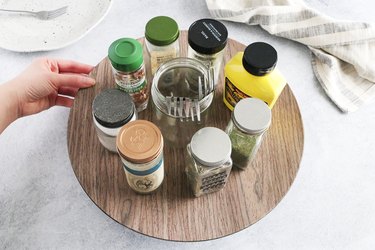
Once you've constructed your lazy Susan, you can set it on the countertop to hold spices, condiments and utensils. Another option is to use it on the dining table to distribute ingredients during a meal. In either case, this home decor project will be a game-changer for reducing clutter in the kitchen.
Learn how to make a lazy Susan turntable with tips for making it your own.
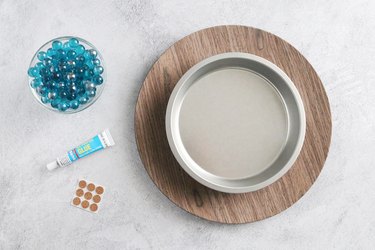
Things You'll Need
Self-adhesive, nonslip cork; felt; or rubber pads
Two round cake pans
Glass marbles
Large, decorative charger plate
Super glue
Tip
If you'd like to use this turntable in the kitchen cabinet as a spice rack, omit the charger plate or wooden board. The instructions for making this particular version will be explained in the tutorial.
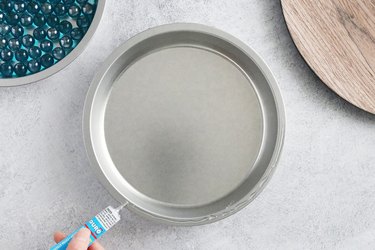
Step 1
Add self-adhesive cork pads to the bottom of one cake pan. You can also use nonslip felt or rubber pads if you'd like. Try to distribute them evenly along the perimeter of the pan. The pads will prevent the lazy Susan from slipping on hard surfaces.

Step 2
Flip over the cake pan. Add the marbles in a single, even layer. This will help the lazy Susan swivel and turn. Set aside the pan of marbles.
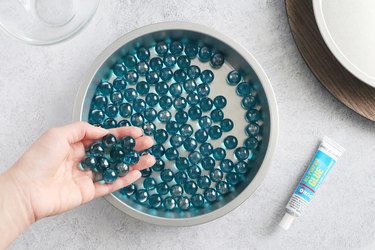
Tip
The number of marbles required will depend on the exact size of your cake pan.
Step 3
To the second cake pan, carefully apply super glue along the rim. Be sure to do this in a well-ventilated area.
Step 4
Adhere the cake pan to the back of the decorative charger plate. Try to place it in the center. Press firmly to secure and then set it aside. Let it dry completely.

Step 5
Once the glue has dried, it's time to construct your handmade turntable. To do this, place the cake pan on top of the marbles. This will allow the charger plate to swivel and rotate. And just like that, you have your own lazy Susan!
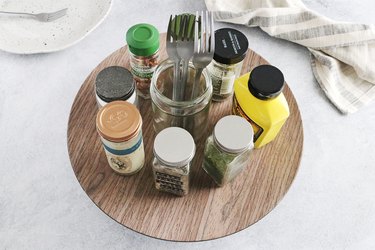
Of course, this is just one way to build a lazy Susan turntable. You can make it without the plate or board to make a version that's more compact. Simply set the second cake pan on top of the marbles and then store your spices and condiments directly in the pan. This version is perfect for organizing items in the kitchen cabinet or pantry, though you can use it as tabletop storage as well.