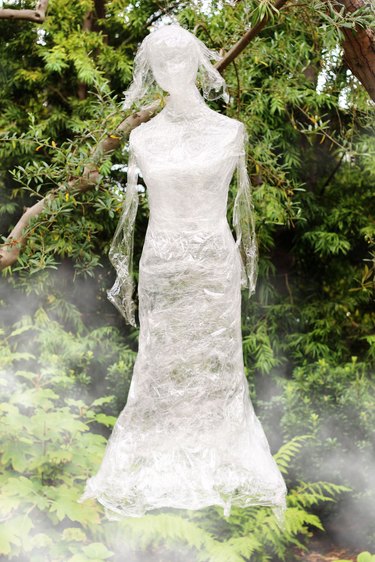
What ghostly apparition is here to haunt your home? How about a life-size ghost made of packing tape and plastic cling wrap? Because of the materials, it's transparent yet strong enough to hold its shape.
Making a DIY packing tape ghost is a great way to start off your Halloween crafts to create a spooktacular atmosphere for your next Halloween party. Hang it from a tree in your front yard or from the ceiling and the spooky ghost appears to float in front of you. You can also use it as a feature in your haunted house. Complement your life-size ghost with additional Halloween decor and Halloween props.
Video of the Day
Video of the Day
Things You'll Need
Foam head
Dress form mannequin
Clear packing tape
Plastic cling wrap
Scissors
Bed sheet
Pins
Fishing line or thread
Make the ghost hea
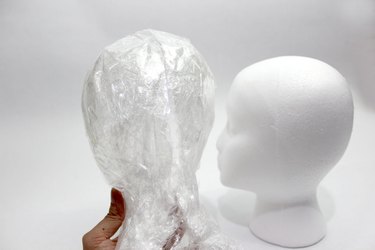
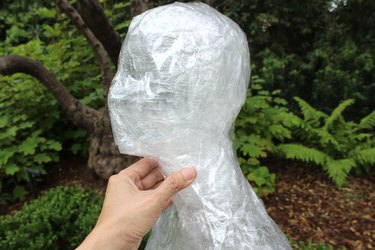
Begin the tape ghost tutorial by creating the head of the ghost. Wrap the Styrofoam head in plastic cling wrap. It is easier to wrap the head with two or three pieces of plastic wrap than one continuous piece. The plastic wrap sticks to itself, so the multiple layers help them stay secure on the foam head.
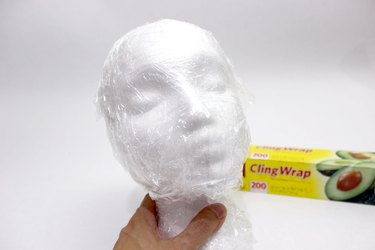
Cover the plastic-wrapped foam head with strips of clear packing tape. Don't use duct tape, as it won't give you the same transparent, spooky Halloween effect. Because packing tape is so sticky, it's more manageable to work with shorter strips that are about 12 inches long. Keep going until the head is completely wrapped in packing tape. Push in the tape around the eyes and nose to capture the facial details.
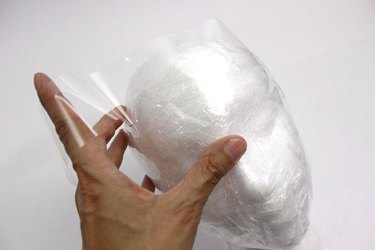
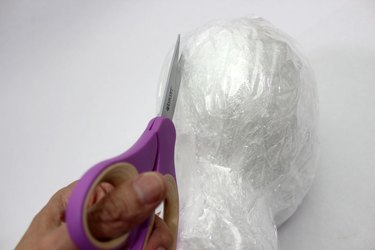
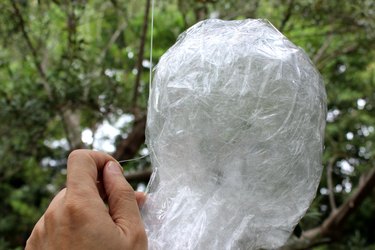
Using scissors, cut a slit at the back of the head through the layers of packing tape and plastic wrap. Cut from the bottom of the head all the way to the top. The plastic cling wrap acts as a barrier that allows the tape to separate easily from the foam.
Slide the foam head out from the opening and close up the opening with packing tape. Set the packing tape head aside for now.
Make the torso of the ghost
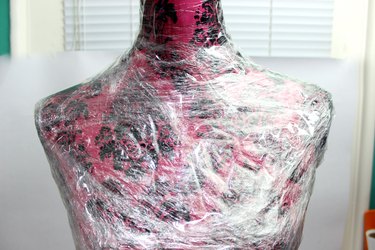
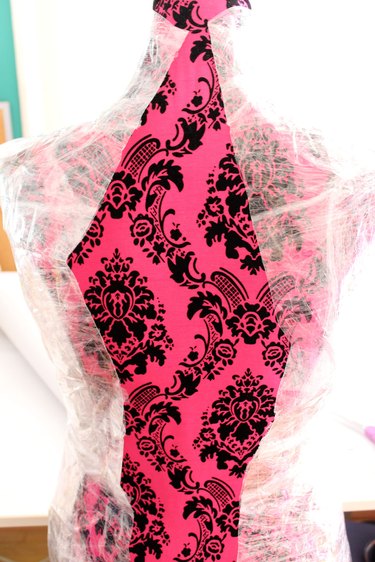
Now that you have some experience creating a body shape with packing tape, let's move on to the torso. Here is where the dress form mannequin comes in. (I found my dress form at a discount clothing store.) As with the head, cover the torso of the dress form with plastic wrap. For now, just go to the hips.
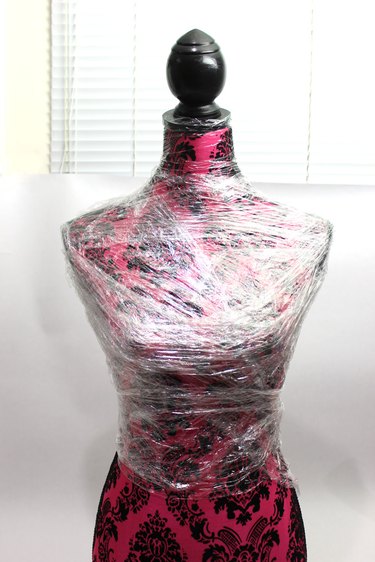
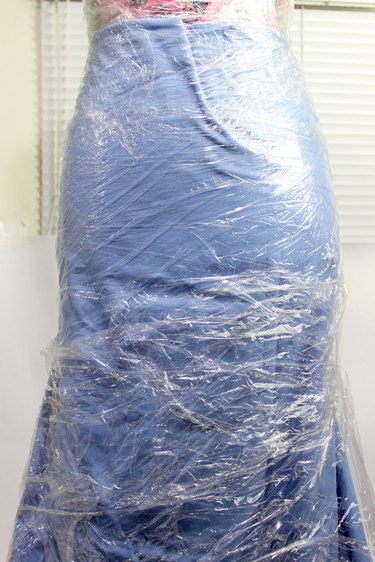
Then, wrap packing tape around the torso. Overlap the strips of packing tape to completely cover the plastic wrap. You don't want any of the plastic wrap exposed. Add extra layers of packing tape if you want the ghost form to be stiffer. For this project, I used about one and a quarter rolls of packing tape.
Make the skirt
Even though this ghost has passed to another realm, she still appreciates the flattering silhouette of an A-line skirt. To achieve that effect, pin a bed sheet around the hips of the dress form and fan out the bed sheet to the floor.
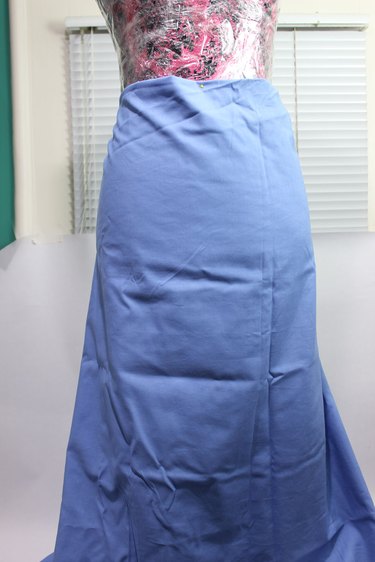
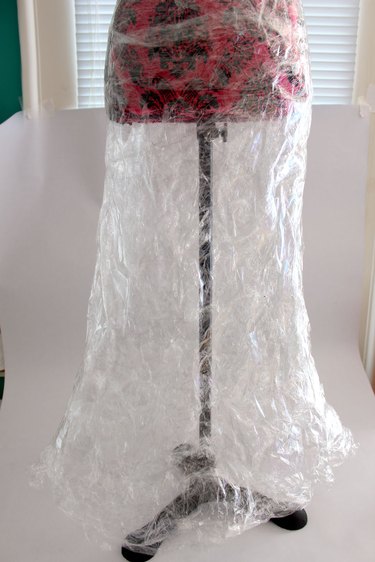
Cover the bed sheet with plastic wrap. In the area that extends past the actual dress form, the skirt is hollow, so there will not be a hard surface to push the plastic wrap against. Instead, just pat gently on the layers of plastic wrap to adhere them together.
Like you've done before, cover the plastic wrap with packing tape. When you get to the bottom of the dress, leave the plastic wrap uncovered, as the wispy pieces of plastic create a more ethereal hem.

Remove the dress form
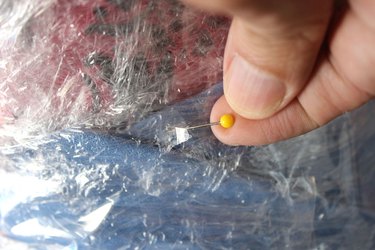
Using scissors, poke holes where you pinned the bed sheet to the dress form and remove the pins. Cover the holes with packing tape.
Then, pull down the bed sheet to reveal the transparent skirt.
Cut a slit up the skirt and all the way up to the neck of the torso, going through the layers of packing tape and cling wrap. Keep the scissor edges away from the dress form so you don't cut into it.
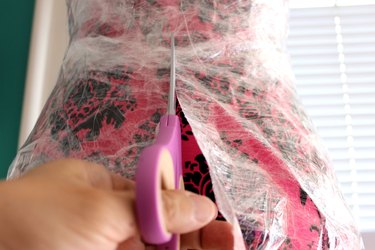
Slide the dress form out of the packing tape ghost and seal the cut with packing tape. The body section is finished.
Attach the head
Now that the head and body are completed, slide the neck of the head into the neck of the torso and attach the two sections together with packing tape.
Hang the ghost
To allow the ghost to hang so it appears to float in midair, tie a piece of fishing line or thread around the neck. Make a knot and then attach the fishing line to a tree branch if you're outside or to a ceiling hook inside.
The finishing details
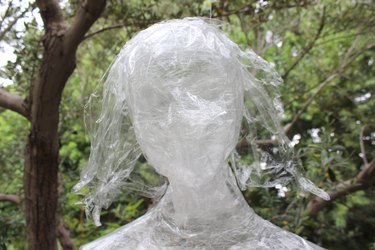
Add some plastic cling wrap to the sides and back of the head to create hair for the ghost. Don't be too careful with the placement of the hair, as you want it to look a bit disheveled. You can tape the plastic wrap to the head, but it clings even without it.
Tip
The hair goes on after the fishing line so the hanging mechanism doesn't mess with the hair.
Attach two long pieces of plastic cling wrap, around 24 inches each, to the shoulders so they cascade down as arm sleeves.
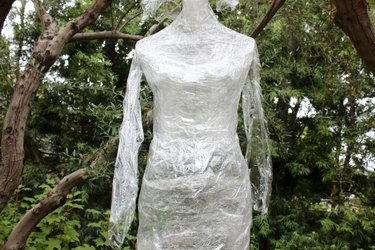
When displayed outside, the ghost comes to life, moving around as the breezes blow. Amplify the spookiness with some packing tape ghost ideas, such as using artificial fog or smoke. You can also use LED lights or shine an uplight toward the figure to illuminate it.