Things You'll Need
1 inch x 2 inch Screen Stock in various lengths for different size quilts.
For Crib quilt - 4 @ 6' long.
For Twin size quilt - 2 @ 6' and 2 @ 8' long.
For Full and Queen size quilt - 2 @ 8' and 2 @ 10' long.
4 C-clamps - 3 inch size
Thumbtacks to attach quilt to frame.
Quilt frames may seem complicated and expensive to someone just beginning to quilt, however, with these simple steps anyone can make their own inexpensive quilt frame.
Step 1
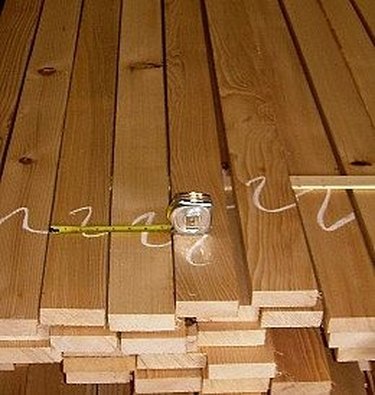
Select lumber at builder's supply in lengths listed. Check each piece for defects, knots, or bowing prior to purchase. Lumber should be flat and lay flush when laid side by side on the floor.
Video of the Day
Step 2
Before using, mark each quilt frame piece with a pencil drawing a line at one foot intervals. These guidelines help you maintain 90 degree corners when clamped. Select boards needed for chosen quilt size and lay on floor in rectangular position.
Step 3
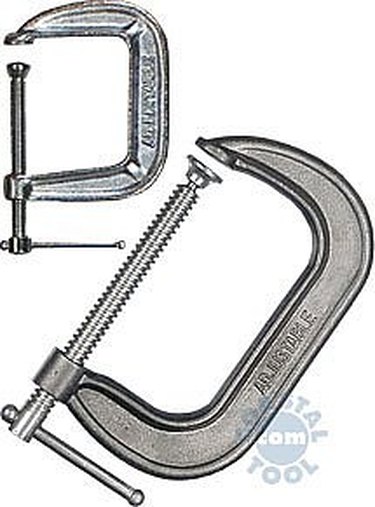
Use C-clamps to connect frame sides to top and bottom frame pieces at four corners. Thumb tack assembled quilt top, batting and bottom to frame sides, using pencil marks as guidelines. Adjust rail placement as needed to allow top and bottom edges of quilt to be thumb tacked to frame.
Step 4

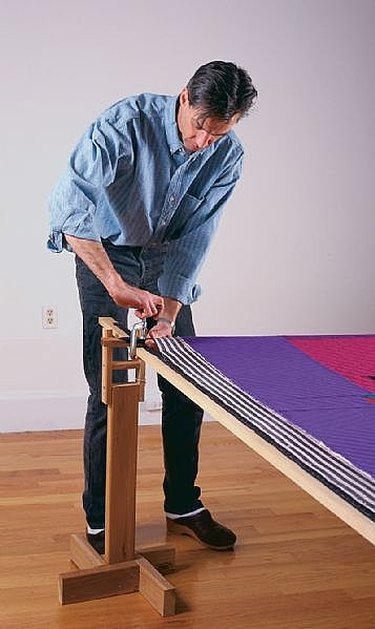
Place clamped frame on quilt stands at comfortable height for hand quilting. Chair backs, stools or saw horses placed at corners may be used instead of quilt stands. Hand stitch as far as you can comfortably reach then release clamps and roll side rails toward middle, re-clamp and repeat until entire surface has been quilted.
Tip
Use softer wood such as Poplar, Redwood or White Pine for your quilt frames as they are easier to use when inserting thumbtacks. Begin at middle of side and work to corners when tacking quilt to frame, being careful to catch all layers of the quilt. Be sure to keep quilt bottom taut while tacking.
Warning
Be careful when stretching quilt on the frame. Thumbtacks may pop if stretched too tight or may tear fabric.
Video of the Day