If you've lovingly handcrafted your holiday gifts this year, why not go all in and make your gift tags as well? After all, personalized touches like these make all the difference -- are we right? And even if you didn't have time to DIY this year, these 3 fun tags will add a handcrafted touch to your gift wrapping. Plus, they're super easy to make. Gotta love that.

Video of the Day
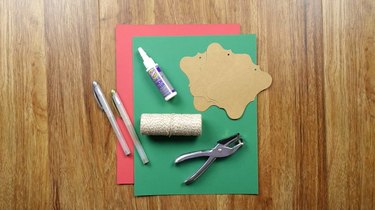
Things You'll Need
Card stock paper in desired colors and/or ready-made blank gift tags
Clear-drying glue
Craft string or twine
Craft pen(s) in desired color(s) - I chose silver metallic
Single hole puncher
Scrapbook craft paper with Christmas design
Star or snowflake stickers
Assorted buttons in bright colors
Fresh rosemary sprigs about 5 inches long
Make Blank Tags
Step 1: Cut Out Desired Tag Shapes
Decide what shape you'd like your tags to be, print or trace them onto your cardstock paper, then cut them out. I chose the classic price-tag shape, but there are plenty of templates online to choose from. My gift tags were fairly large at around 4.5 inches x 3.5 inches so that I had plenty of blank area to work with. Note that the rest of the dimensions I give in this tutorial will assume that you've done the same. However, if you want smaller tags, adjust dimensions accordingly.
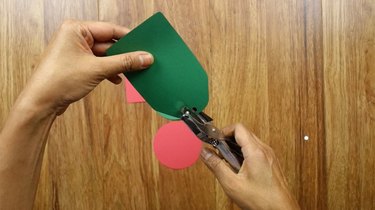
Step 2: Punch Holes in Tags
Use your single hole puncher to punch holes in your tags. Now you're ready to start!
Christmas Tree Tags
Step 1: Cut Scrapbook Paper
Cut 2-inch x 3-inch rectangles from your printed scrapbook paper.

Step 2: Fold Fan/Accordion Style
Fold each piece in the fan/accordion style starting from a 2-inch edge. Make sure that the folds on the edges angle downwards so that only the printed side of the paper shows from the sides of your triangle tree.
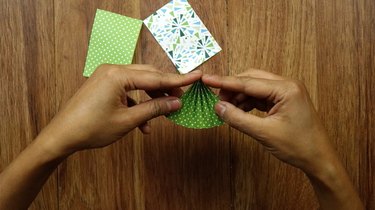
Step 3: Glue Between Folds
Sparingly apply dabs of glue between folds on both sides of one edge.

Step 4: Pinch to Secure
Pinch the glued edge and hold for a moment to secure. Immediately wipe off any excess glue that is squeezed out. You can use your fingers, but I wanted to avoid mine from sticking to the paper so I used long nose pliers instead. Tweezers should also do the trick.

Step 5: Glue Onto Tag and Apply Sticker
Apply glue to the back side of your tree and stick onto your blank tag, taking care to leave enough room between the punched hole and your star/snowflake sticker. Finally, affix your sticker to the top of your tree. Done with tag number 1!

Button Ornament Tags
Step 1: Select Buttons
Grab some assorted buttons and select three of varying sizes and colors that'll look great together.

Step 2: Draw Three Lines
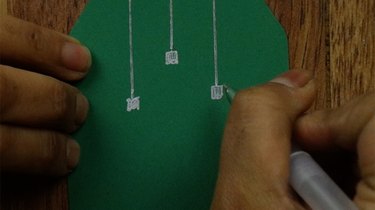
Using a straightedge, draw three lines of varying lengths from the top of your tag down. Your lines should be somewhere between 1 to 2 inches long. To simulate wire, I used a metallic silver craft pen.
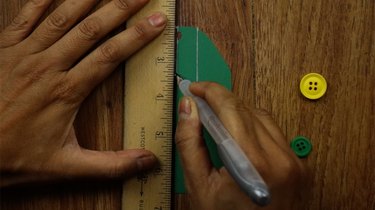
Step 3: Draw Small Squares
Now draw and fill in small squares at the bottom of your lines. I wanted a playful, scribbly look, so didn't mind coloring a bit outside of the lines! These represent the tops of your hanging ornaments.
Step 4: Glue Buttons
Glue buttons right below the squares, and you're done! Some glue will probably ooze through the holes in your buttons. If so, use a toothpick to remove the excess, but don't stress too much since your glue will dry clear.

Fragrant Rosemary Wreath Tags
Step 1: Cut Fresh Rosemary Sprigs
Cut some sprigs of fresh rosemary. Make sure to select young, pliable pieces about 5 inches long.

Step 2: Cut String or Twine
Cut a piece of string or twine about 9 inches long.

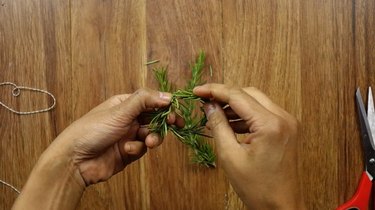
Step 3: Bend Into A Circle
Make a small wreath by bending your sprig into a circle, overlapping edges about ⅝ of an inch.
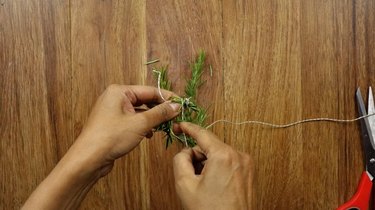
Step 4: Wrap and Tie Wreath
Wrap around the overlapped edges (through the wreath's center) about five times to secure your circle, then tie into a bow.
Step 5: Glue onto Tag
Finally, apply glue to the back of your wreath on the string-wrapped area, and affix onto a blank tag. Done!

Now, let the gift tagging commence!