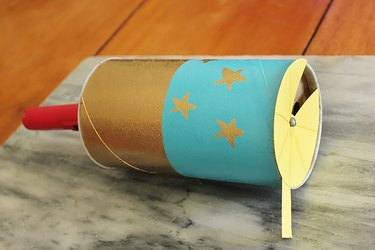
Each month, the illuminated portion of the moon allows us to see the different phases of its orbit. Build a simple moon phase viewer to familiarize children with the moon's sidereal period and boost their interest in astronomy. Combine science with art by decorating the tube with a celestial theme.
Things You'll Need
Video of the Day
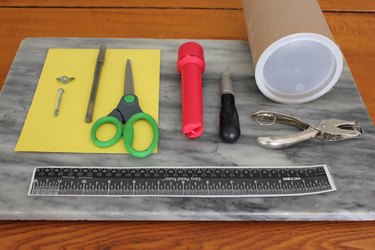
- Cardboard tube with a plastic lid (an empty oatmeal or salt container works best)
- Ruler
- Pen
- Box cutter
- Cardstock
- Scissors
- Hole punch (optional)
- Screw
- Wingnut
- Flashlight
- Paint, glitter, stickers or other decorations (optional)
Video of the Day
Note: For the best results, do not use an LED flashlight with multiple lightbulbs. Try to find a flashlight with a single lightbulb inside.
Step 1: Divide the Tube into Eighths
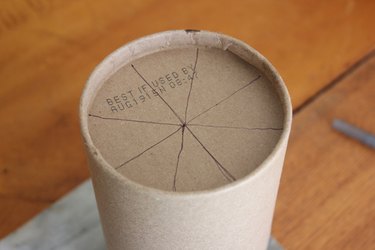
Using the ruler and pen, divide the bottom of the cardboard tube into eighths. Each section will contain one moon phase.
Step 2: Draw the Moon Phases
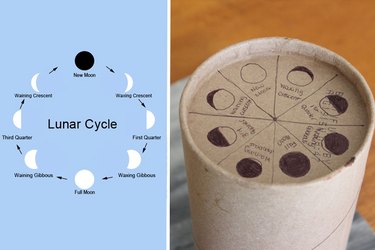
Draw one moon phase in each section. Starting with the new moon and rotating clockwise, draw the new moon, waxing crescent, first quarter, waxing gibbous, full moon, waning gibbous, third quarter and waning crescent in each section. Shade in the portion of the moon that would be lit if you were looking at it in the sky. Label each phase below the drawing.
Step 3: Cut Out the Moon Phases
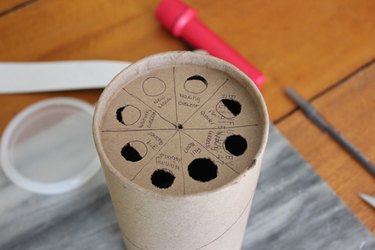
Use the box cutter to cut out the shaded portion of the moon phases you drew. After you have cut out all of the moon phases, cut a small hole in the center of the cardboard tube with a hole punch or box cutter. Make sure the hole is large enough for the screw to fit through.
Note: The new moon is not visible to the naked eye. Therefore, you do not need to cut out any portion of cardboard for the new moon section.
Step 4: Create a Light Block
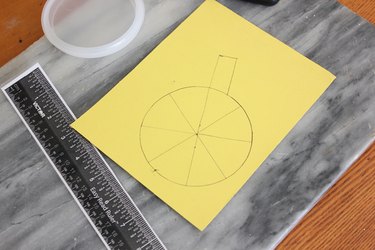
Place the end of the cardboard tube on your cardstock and trace around the outline to create a light block for your viewer. Add a 2-inch rectangle to the edge of your circle as shown. This will create a tab for you to change the moon phases as you are viewing. Divide the circle into eighths with a pen and ruler.
Step 5: Cut Out the Light Block
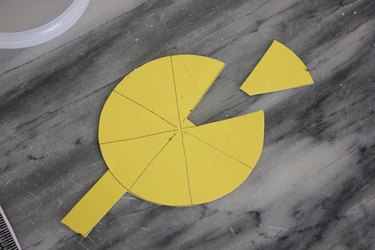
Cut out the circle and attached rectangular tab. Then cut out the section of the pie that is across from the tab, but do not cut all the way to the center of the circle. You need to leave about 1/4 inch of room at the center to punch a hole for the screw.
Step 6: Punch a Hole for the Screw
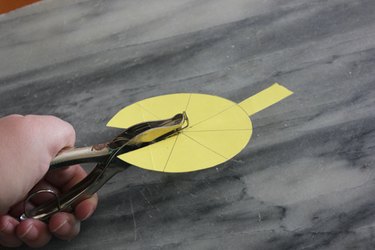
Punch a hole in the center of your circle and then place your light block on the end of your canister on top of the cut-out moon phases.
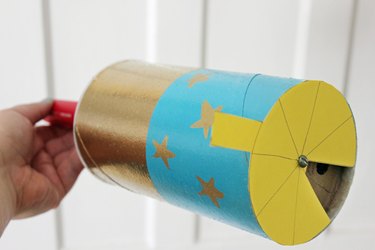
Step 7: Attach the Light Block to the Tube

Slide the screw through the hole in the light block and then through the tube. Attach the wingnut on the opposite end of the screw, inside the cardboard tube. Don't screw the wingnut on too tightly or you will wrinkle the paper. The tab should slide the light block easily around the end of the tube.
Step 8: Attach the Flashlight to the Tube
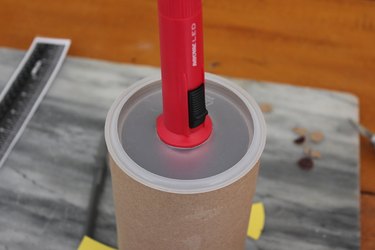
Place your flashlight centered on the plastic top to your cardboard tube and trace the outline with a pen. Cut out the hole you drew and feed the top of your flashlight through the hole. Fasten the top with the attached flashlight back onto the open end of the cardboard tube, leaving the handle portion of the flashlight outside of the tube.
Step 9: Decorate the Moon Phase Viewer
Use paint, stickers, stencils, ribbon or markers to decorate the outside of the moon phase viewer tube.
Step 10: Use the Moon Phase Viewer
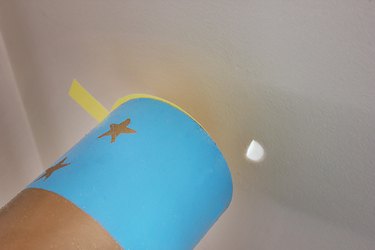
In a dark room, hold the moon phase viewer a few inches away from a wall or piece of paper and turn on the flashlight. An image of the moon phase will be projected onto the wall. Use the tab to rotate the light block and view one phase at a time.