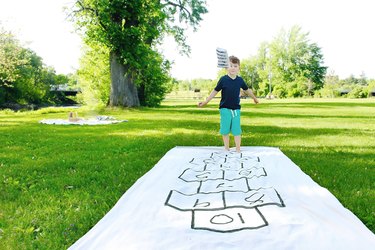
Creating your own portable hopscotch board using a canvas painter's drop cloth makes playing as easy as unrolling a sleeping bag. This simple and affordable DIY project can be completed in an afternoon and will last throughout a childhood.
Things You'll Need
Canvas drop cloth, large rectangular size (approx. 4-by-12-feet)
Piece of 12-inch square craft paper
Chalk
Paper towel
Fabric paint or acrylic paint and textile medium
Paintbrush
Scissors
Grommet kit
4 tent stakes
Hot glue or fabric glue and dry beans (optional)
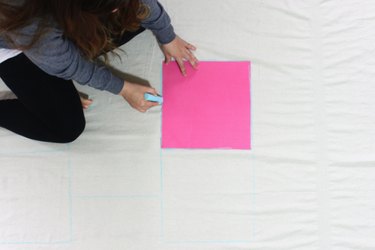
Step 1: Trace the Basic Outline
Lay your canvas drop cloth on the floor and smooth any wrinkles. Arrange your hopscotch board beginning approximately 2 feet from the bottom edge of the long dimension and centered in the short dimension. Use a 12-inch square sheet of craft paper as your template for the hopscotch board squares by tracing around the craft paper with a piece of chalk. The classic pattern follows a 1-2-1-2-1-2-1 box arrangement, making 10 boxes in total.
Video of the Day
Step 2: Number Each Square
Next, number the boxes from 1 to 10. When writing your numbers in each square, make them large enough to read from a distance.
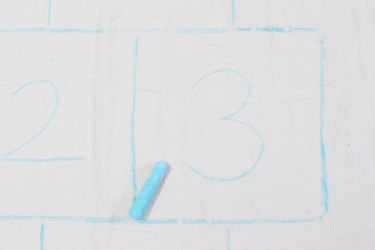
Tip
If you make a mistake with the chalk, rub it with a dry paper towel and try again.
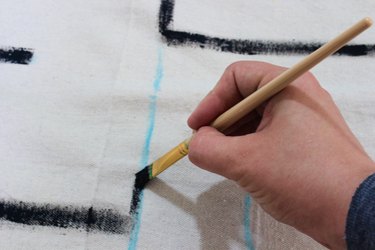
Step 3: Paint Over the Chalk
When you are satisfied with your chalk outline, it is time to paint. Decide what kind of line you want (thick and bold, light and simple, or bright and colorful), and then choose the brush and paint color that best fits that aesthetic. Paint right over the chalk; it will fade over time and eventually rub off completely.
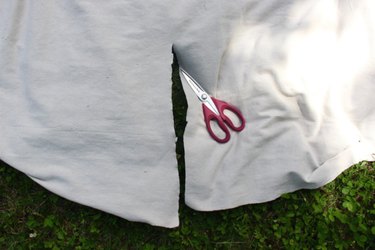
Step 4: Cut 2 Feet Off the Canvas
Trim the canvas hopscotch board by cutting 2 feet off of one end. Then, cut that 2-foot piece in half, making two 1-foot strips. You do not need to be exact. Set the strips aside, as you will make use of them in Steps 7 and 10.
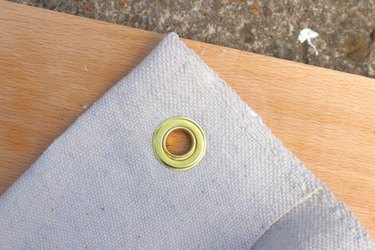
Step 5: Add a Grommet to Each Corner
First, fold over the cut edge about 3 inches. Then follow the instructions that come with your grommet kit and add a grommet to each corner of the board. You will basically punch a hole (with the provided tool), fit all the pieces together like a puzzle, and then hit it a few times with a hammer. This will not only give your hopscotch board a finished and professional look, but it is essential for Step 6.
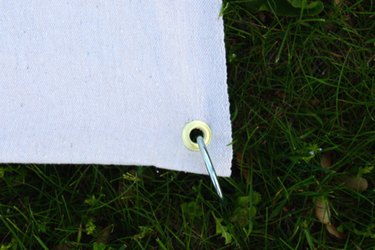
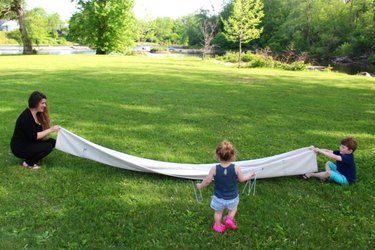
Step 6: Secure Board With Tent Stakes
Pull the hopscotch board taut and secure it to the ground with a tent stake in each corner to avoid it bunching or blowing away on a windy day. Tent stakes are easy to find and fit through standard grommet holes.
Step 7: Make Bean Bags (Optional)
Use one of the strips of extra fabric from Step 4 to make a few bean bags for the "placeholder" element of the hopscotch game. Use two equally sized pieces of fabric. Fold the edges over so that the seams are on the inside, and glue together all but one edge. Add a handful of dry beans before carefully folding the last edge inward and finishing with more glue. Decorate the outside of the bags with leftover paint from the hopscotch board.
Tip
If you choose not to make the bean bags, just use the traditional placeholder: rocks.
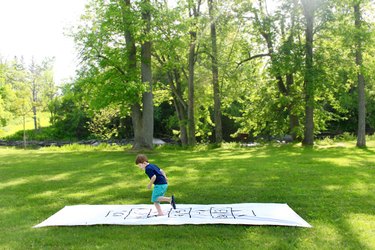
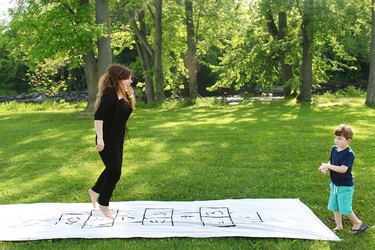
Step 8: Play Hopscotch
Player one tosses a placeholder toward the "1" square. If it lands inside the square, the player can proceed to hop on each of the numbers after jumping over the "1" square. As player one returns, he shall pick up the placeholder as he hops past. If he is able to hop in each square without falling, he gets to try tossing his placeholder onto the "2" square and so on. The first player to successfully complete the course wins.

Tip
There are so many variations to the game hopscotch, including different looking boards, rules for hopping and added challenges. Use the rules and board layout that work best for your entertaining purposes.
Step 9: Roll It Up for Storage
When it is time to pack up and head home, fold the hopscotch board longwise onto itself two times. This will leave you with a long rectangle about 1 foot wide. Place the tent stakes at one end and begin tightly rolling, just as you would a sleeping bag.
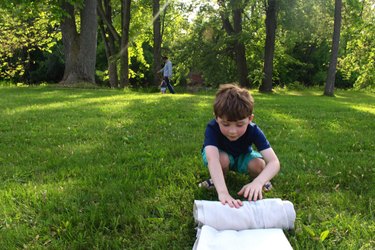
Step 10: Tie It Up
Use the second extra strip of fabric from Step 4 to wrap around the rolled up board and tie it tightly with a bow or knot. Now you have everything you need, stored together, for next time.

Tip
Hem the edges of the fabric scrap used to secure the rolled up hopscotch board for a more finished look.
Video of the Day