Things You'll Need
Rags
Spray-on shellac
Prepared all-purpose joint compound
Powdered-topping joint compound
Plastic bucket
Paint stick
Smooth-edged trowel
10-inch taping knife
Medium-grit sandpaper
Manual palm sander
Older houses have a tendency to settle on their foundations, which can cause formerly smooth plaster walls to pucker and bubble. If the plaster was incorrectly applied in the first place, this can make the problem even worse, since uneven bumps will be exaggerated. If your walls are in wet areas like bathrooms and kitchens, you should check for a leak before making any cosmetic repairs. Once you've confirmed that the issue is merely aesthetic, plaster walls that have already dried with a bumpy surface can be corrected using a skim-coating process.
Step 1
Push against the plaster wall with your palms and check for any give. If the surface seems pliable, there is a chance that the bumps are a sign of water damage behind the wall. Have the wall inspected by a licensed inspector or contractor.
Video of the Day
Step 2
Wipe down the wall with rags to remove dust and dirt. Locate any cracks or holes and spray them with shellac. Let the shellac dry and fill the damaged areas with all-purpose joint compound so that the surfaces are even with the majority of the wall (not the higher, bumpy areas).
Step 3
Mix the powdered joint compound in a plastic bucket. Add water slowly, stirring the compound with a paint stick. When the consistency resembles soft-serve ice cream, it is ready.
Step 4
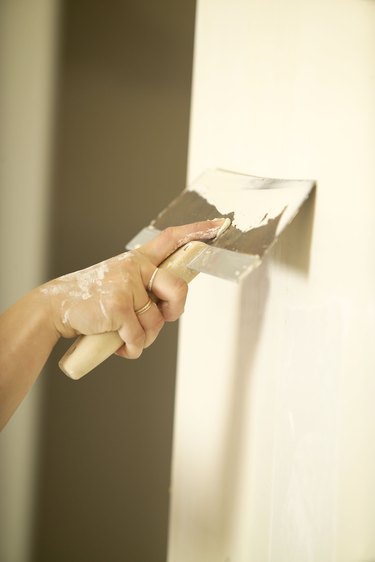
Scoop up approximately 3 cups of joint compound onto a smooth-edged trowel. Spread the compound in one direction over the entire wall in long, straight horizontal lines that overlap as little as possible. Work from the top to the center of the wall, then from the bottom of the wall up to the center.
Step 5
Let the wall dry for a full day. Apply a second layer of joint compound, working vertically this time. Spread the compound on from one side to the center of the wall and then from the opposite side to the center.
Step 6
Smooth any uneven areas of the wall with a 10-inch taping knife. Wait 24 hours for the compound to dry completely. Sand any rough areas of your level wall using fine-grit sandpaper on a manual palm sander.
Warning
Wear protective glasses and a paper dust mask while working.
Ventilate the room as much as possible while working.
Video of the Day
- Ask the Builder; Repairing Plaster Walls; Tim Carter
- Ask the Builder; Plaster Wall Restoration; Tim Carter
- Plaster-wall-ceiling-solutions.com: You Can Skim Coat Rough Plaster or Drywall ...Prep For Wallpaper or New Texture
- New York Times; HOME CLINIC -- The Technique of Skim-Coating a Plaster Wall; Edward R. Lipinski; March 14, 1999
- Mike Bell's drywallschool.com: Everything About Drywall Joint Compound (Mud)