Things You'll Need
Sponge
Vacuum cleaner
Drop cloths
Plastic
Painter's tape
Hand drill
Mixer attachment
Joint compound
Roller
Large brushes
Drywall trowel
Paint
Bucket
Create a textured ceiling surface using drywall mud. Often referred to as joint compound, the material is used to connect drywall sheets joints. However, the gypsum-based plaster is ideal for stomping texture onto ceilings to create innovative patterns. An additional benefit of plaster mud ceilings is that they work as an acoustical sound barrier. However, once applied, the rough texture is very difficult to remove. Only install if you are willing to have a textured ceiling for many years.
Step 1
Clean the ceiling with a damp rag or sponge if dirt buildup is present. Suction away any cobwebs in the ceiling corner. Protect your floors by using drop cloths or large plastic sheets. All items should be moved out of the room, or completely covered in plastic to avoid any damage.
Video of the Day
Step 2
Place painter's tape along the edge of the walls touching the ceiling. Rub the tape down well so plaster or paint do not seep underneath.
Step 3
Use a hand drill and stir your joint compound, or mud, to a creamy consistency. Attach a blending tool to your drill and stir the mud for about one minute. Mixing the mud ensures it is evenly moist and ready to use.
Step 4
Roll the mud onto the ceiling using a paint roller. Use a roller with a long nap, approximately 3/4 inch. Apply the plaster in all directions. Cover about a 4-by-4-foot space.
Step 5
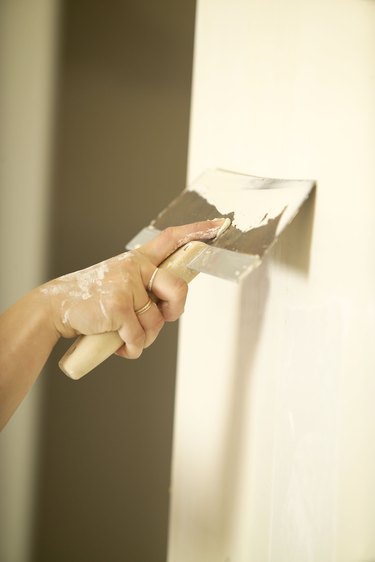
Pick up your stomping brushes. Any large, bristle brushes may be used. Stamp the bristles into the wet plaster to create texture. Repeat over the entire area. Leave the texture as is, or use a drywall trowel to knock down and smooth away any peeks. Let the ceiling dry for about 24 hours.
Step 6
Paint the ceiling using a rough nap roller. Cover the texture with one to two coats of latex paint. For darker colors, first apply a coat of grey primer. To paint the edges of the ceiling, get as close to the wall as possible with the roller. Dab in paint using a chip brush up to the edge of the ceiling.
Tip
Always practice the stomp technique if you do not have a lot of experience creating drywall texture. The end results will look more professional with some practice under your belt. Experiment with different brushes to create the right stomping texture for your room. Besides brushes, plastic bags and drywall trowels stamped into the plaster create unique finishes.
Warning
Plaster often drops from the ceiling during this process. Cover your head with a hat or scarf. Keep a 5-gallon bucket of water handy to clean up any fallen plaster.
Video of the Day