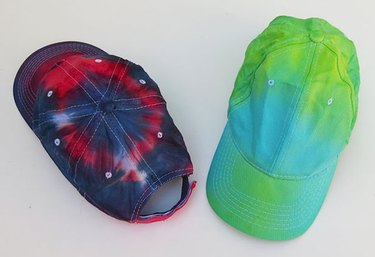
Give your baseball cap a bold and bright pattern with this easy tie-dye technique. By simply binding the twisted fabric with rubber bands or string, the applied dye creates a marbled effect that can transform any piece of clothing to a tie-dyed masterpiece.
Things You'll Need
Fabric dye
White baseball cap
Drop cloth
Plastic gloves
Reclosable bag
Sponge brush
Rubber bands or string
Paper towels
Tip
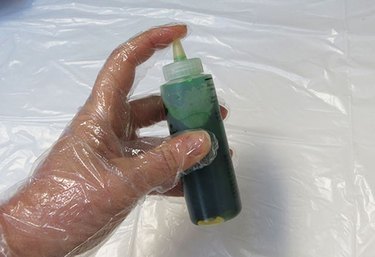
There are many choices when it comes to fabric dye, from individual colors to complete tie-dye kits. A kit usually includes plastic gloves and rubber bands, which is great to get you started. If you’re using a single powder dye, mix it in a plastic squeeze bottle so you can have the most control when applying each color.

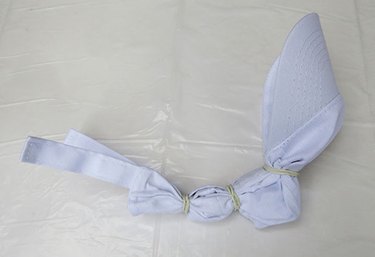
Step 1: Wrap Rubber Bands Around Hat
Wrap 3-4 rubber bands around the hat in different spots to create sections. If you would like to see blocked color when it's finished (red and blue hat example), wrap the rubber bands as tight as possible. This will keep the dyes from blending together. If you want the colors to blend together (green and blue hat example), wrap the rubber bands tightly, but with a little more slack.
Video of the Day

Step 2: Mix Dye
Put on your gloves and mix the dye according to the directions. Most instructions will have you add water and shake until the powder has dissolved.
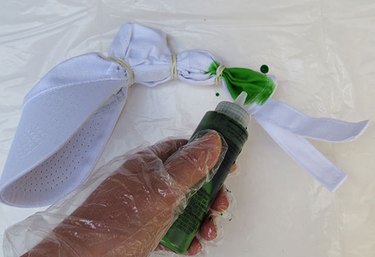
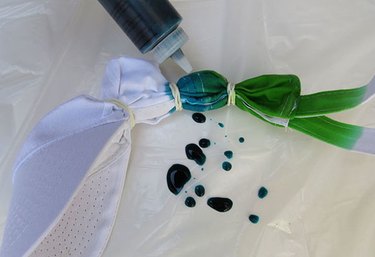
Step 3: Apply Dye to First Section
Apply your first color of dye to the first section. Use just enough dye to cover the white and try not to oversaturate.
Step 4: Apply Dye to Second Section
Apply your second color to the second section. It's normal for some of the dye to seep under the rubber bands.
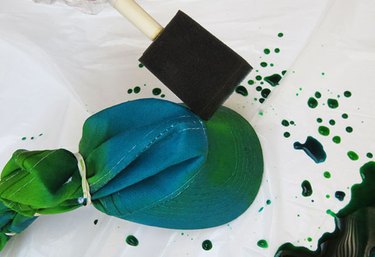
Step 5: Smooth Dye with Foam Brush
For the bill of the hat, apply the dye and then use a foam brush to spread and smooth it out. Because it's a hard surface, the dye will run off the hat and not soak up as easily.
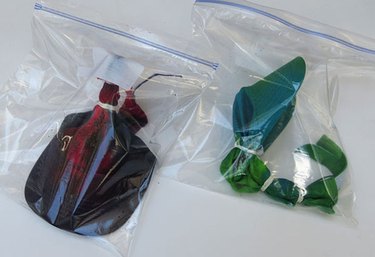
Step 6: Let the Dye Rest
Once your hat is finished, put it in a reclosable bag and let it rest for 6-8 hours. This will allow the dye to set into the fabric.
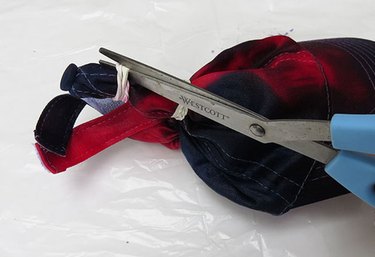
Step 7: Rinse Hat and Cut Bands Off
Take the hat out of the bag and rinse off any excess dye until the water runs clear. Then, cut the rubber bands off.
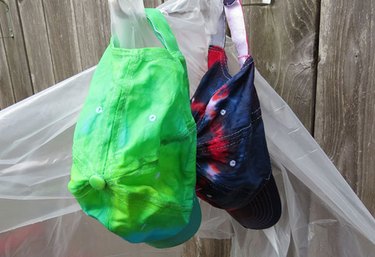
Step 8: Hang to Dry
Hang to dry. Some of the dye will drip off when wet so hang outside or someplace safe.
Tip
Wash tie-dyed items separately the first time to avoid having the colors bleed onto other items of clothing.
Video of the Day