Things You'll Need
4 cords
Masking tape
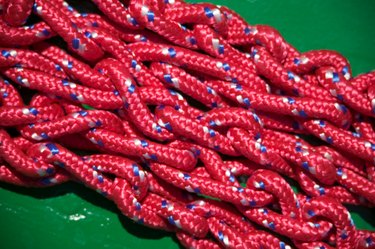
While most people learn how to make a three-strand braid, weaving a four-strand braid is not as common. There are several types of four-strand braids, including flat and round. Both are sturdier than a three-strand braid and less likely to unravel. A flat four-strand braid is similar to a three-strand braid, except that there is a small diamond pattern running down the center, produced by the fourth strand. A round four-strand braid is often called a spiral or diamond braid. Use a four-strand braid to weave a rope for utility purposes, to make a craft cord for jewelry, a ribbon for a floral bouquet, or even for your own hair.
Flat Braid
Step 1
Line up the ends of each of the four cords; each should be 1 1/2 times as long as the desired finished braid. Tie an overhand knot near the end to secure the cords together. Tape the knot to a flat surface where you can work the braid. Omit this step if your cords are already connected at one end -- if you're braiding hair, for example.
Video of the Day
Step 2
Separate the four cords so they aren't tangled or overlapping. Keep track of which cord is which, 1 through 4 from left to right.
Step 3
Bring cord 1 (the left-most cord) over cord 2 (the adjacent cord), under cord 3 and over cord 4. Pull the cords to tighten them. Cord 1 is now cord 4 because it now occupies the right-most position in the four-cord series.
Step 4
Bring the new cord 1 over cord 2, under cord 3 and over cord 4. Pull the cords to tighten them.
Step 5
Braid until your braid is the desired length. After a few repetitions, the pattern will emerge. Maintain tension on the cords at all times for a tight, even braid.
Video of the Day
Round Braid
Step 1
Line up the ends of each of the four cords, and tie and overhand knot near the end to secure the cords together. Tape the knot to a flat surface where you can work the braid. Omit this step if your cords are already connected at one end -- if you're braiding hair, for example.
Step 2
Separate the four cords so they aren't tangled or overlapping. Keep track of which cord is which, 1 through 4 from left to right.
Step 3
Cross cord 2 over cord 3. You are essentially crossing the two middle cords, the first over the second. Cord 2 becomes the new cord 3 and vice versa.
Step 4
Bring cord 1 under cords 2 and 3. Bring cord 1 around cord 3, placing it between cords 2 and 3. Cord 1 becomes the new cord 2. Pull the cords to tighten them.
Step 5
Bring cord 4 under cords 3 and 2. Bring cord 4 around cord 2, placing it between cords 2 and 3. Cord 4 becomes the new cord 3. Pull the cords to tighten them.
Step 6
Braid until the cord reaches the desired length. After a few repetitions, the pattern will emerge. Maintain tension on the cords at all times for a tight, even braid.
Tip
Hold the cords close to the braid, not at the ends. This helps to maintain tension on the cords, producing an even braid without gaps or lumps.