Things You'll Need
Measuring tape
Dark green flat twin sheet
Scissors
Chalk
Pins
Sewing machine
Thread
Needle
Cloak toggle
Funny feet slippers
Scissors
Permanent craft adhesive glue
Flat canvas shoes with elastic sides
Clothespins
White acrylic paint
Yellow ochre acrylic paint
Brown acrylic paint
Palette
Paint brush
Palette knife
1 package curly brown doll hair, 50 ounces
Tweezers
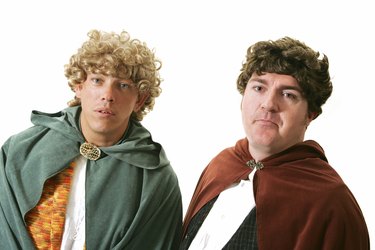
Gather eight traveling companions and set out on a heart-pumping adventure as Frodo Baggins. You can transform yourself into this loveable hobbit by adding a few design elements to your own brown trousers, white button-up shirt and suspenders. In a small amount of time, you can create stunning hairy hobbit feet and your own Lord of the Rings-inspired traveling cloak.
Hairy Hobbit Feet
Step 1
Cut the soles from the funny feet slippers. Leave as much of the side of the slippers as possible.
Video of the Day
Step 2
Lay the slipper tops over the top of the canvas shoes. Make a mental note of how and where the slippers overlap the shoes.
Step 3
Remove the slippers and add permanent craft adhesive glue to the top and sides of the canvas shoes.
Step 4
Carefully place the slippers back over the canvas shoes. Press the slippers onto the canvas. Clip the feet in place with clothespins. Allow the glue to dry.
Step 5
Paint a base coat on the hobbit feet with white acrylic paint. Let dry.
Step 6
Mix a small amount of yellow ochre, white and brown paint until you achieve your natural skin color. Paint the hobbit feet. Let dry.
Step 7
Spread a thin layer of the permanent craft adhesive glue onto the tops of the hobbit feet and across the top of the toes.
Step 8
Use tweezers to add strands of the brown curly doll hair to the glue. Add hair just above the toe line and work your way upwards. The overall amount of hair you use is up to you. Allow the glue to dry before wearing.
Frodo's Traveling Cloak
Step 1
Measure your back from the base of your neck to your mid-calf. Record the length.
Step 2
Divide the sheet in half lengthwise with the wrong sides facing each other. Cut the bottom off of the sheet so that the sheet measures the same length as your back to mid-calf measurement. Set the extra fabric aside.
Step 3
Draw an arch that extends to the edge of the fabric, starting at the top fold. This will create the shoulder portion of the cape. Cut along the line of the arch so that the sheet resembles a shark's fin. Open the fabric with the wrong side facing up.
Step 4
Fold the extra fabric in half. Cut the top edge to resemble a semicircle. It should be the same width as the cloak and measure 24 inches vertically. Lay the flat end of the long edge of the semicircle over the top edge of the cape, wrong sides facing each other. Pin the pieces together.
Step 5
Sew the pieces together with a 5/8-inch seam allowance. Sew the garment from the center of the fabric outwards. Follow the garment's curve. Remove the sewing pins and turn the cloak right side out.
Step 6
Hem the cloak with a 1/4-inch seam. If necessary, pin the hem in place before sewing.
Step 7
Sew a toggle to the front of the cloak where the hood and cloak pieces are attached.
Video of the Day