Things You'll Need
Measuring tape
Saw
Rubber mallet
Silicone
Caulk gun
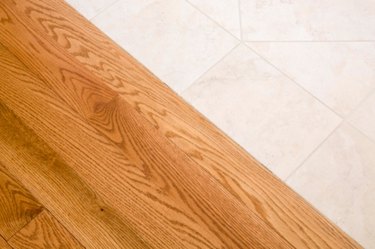
Reducer molding is the molding you install between two flooring types that are of different heights. The reducer molding makes the transition between the two floor heights aesthetically pleasing and safe for walking between the two spaces. Most often required when wood or wood laminate meets vinyl flooring, reducer molding comes in a variety of sizes to manage many height differences and is also in stain finishes to match the wood or wood laminate floor.
Step 1
Measure the space between the two floors very carefully as this measurement determines what size and type of reducer molding you need to bridge the space.
Video of the Day
Step 2
Measure the length required for the reducer molding and cut to size. If necessary, stain the reducer molding to match the existing floor.
Step 3
Locate the tongue edge of the reducer strip. Insert this tongue edge into the groove edge of the wood floor, using a rubber mallet if needed to slide the reducer molding fully into position.
Step 4
Apply a small bead of silicone to seal the gap between the reducer space and the vinyl flooring. Since vinyl floors are washed when cleaned, this is important to prevent water from seeping under the reducer molding and damaging the molding or the wood floor.
Tip
Consider nailing the reducer strip in place, especially for large openings. In most typically sized doorways, this is not necessary.
Reducer strips are not required to transition from all flooring types. If in doubt, talk to a flooring professional.
Video of the Day