Things You'll Need
Ladder
Voltmeter
Electrical tape
Drywall saw
Wire stripper
Wire nuts
Hanger bracket kit
Adjustable crescent wrench
A ceiling fan with a light can help lower your electric bills for cooling in the summer, move warm air around your house during the winter, and brighten a room. It's easiest to replace an existing light fixture with your new fan and light combination, because you won't need to run any new electrical wiring to it. The installation will be simplified if you have attic access above where you'll be installing your new fan, but that access isn't necessary.
Step 1
Turn off the breaker that supplies power to the light fixture you'll be replacing. Check the connections at the fixture with a voltmeter to ensure the power is off. Disassemble the existing light fixture with a screwdriver and remove it. For added safety, install wire nuts on the bare wires until you're ready to attach the new fan wires.
Video of the Day
Step 2
Install the support bracket and electrical box for the new fan and light combination, using a screwdriver and the supplied screws. The support bracket may require an adjustable crescent wrench to tighten the bracket between the studs. Ceiling fans have heavy motors; the electrical boxes used for ceiling light fixtures are not strong enough to support a ceiling fan. You may need to cut some additional drywall from the ceiling to allow for the heavier-duty support bracket and electrical box. Trace the outline of the new electrical box with a pencil, and cut the new opening with a drywall or keyhole saw.
Step 3
Attach the new hanger bracket to the ceiling studs using the manufacturer's directions, and mount the new electrical box. Pull the power wires into the electrical box and secure them in place with a lock nut. Mount any decorative plate that came with your fan, routing the electrical wires through the opening in the plate.
Step 4
Lift the ceiling fan motor unit into place and have an assistant support it. Remove the safety wire nuts from the power wires, and match the white wires, the black wires, and ground wires. Install the wire nuts, and wrap electrical tape tightly around each of the paired wires where they enter the wire nut. Push the paired wires into the electrical box, making sure that the wires are not crimped. Bolt the fan motor assembly into place.
Step 5
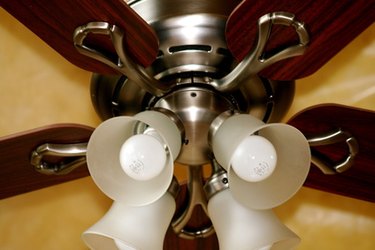
Screw the fan blades to the mounting arms, and attach the blade assembly to the motor shaft. Make sure the screw holding the blade assembly to the motor shift is well-tightened. Install any decorative light shades that came with the fan over the light sockets, holding them in place with the set screws provided. Do not overtighten the screws, or you could crack a light shade.
Step 6
Restore power to the fixture wiring at the circuit breaker and test the fan and lights. On most fan/light units, the lower chain will control the lights, and the upper chain will control the fan speeds. If you can reverse the directions on your fan motor—often with a slide switch on the side of the fan body—adjust it to blow air downward in the summer, and to pull air upward toward the ceiling during the winter.
Video of the Day