
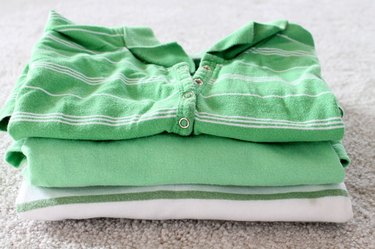
Celtic knots represent infinity and eternity because they don't contain beginnings or ends. In ancient times, if a gift was adorned with a Celtic knot, it was thought to give the recipient longevity or good luck in new adventures. This no-sew headband is made with a Shannon knot, which symbolizes balanced creativity, a fitting emblem because it makes creative use of old T-shirts. You have to see how easy this is! Watch the video here.
Things You'll Need
Video of the Day
- Sharp scissors
- Hot glue gun and glue stick
- Measuring tape (optional)
Video of the Day
Step 1
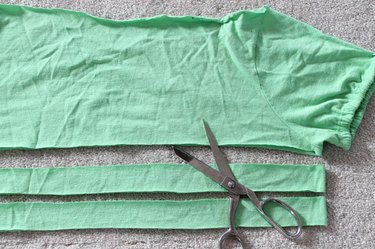
Use sharp scissors to cut two 1 1/2-inch wide strips across both layers of the T-shirt. Do not use the hemmed bottom edge of the shirt. Each strip will have two layers.
Step 2

Stretch the strips. Do not unfold the two layers. Grab each end and pull tightly until the strip rolls into itself.
Step 3
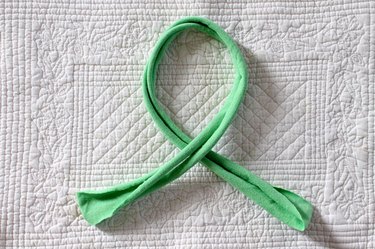
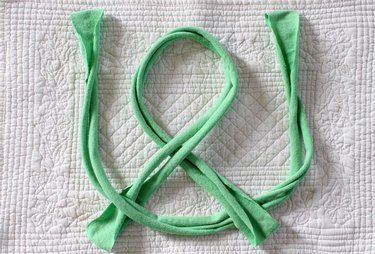
Create a loop with one of the strips by crossing the right side over the left side. Keep the loop at the top.
Step 4
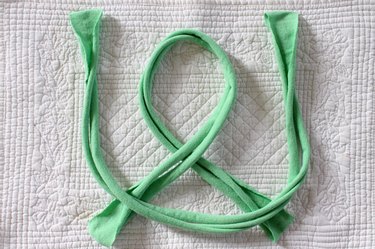
Lay the second strip in a U-shape on top of the first strip. Place the ends at the top.
Step 5
Place the right side of the top piece under the right side of the bottom piece.
Step 6
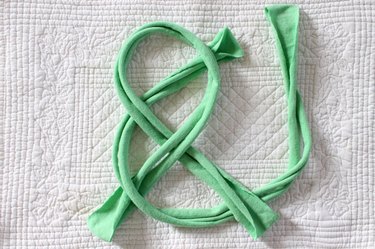
Place the left side of the top piece under the loop of the bottom piece.
Step 7
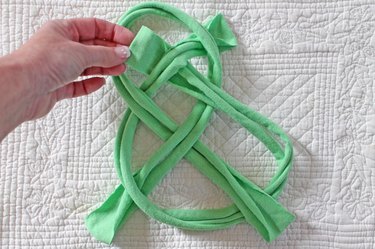
Place the right side of the top piece over the loop of the bottom piece, passing under the left side of the top piece and then over the other side of the loop.
Step 8
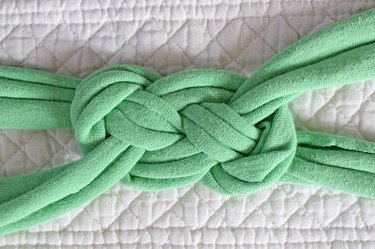
Pull on each end gently and slowly until a neat knot is created and you have loose strips of fabric on each side of the knot.
Step 9
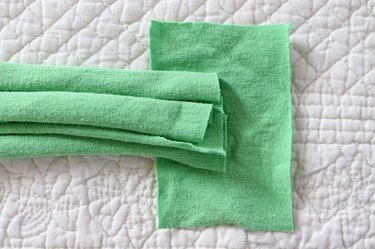
Wrap the strips around the head of the person who will be wearing the headband to mark where to cut the ends. Or measure the person's head circumference and cut the ends to that length. Cut a 2 1/2-by-3 1/2-inch piece of T-shirt and place both ends of the headband on top.
Step 10
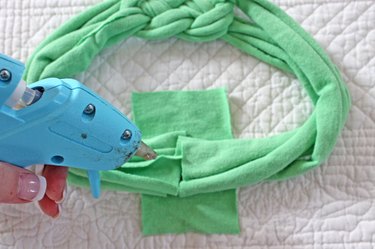
Spread some hot glue onto the tops of the headband ends.
Tip: You could use fabric glue instead of hot glue, but it will take longer for the glue to dry.
Step 11
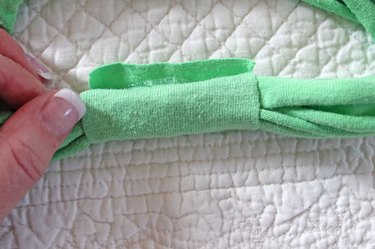
Roll the 2 1/2-by-3 1/2-inch piece of T-shirt tightly around the glued ends of the headband. Use caution when rolling the fabric to avoiding burning your fingers.
Step 12
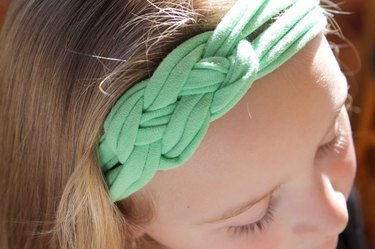
Let the glue dry for a few minutes, slip the headband on and enjoy some balanced creativity of your own.