Things You'll Need
Utility knife
Sledge hammer
Reciprocating saw
Pry bar
2-by-4 lumber
Circular saw
Tape measure
Level
2-by-6 lumber
1/2-inch plywood
Wood glue
Box nails
Hammer
Framing nailer
Shims
Pre-hung door
Door casing
Knob and hardware
Drywall
Drill
Drywall knife
Sander
Painting supplies
Widening a doorway is one way to improve access to your home. It requires making extensive changes to the door frame to move the studs and install a longer header. Tackle this job on a day warm enough to expose your home to the elements and have plenty of help for lifting out the old door. Installing a pre-hung door is the preferred method for replacement, as it saves time and money. Most door styles are readily available for purchase in standard sizes. Order custom doors ahead of time, if that is preferred to standard doors. Use the standard, 80-inch high door for an easy fit.
Step 1
Pull the casing or side trim from the interior of the existing door with a pry bar. Do this in order to expose the gap between the door jamb and the wall frame. Cut all nails and screws at the top and down both sides with a reciprocating saw. Locate and remove the screws in the threshold at the bottom of the door. Use a three-pound hammer to pound the top of the old door out, until the unit is loose and can be tipped. Lift it out of the opening. Cut the drywall floor to ceiling, with a utility knife, 6 inches on either side of the door and remove it to expose the frame.
Video of the Day
Step 2
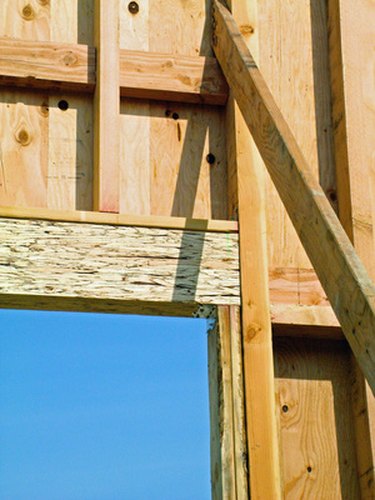
Use a pry bar and sledge hammer to remove the knob side studs from the frame. Push the bottom of the studs into the door opening, then cut them loose from the header with a reciprocating saw. There will be two. One will be full length running from the floor to the bottom of the wall's top plate. It is known as the "king stud." The other one inside that, running from the floor to the bottom of the header, is known as the "jack stud." Carefully pry the header away from the studs on the hinge side. Cut the nails with the saw.
Step 3
Measure your new door unit horizontally from outside-to-outside of the frame. Your new opening will need to be 1/2-inch wider than this. Cut new king and jack studs, using the originals as templates for length. Cut two pieces of 2-by-6 the width of the new door opening, plus 3 1/2-inches. Cut a piece of 1/2-inch plywood 5 1/2-inches wide and the same length as your 2-by-6. Glue and nail these three pieces together, with all edges flush and the plywood in the center. This is your header.
Step 4
Measure from the face of the hinge side jack stud across to the bottom sill of the wall on the knob side. Mark it at a point equal to the width of the new door plus 3 1/2-inches. Cut it off at this point with a circular saw. Nail the new jack stud to the face of the new king stud, with their bottom ends flush. Stand this double stud up into the opening, with the bottom outside face of the king stud against the freshly cut end of the floor sill. Use a framing nailer to drive the nails in at an angle into these studs, securing them to the sill. Use a tape measure to check the distance between the king studs and adjust as needed to make it as wide as the new door, plus 3 1/2-inches. Angle nail the king stud to the top plate of the wall. Set the new header in place and nail it to the king studs.
Step 5
Measure and mark the exterior siding to widen the opening the difference between the old and new doors. Cut the siding away using the circular saw. Stand the new, prehung door in the opening and nail the exterior trim at one top corner. Wedge shims behind both side jambs at the top, bottom and middle. Use a level to check both jambs and adjust as needed by shifting the bottom of the door in or out. Open the door and test for proper operation. Adjust the bottom corners in or out until the door opens and closes smoothly. Nail through the side jambs into the frame behind at each shimmed location. Drive one 3-inch treated deck screw through every hole in the threshold.
Step 6
Cut and install drywall to cover the cut area. Use 1 5/8-inch drywall screws to attach it. Cut casing for the top and sides of the door opening. Miter the side pieces at 45 degrees, so that the short side of the miter is 1/4-inch above the bottom edge of the jamb header. Nail them in place on the side jambs with a pin nail gun, one nail every 6 to 8 inches. Cut a piece of casing, with 45-degree miters on each end, to fit between the side casing and nail it to the jamb header.
Step 7
Install the knob by inserting the striker bolt through the hole in the edge of the door. Use the two screws provided to attach the striker bolt collar plate to the edge of the door. Insert the two halves of the knob through the holes in the striker bolt, thread the two long screws through the holes in the knob plate on the inside of the door and tighten with a screw driver. Center the striker plate on the hole in the knob side jamb and attach it using two 3-inch treated deck screws, driving them through the jamb into the jack stud for added security.
Step 8
Tape and mud the seams in the drywall with a wide drywall knife. Allow the mud to dry, sand the seams smooth and paint the wall, door and trim to match.
Video of the Day