Things You'll Need
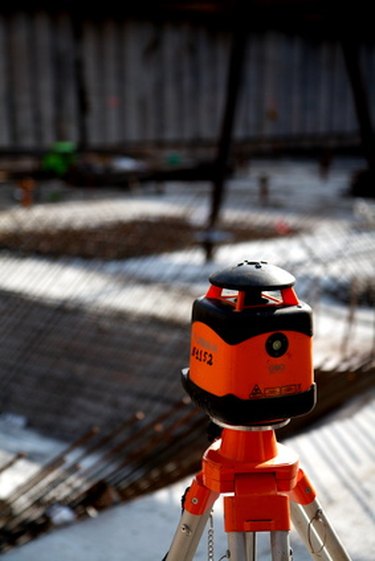
Laser level
Laser level measuring pole
Sensor
Tripod
2-lb. sledge
1/2-inch rebar, 24 inches long
Laying out a foundation with a laser level has become a one-man job. Although a laser level will only help in leveling the foundation footer, it will not help in squaring the footing, which must be done by triangulation. However, this much-improved level will help level long runs of foundation footings within 1/8-inch accuracy. The average do-it-yourselfer can use a laser level with only minimal training.
Step 1
Set up the laser level tripod on a level surface just a few feet lower in grade than the footings. You can eyeball this setup by looking at the grade of the land. Just place the tripod on the lower point of the slope. Although the tripod does not have a level attached, extend the legs so that the tripod base is eyeball level.
Video of the Day
Step 2
Attach the laser level to the tripod by setting the level on the tripod base and inserting the pivoting screw beneath the tripod base into the bottom of the laser level. Don't tighten the screw down yet. Adjust one of three screws located under the laser level until the levels bubble indicator is level. You may need to work with the screws a bit to get the device level, however. Once the laser is level, then tighten down the thumb screw that holds the level to the tripod base.
Step 3
Attach the laser sensor, which is a 6-by-8-inch square box, to the leveling pole. Open the pole up to full extension and attach the sensor box to the pole by sliding the box onto the pole and tightening the thumb screw. You will loosen this screw and move the box once you get a reference level shot. Turn on the laser level and the sensor.
Step 4
Drive a 1/2-inch rebar into the ground 12 inches at one corner of the excavated footing. Place the laser pole on top of the rebar and listen for the sensor to alarm. If you hear no sound, loosen the thumb screw--while the pole remains on top of the rebar--and move the sensor up or down slowly until you hear the alarm and tighten the screw. This indicates that the laser has found the sensor and you now have a reference point for all other rebar heights. The rebar will represent the thickness of the footer, and all concrete will be poured to this height.
Step 5
Place the next rebar 4 feet away from the first and tap into the ground only a few inches. Remain in the center of the excavated footers, however. Place the laser pole on the rebar and listen for the alarm. If none is heard, tap the rebar down a few inches and check again. Continue tapping the rebar a few inches until the alarm sounds. Do not move the sensor box on the stick. You will leave this in place for the remainder of the footing shots. You will only move the rebar by hammering it into the ground to adjust the height.
Video of the Day