Things You'll Need
Wire plate hanger
Measuring tape or ruler
Masking tape
Picture hook with nail
Hammer
Ribbon or cord
Decorative hook
Poster putty or museum putty
Screws and wall anchors
Drill
Screwdriver
Picture ledges
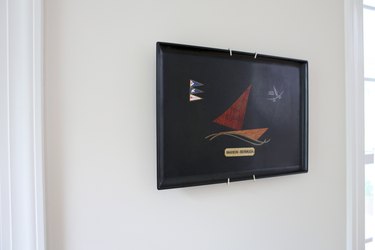
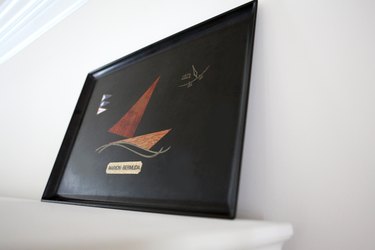
Hang a decorative tray on your wall to accent the room's style, evoke a travel memory or collector's passion, or just add a splash of color and pattern. With the range of display options available, including decorative hooks, adhesive mounts, plate hangers and floating picture ledges, you can find a way to hang nearly any kind of tray. When choosing a hanging method, make sure the product is compatible with the wall surface along with the size, weight and material of the tray.
Wired for Hanging
Step 1

Fit a wire plate hanger onto a shallow-edged tray. Plate hangers, consisting of two pairs of wire hooks joined by a pair of springs, are designed to fit on the lip of a tray or plate. Fit one pair of hooks on the top lip of the tray and gently stretch the springs down the back of the tray so the second pair of hooks fits on the bottom edge. Make sure the plate hanger is the proper size for your tray, and that it's centered so the tray is balanced for hanging evenly. When the hanger is securely fitted, measure the distance from the top of the hanger loop to the top of the tray.
Video of the Day
Step 2
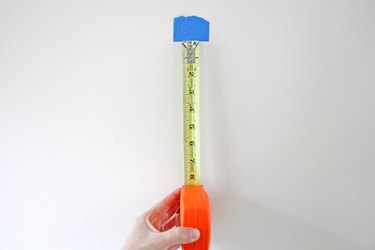
Mark the desired location of the tray on your wall. Adhere a small piece of masking tape on the wall to represent the center of the top of the tray. Measure down to find the placement of the hanger loop, and mark this point with a pencil.
Step 3
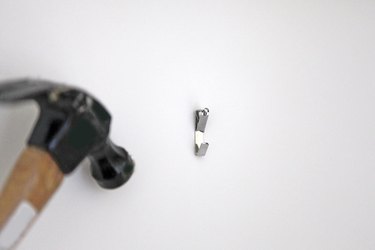
Install a picture hook, or other hanging mount suitable for the wall surface, at the pencil mark. For precise placement, the base of the hook should coincide with the mark. Install the hook following the product directions.
Step 4
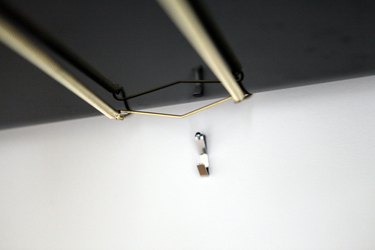
Hang the tray by placing the hanger loop over the wall hook. Stabilize the position of the tray, if needed, with small pieces of poster putty pressed between the tray and the wall.
Tie a Knot and Hang On
Step 1
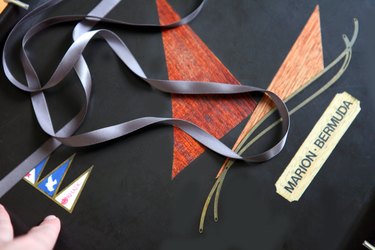
Tie a ribbon or cord to the tray handle, or thread it through the tray's pierced edging if applicable. Make a loop that extends about 4 to 6 inches above the tray, and tie it securely with a bow or knot. This hanging method is visible, so choose a ribbon or cord that complements your decor.
Step 2
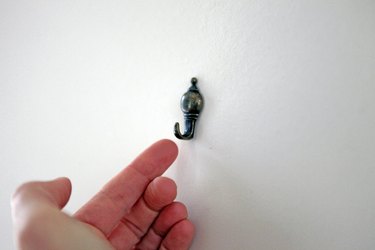
Install a decorative hook to display the tray at the desired wall location, allowing for the additional length of the ribbon loop above the tray handle. Follow product directions for installing the hook, using screws and anchors that are appropriate for the wall surface.
Step 3
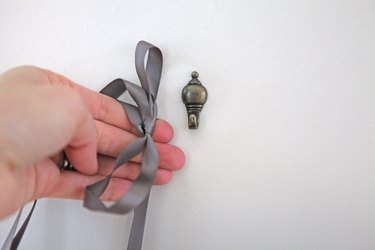
Place the ribbon or cord loop over the hook to hang the tray. Stabilize the tray with poster putty if needed.
Pretty on a Picture Ledge
Step 1
Install a picture ledge or ledges with a lip at the front. Premade picture ledges are usually provided with integral hangers, screws and anchors so they can be hung to "float" on most wall surfaces. Make sure there's enough wall space above the ledge to accommodate the tray.
Step 2
Arrange the tray on its edge with the back leaning against the wall. This method safely displays any type of tray. You can add framed pictures, small vases, figurines and other objects to the display, and you can change the display as often as you like.
Step 3

Stabilize the tray as needed with small pieces of museum putty to hold it in place on the shelf and against the wall.
Tip
Picture hooks secured with a nail can be hammered directly into drywall or wood walls. However, most wall hooks and picture ledges are mounted to the wall with wood screws. Unless your hanging location is directly on a wall stud, you will need to use a device to anchor the screws firmly in drywall, plaster or masonry. First, drill a hole to accept the anchor; a hand drill works on drywall but plaster and masonry walls require an electric drill with a special bit. Gently hammer the anchor into the hole until it's flush with the wall. Push the screw through the hole in the hanger and drive the screw into the anchor with a screwdriver until the screw head holds the hardware firmly against the wall.
Hold a small carpenter's level against the top edge of a square or rectangular tray to ensure it's horizontal. This is also useful if you hang picture ledges.
If the lip of your tray is too pronounced to use a wire plate hanger, you can use an adhesive disc hanger on the back of the tray. The disc hanger has a built-in loop to hang from a wall hook. Following product directions, wet the adhesive disc and allow the glue to develop for a minute, and apply the disc to the clean tray back, making sure the hanging loop is evenly spaced between the tray edges and does not extend above the lip of the tray. Let the glue dry overnight, and hang the tray. The adhesive disc can be removed by wetting it if you later want to use the tray for another purpose.
Warning
When using power tools such as an electric drill, follow the manufacturer's safety guidelines.
Video of the Day