Things You'll Need
Ladder
Chalk line
Measuring tape
Gutter
Gutter end caps
Hacksaw
Crimper
Downspout connector
Pencil
Tin snips
Drill
Silicone sealant
Gutter brackets
Gutter screws
Downspout material
Downspout shoe
1/4-inch sheet metal screws

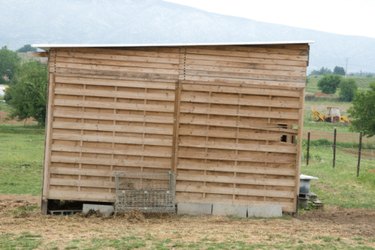
A gutter collects water that would normally fall off a structure's roof and pool on the ground, and diverts that water away from the structure. Gutters are normally installed on houses to protect the foundation from water damage but they can attach to any structure that has a roof, including a garden shed. Installing a gutter, even on something as small as a garden shed, will take up most of a day, so plan accordingly.
Step 1
Position one end of your chalk string about 1 inch below the top of the fascia board on the lower edge of your shed's roof. If the roof falls in two or more directions, pick a side to start with.
Video of the Day
Step 2
Move to the other end of the roof and position the other end of the chalk string 1/2 inch lower for every 10 feet of shed length. Pull back on the chalk string and let it go to create a properly-sloped chalk line for the top of your gutter to follow.
Step 3
Cut a piece of gutter material with your hacksaw that's equal to the length of the side of the garden shed. Place end caps over the ends of the gutter and crimp them in place using your crimper. Some gutter models may have end caps that you screw into place using sheet metal screws.
Step 4
Place the gutter upside down in front of you. Place a downspout connector on the bottom of the gutter, a few inches from the end that will be at the lower side of the line you made on the fascia board. Trace the outline of the downspout connector with a pen or pencil.
Step 5
Drill a hole in the gutter, somewhere inside the outline you just drew. Take your tin snips and cut along the outline, using the drilled hole to get started.
Step 6
Turn the gutter over. Place a line of silicone sealant under the lip of the downspout connector, then press the connector into the opening in the gutter.
Step 7
Place brackets into the gutter. Have one bracket on each end, and the rest about 18 inches apart. Most brackets will snap under the gutter's front lip; the back edge will then slide over the rear of the gutter.
Step 8
Climb your ladder and hold the gutter up so the top runs along the chalk line you snapped. Drill the long gutter screws through the brackets and into the fascia board.
Step 9
Attach a downspout shoe to one end of your downspout pipe, using two sheet metal screws. Cut the other end with your hacksaw so the downspout will reach from the downspout connector on your gutter to the ground. Attach the downspout to the downspout connector using two sheet metal screws.
Step 10
Repeat the procedure for the other side of the shed, unless the entire roof is only angled in one direction.
Tip
If your roof hangs over the side of the garden shed so there are no fascia boards to drill into, simply drill a large piece of wood into the shed wall at the necessary height and use that piece of wood as a fascia board.
Some gutter and bracket sets are designed to have the gutter rest on top of the brackets. In that case, attach the brackets to the fascia boards, then rest the gutter on top.
Video of the Day