Things You'll Need
Drill with masonry bit (5/8 inch bit)
3/8 inch expansion bolts (with setting tool included)
Hammer
Tape measure
Marker
Torque wrench (if desired)
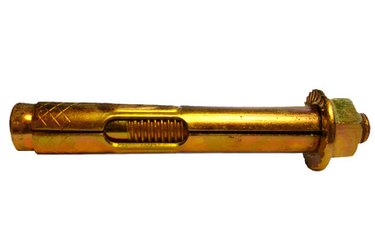
"Expansion bolt" is a generic term that refers to three fastening components combined together: a threaded bolt, a properly sized nut and an expanding sleeve assembly. When assembled together, the force generated between the nut and bolt (when tightened) forces the outward expansion of the sleeve assembly, thus gripping the material the sleeve is embedded into. They are most commonly used in porous materials such as brick, concrete and stone applications where traditional threading cannot be created. Expansion bolts are easy to install once the general operational theory is understood, and may be used in extra heavy duty applications where gripping power is paramount.
Step 1
Determine what size expansion bolt is required for your application. A common installation of securing the metal legs of a machine to a concrete floor, for example, might require one expansion bolt per leg, with each expansion bolt 3/8 inch wide by 3 inches long.
Video of the Day
Step 2
Mark the location of the expansion bolt locations on the floor--this is where the bolt will be secured to the floor. Most heavy duty machines have holes pre-drilled in their feet (legs) for just this purpose. Mark the location of all anchors on the concrete at one time with a marker, so that they are all aligned correctly relative to one another.
Step 3
Drill the proper size and depth hole for each anchor. The correct size of hole will be supplied by the manufacturer of the anchor bolt, usually labeled right on the box. A rule of thumb is that for a 1/4 inch anchor, use a 1/2 inch drill bit; for a 3/8 inch anchor, use a 5/8 inch drill bit, etc. Depth of the hole is determined by making sure the nut can attach to the bolt (anchor) with enough threading remaining so that it can be torqued sufficiently (usually two complete 360 degree turns of the nut).
Step 4
Insert the anchor into the hole. Make sure the anchor is resting at the very bottom of the pre-drilled hole before proceeding. Gently tap the anchor (using a hammer) until you are sure it is in its proper position. Remove the nut from the anchor. Next, insert the anchor tool onto the top of the buried anchor (the tool will be included with the anchor(s) kit). Strike the anchor tool firmly three or four times, which will expand the anchor sleeve enough to allow the expansion process to begin once the nut is tightened.
Step 5
Insert the bolt through the device being secured and then into the anchor (which is still buried). Tighten the nut to the desired amount of torque, or until it is tight if no torque specifications are available.
Tip
Always use the manufacturer's specified drill size when drilling anchor holes. If sized improperly, the anchor may not be of sufficient strength to hold the anchored device securely (the anchor will be too loose).
Warning
Do not over-torque the nut. It will snap the bolt off below the surface of the material in which the anchor has been placed.
Video of the Day