Things You'll Need
Torn fabric
Needle
Pins
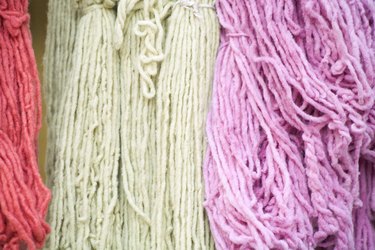
Darning wool, silk or cotton thread in compatible colors
Additional fabric, same or of a compatible color
Small sharp scissors, like embroidery scissors
Iron and ironing board
Pressing cloth
Darning egg, optional
Darning egg or pillow
One source of the proverb "Man may work from sun to sun, but woman's work is never done" must be the mending basket. Today synthetic fabrics have made patching, mending and darning tasks that women once routinely learned largely unnecessary. But with the high cost of fine natural fabrics, especially wool, reviving techniques economical housewives have used for centuries makes sense. Even a tear of several inches in size does not require you to throw fine wool fabric away; it is certainly worth trying to repair an expensive garment or blanket of fine wool before you replace it. These techniques are simple; give them the gift of time and give yourself the gift of a repaired treasure.
Patching
Step 1
Patch the tear. Small stitches and fabric-matching will let you make a nearly invisible patch. The first thing to do is to find compatible fabric. Search seams, hems and facings on a garment. You may well be able to cut out a piece of existing fabric from an invisible source. Tack the edges of your patch using an overcast stitch so that edges do not fray and create a new problem. If you cannot find a source of patching, take your garment to the fabric store and look for similar material. If your tear has resulted in a hole--that is, if some fabric is missing--look for something as close to the original as possible in color and texture. If the fabric is torn but intact, seek a fabric of similar color and nonstretchy quality; even sheath lining or broadcloth will do. The goal is to strengthen the existing fabric and prevent show-through (the red-undies-white-slacks syndrome). A free swatch may be enough material; purchase a quarter-yard if not. Your patch needs to be at least half an inch larger than your tear on all sides for easy handling.
Video of the Day
Step 2
Place your fabric or garment face down on the ironing board. Pin it in place, putting pins an inch or more away from the tear, on all four sides. Cut your patch at least one half inch larger than the tear on all sides; an inch on each side makes handling easier if you are new to this technique. Using a contrasting color of thread, secure the patch (also face down) to the fabric with big basting stitches.
Step 3
Turn patched fabric over (face up). Transfer to your lap if it is uncomfortable to bend over the ironing board. Using compatible-color thread or darning wool, secure the patch with tiny up-and-down stitches one-quarter inch from the edges of the tear, and tying your thread off on the back.
Step 4
Remove basting stitches and any remaining pins. Move fabric back to the ironing board, face up. Set steam iron on wool/moderate and place pressing cloth over mended area. Press gently and check your work.
Step 5
Using small, sharp scissors, trim frayed edges or threads on top of the patch, to within one-eighth of an inch. Press gently again with the iron. Your patch should be moderately hard to find! In the finest work, patches are trimmed with scissors on the back and finished with an overcast single-fold hem.
Reweaving and mending
Step 1
Reweave small holes or tears. Professional reweavers will search the garment or fabric to find and detach long threads from hems or edges. Again, depending on how much the mend is likely to show, use threads that are close to the original material. Darning wool, if you can find it, is best; color-matching, however, may be hard. Wool with a sheen can be mended with silk thread; matte finish wool can be mended with mercerized cotton thread.
Step 2
Stabilize the hole or tear by making tiny up-and-down stitches in a ring or square around the hole. One or two rows both prevent stretching and create a reweaving frame for further stitches.
Step 3
Cover the hole by following the original weave of threads that created the fabric. Using your framing stitches as anchors, cover the area with warp (up and down) stitches. Rotate the fabric 90 degrees so that you can then weave woof (across and back) stitches through the warp stitches. Make stitches flat but do not pull on them. Pulling will create puckers in your fabric.
Step 4
Press with steam iron and pressing cloth to check your work.
Tip
Reweaving takes time. Using a darning egg to highlight the area you are working on can be helpful, but do not pull fabric tightly over the egg; instead of puckers, you'll get lumps.
One of the signs of changing fabric technology is the relatively small amount of mending information available on the Web. Fortunately, clerks in fabric stores are often a good source of information and instruction, and below you can find an informative interview with a professional reweaver.
A very finely woven wool fabric, a complex plaid, or a very expensive garment may benefit from professional reweaving.
Warning
Do not be discouraged if your efforts take practice. Historically, mending was taught to children and occupied many hours. Improve your chances of success by taking your time, providing yourself with good, bright light, and remembering that even experienced menders sometimes had to take their work out and do it over.
Video of the Day