Things You'll Need
Needle nose pliers
Heavy duty cardboard tube
Space heater or hair blow drier
Scrap canvas strips
Canvas stretching pliers
Staple gun
3/8 inch staples (or shorter)
There are circumstances that necessitate removing paintings from their stretcher frames and re-stretching them later. Usually such circumstances involve transporting paintings, especially if the art is over-sized or it is part of a traveling exhibition. Removing existing paintings and re-stretching them is hard on the edges of the canvas and on the painted surface. The biggest dangers are a tearing of the edges and cracked paint. However paintings conservator James Bernstein suggests that these problems can be avoided if the proper steps are taken in the proper order, and the right tools are used.
Step 1
Remove an existing painting by pulling out the staples holding the canvas to its stretcher frame. Use needle nose pliers and grip the long edge of the staple and pull straight out without twisting, otherwise the canvas edge tears or the canvas weave pulls apart, leaving large holes.
Video of the Day
Step 2
Roll the painting, if there is a delay between removing the painting and re-stretching it, face side out by laying the painting flat and using a broom stick or curtain rod to start the roll to avoid crinkling the canvas edge. Store the painting in a heavy-duty cardboard tube. Hang the tube on a wire strung through the tube to keep the weight of the canvas roll from bearing in on itself.
Step 3
Place the rolled painting in the location where it will be re-stretched at least 24 hours before re-stretching to give the canvas and the paint layers on the surface time to acclimate to the location's climactic conditions.
Step 4
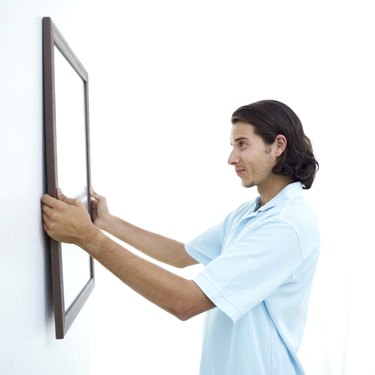
Unroll the painting, lay it face down on a flat surface, and place the assembled stretcher frame on the back, adjusting its placement as needed for proper hanging.
Step 5
Heat the painting just a little by turning on a small space heater in the room or by using a hair blow dryer on low and waving it over the back of the painting to give flexibility to the layers of paint and primer on the canvas.
Step 6
Fold one edge of the canvas over its stretcher bar, and lay a strip of scrap canvas along the line where the staples will secure the canvas to the stretcher frame to keep the staples from making direct contact with the painting.
Step 7
Load the staple gun with staples no longer than 3/8 of an inch to avoid damage should the painting need to be removed from the stretcher frame again in the future.
Step 8
Shoot one staple into the canvas in the center of the stretcher bar through both the scrap and painting canvas. Shoot additional staples into both layers of canvas, securing them to the stretcher bar, working back and forth on either side of the first staple until the first side is completely secure.
Step 9
Fold the opposite edge of the painting over its stretcher bar, and stand the painting up so that the stapled, secured edge is against the floor and the opposite edge is straight up.
Step 10
Grip the folded over edge of the canvas to be secured to the stretcher bar in the center with the canvas-stretching pliers and gently pull until the canvas is pulled taut. Staple the canvas edge in the center, and repeat the process working back and forth on either side of the first staple until the edge is completely secured to the stretcher bar.
Step 11
Repeat the above process for the remaining two sides of the canvas.
Video of the Day