
In just a weekend's worth of time, you can make a piece of furniture that offers additional storage and decorative possibilities beside your favorite reading chair or your bed. When topped with a lamp, vase of flowers and other decor, you can transform an average crate into a beautiful showpiece.
Things You'll Need
Video of the Day
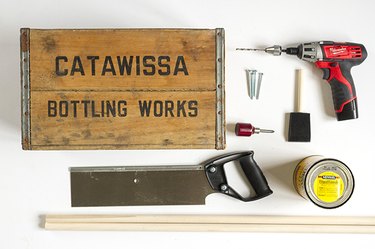
- Wooden crate
- 2 3/4-by-48-inch wooden dowel rods
- Ruler
- Handheld hack saw
- Miter box
- 120-grit sandpaper
- Electric drill
- 11/64-inch drill bit
- 4 #12 1-3/4-inch Phillips flat-head screws
- Stubby, manual Phillips screwdriver
- Wood stain
- 2-inch foam brush
- Utility paper towels
Video of the Day
Step 1: Cut Dowel Rods to Make the Legs
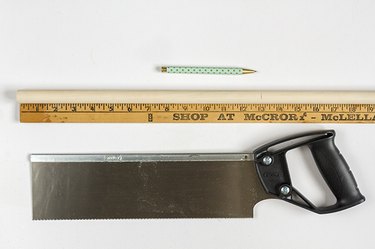
This nightstand measures 22 inches in height. Taking into account the crate's 9-inch-wide opening, the dowel rods, used to make the legs, need to measure 13-inches long. Use a ruler to make marks every 13 inches on the dowel rods, and then cut them to size with a handheld hack saw and miter box. Set the excess wood aside, and sand the sawed ends with 120-grit sandpaper.
Before attaching the wooden dowels, inspect the crate for weak spots and sand the rough parts of the wood.
Step 2: Mark the Leg Holes

Choose one of the crate's long sides as the nightstand's underside. Then, with a ruler and pencil, mark a hole 2-inches in from the edge at each corner. These marks are where the legs will be attached.
Step 3: Drill Holes Into the Crate

Outfit a handheld electric drill with an 11/64-inch drill bit and drill the marked holes on the crate's side. Brush away the wood dust.
Step 4: Drill Holes Into the Dowels
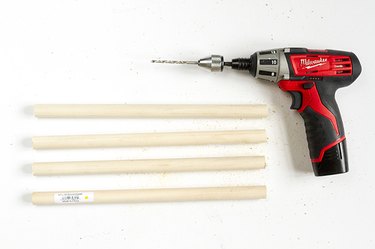
Drill holes into the top of each of the dowel rods.
Step 5: Attach the Hardware
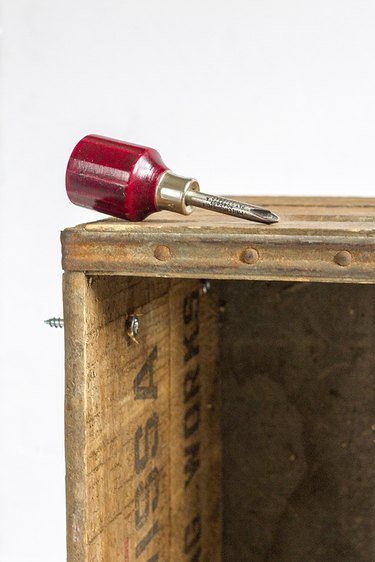
Screw 4 #12, 1-3/4-inch, Phillips flat-head screws through the drilled holes from the inside of the crate. Use your stubby-handled, manual screwdriver for this step because of the limited interior space inside the crate. Make sure the screws are twisted all the way through the crate.
Step 6: Attach the Legs
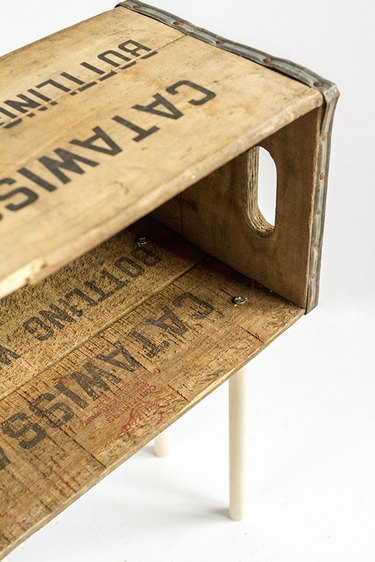
With your manual screwdriver securely fixed inside the crate on the head of the screw, use your free hand to twist each dowel rod in place.
Step 7: Stain the Assembled Piece
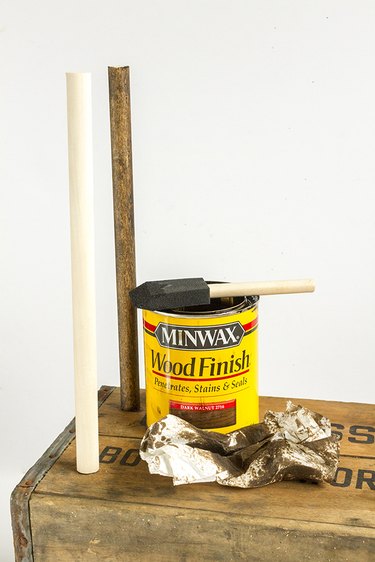
Lightly sand the crate and legs to remove any rough spots first. Then, brush on a coat of wood stain with your foam brush. Choose a stain that most closely matches the existing finish of your vintage crate. If you purchased a new, unfinished crate, coat the entire nightstand with stain.
Allow the stain to soak into the wood for 30 seconds to 1 minute, and then wipe it off with a utility paper towel. If desired, apply a second coat of stain for another 30 seconds. Set the nightstand on a drop cloth in a well-ventilated area, and allow it to dry for 24 hours.
Step 8: Decorate the Nightstand
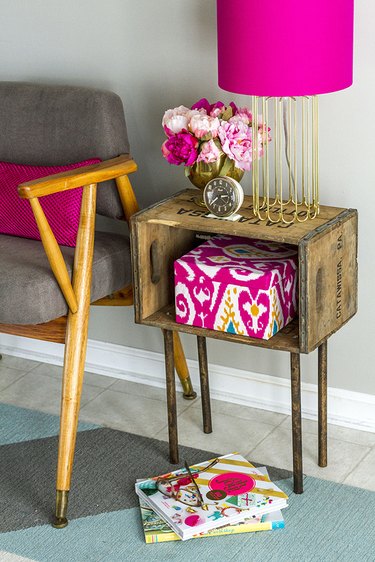
Once dry, fill your new nightstand with books and other decorative accents.