Things You'll Need
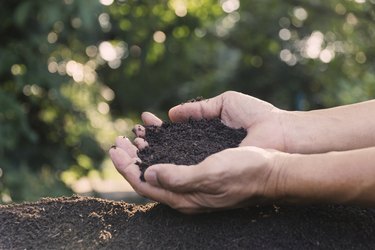
Soil
Newspaper
Clear glass quart jar with tight-fitting lid (or similar substitute)
Table salt or non-foaming dishwasher detergent
Stopwatch or timer
Permanent marker
Two rulers, pencils or straight-edged utensils
Soil texture, which refers to the relative proportion of mineral particles of various sizes in soil, is among the most important soil characteristics. Texture influences water-holding capacity, drainage, aeration, organic matter content and other properties. You can use a soil texture triangle to classify your garden's soil and its texture. This allows you to predict potential problems and determine whether a certain plant is likely to thrive or struggle in a site.
How the Soil Texture Triangle Is Helpful
A common soil science and agricultural tool, the soil texture triangle uses the percentages of sand, silt and clay in the soil to assign it to one of 12 textural classes. Properly classifying the soil in your yard or garden helps you describe the soil scientifically, thereby heading off potential future problems with the plants you choose to grow there.
Video of the Day
Estimating Soil Texture
Step 1: Dry Some Soil
Spread a few cups or several handfuls of soil out over a newspaper to dry.
Step 2: Pick Out Debris
Pick out all gravel, rocks, pieces of wood or other debris and crush the remaining soil pieces so that no larger pieces remain and the soil resembles a fine, uniform powder.
Step 3: Combine the Ingredients in a Jar
Add the soil to a clear glass jar so it is about a one-fourth full, add water to fill up the jar about three-fourths full and add 1 teaspoon of table salt or non-foaming dishwasher detergent.
Step 4: Shake the Jar
Shake the jar hard, with a tight-fitting lid on, for 10 to 15 minutes.
Step 5: Settle the Jar's Contents
Set the jar in a place where it can sit undisturbed for a few days.
Step 6: Start the Timer
Start a timer or stopwatch immediately.
Step 7: Mark the Layer of Sand
Mark, on the side of the jar, the layer of sand that settles out of the water after a minute. Sand particles are the largest of the soil particles and settle out of the mixture the fastest.
Step 8: Label the Silt Layer
Mark the top of the layer that forms after two to four hours of sitting. This layer is the silt layer and is often a different color than the sand layer. Silt particles are larger than clay particles but smaller than sand particles.
Step 9: Note the Clay Layer
Mark the top of the clay layer that forms atop the other layers once the water clears, which may take several days. Clay particles are very fine and can remain suspended in the water for a long time.
Step 10: Calculate the Percentages
Calculate the percentage of each type of particle in the soil sample. Measure the thickness of each layer and the entire sample. Divide the thickness of each layer by the total thickness to determine the percentage of each. Use these percentages in the soil texture triangle chart.
Reading a Soil Texture Triangle
Video of the Day
Step 1: Locate the Sand's Number
Locate the number that represents the percentage of sand in the soil sample along the bottom of the soil texture triangle. At each number, two lines enter the triangle; hold a ruler, pencil or finger along the left line.
Step 2: Find the Silt's Number
Find the number that represents the percentage of silt in the soil along the right side of the soil texture triangle. Follow with a finger or a lay a ruler or pencil down on the diagonal line that emerges from the silt percentage number.
Step 3: Determine the Intersection Point
Find the point where the two lines intersect. Follow the line that emerges to the left of the intersection point back to the left side of the triangle, where it reaches the percentage of clay, and make sure that the percent clay on the chart is the same as the percentage calculated from the soil sample.
Step 4: Read the Soil Texture Classification
Read the textural class that the point of intersection falls into. For example, a soil sample that is 40 percent sand, 40 percent silt and 20 percent clay is a loam, whereas a sample that is 10 percent sand, 45 percent silt and 45 percent clay is a silty clay.