Things You'll Need
2 boxes, one smaller than the other
Empty paper towel roll or two empty toilet paper rolls
Silver paint
Silver metal paper fasteners
Paint brushes
Hot glue gun or tape
Scissors or box cutter
Washi or colored electrical tape
Pipe cleaners (optional)
Permanent marker
Construction paper
Valentine's Day stickers
Buttons (optional)
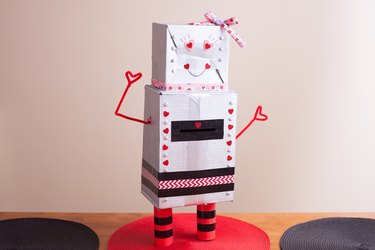
On Valentine's Day, help kids store their cards and notes in a charming robot box. With easy-to-follow steps, this robot is a perfect project for you to do with your kids. But what does a robot have to do with this day of love, you ask? All we know is that this adorable DIY will steal everyone's heart. Watch the video here!
Step 1
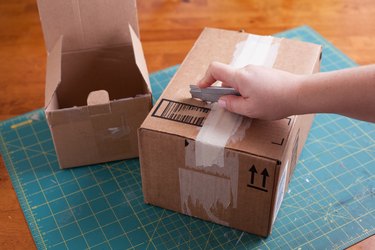
Decide where you want to put the slot-shaped opening. The slot could be on the top of the smaller box, the "head," or on the larger box where the robot's "chest" will be. Use scissors or a box cutter to make the cut. This is where kids will put their Valentine's Day cards.
Video of the Day
Step 2
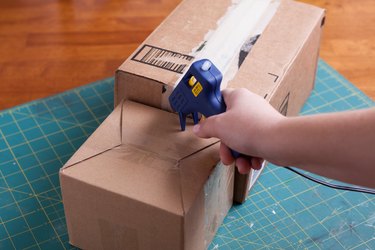
Glue the smaller box on top of the larger box. Now the head and body are attached.
Step 3

Attach the metal paper fasteners wherever you'd like. These will be the "bolts" on the robot. I added four on each side of the robot's face, and six down the front of the larger box, all in a row. You can also choose to put a row of bolts down the center of the body to look like shirt buttons.
Step 4
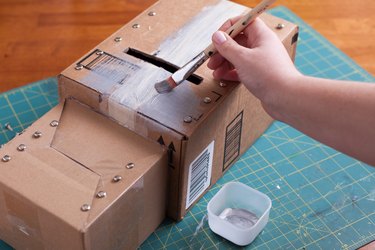
Paint the two boxes silver and let them dry. Depending on your paint and any markings on your boxes, you may need two coats.
Step 5
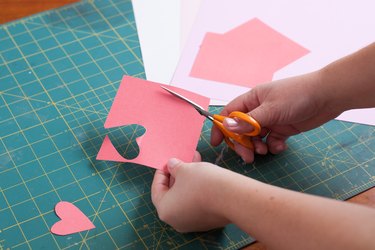
While your boxes are drying, use the construction paper to cut out hearts or other decorations that you'd like to add to the robot.
Step 6
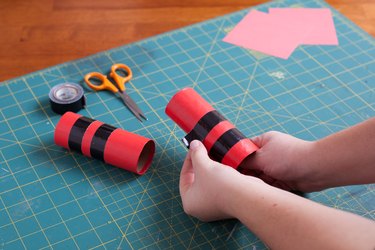
Make the robot's legs. Cut an empty paper towel in half or use two empty toilet paper rolls. Paint them silver like the body, and/or wrap them in washi tape to give them a striped look.
Step 7
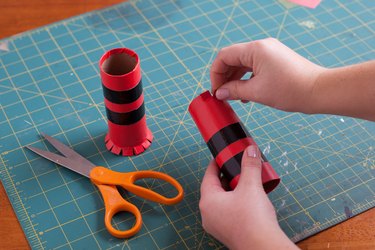
To make the legs easier to attach, cut one end of the roll into four small tabs. Bend back the tabs and glue or tape the legs to the bottom of the larger box.
Step 8
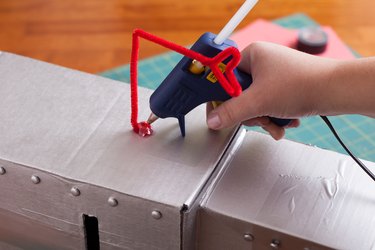
For bendable arms, use two lengths of pipe cleaners with the ends shaped as hearts for hands, then glue them to the sides of your robot as I've done here. Or, you can cut two strips of construction paper and fold them accordion-style for spring-y arms. Cut two hearts for hands and glue them to the ends of the arms, then glue your arms to the sides of your robot.
Step 9
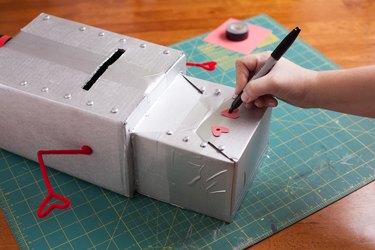
Give your robot a cute face using permanent marker, construction paper, buttons, and/or stickers. Have your little one join in on the fun!
Step 10
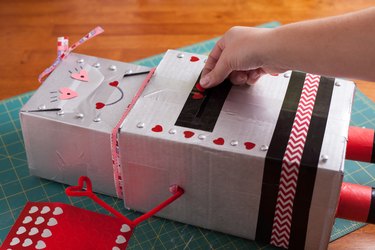
Decorate the robot. Add hearts, stickers or any other embellishments. Write your child's name on the back of the robot for personalization.
Video of the Day