Things You'll Need
Foam, such as a block from packaging, or a thick towel
Safety goggles
Respirator
Work gloves, leather or reinforced
Stable work surface, such as a workbench, counter or heavy table
Jeweler's vise, ordinary vise or clamp
Heavy-duty, sharp needle, such as an embroidery needle
Sharp object, such as an awl or a chipboard screw
Rotary tool or drill and small bits, depending on the desired hole size
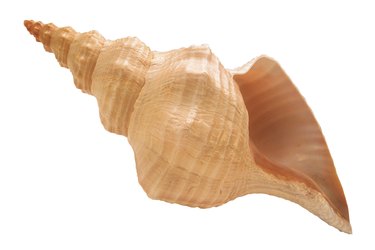
Making holes in seashells prepares them for stringing as beads or attaching them for other craft projects. You can use one of a variety of power tools to make holes in your seashells, but low-tech, everyday sharp objects can make holes in most shells and are safest for beginners. Always wear eye protection when making holes; even tiny seashell chips are sharp and can cause eye injuries.
Holes Without a Drill
Step 1
Put on a respirator. Inhaling dust and particles from seashells can cause respiratory problems, and, in some cases, result in fever and infections.
Video of the Day
Step 2
Mark the place on the shell with a pen where you want to make the hole. Check the position before you drill. For example, if you're going to put a jump ring in the hole for an earring, slide the ring into position on the shell to ensure the hole is in the right place.
Step 3
Put on work gloves to reduce the risk of poking yourself. Set the shell with its flattest side down on foam or a folded towel.
Step 4
Position a needle on the mark and work it with a twisting motion to start the hole. Exert gentle, even, pressure. On thin or relatively soft shells the needle may go all the way through.
Step 5
Set the tip of an awl or chipboard screw in the started hole, if needed. Keep twisting gently until the shell gives and allows the point through.
Rotary Tool or Drill
Step 1
Mark the hole position on the shell with a pen. Leave at least 1/8 inch of shell between the edge of the shell and the hole, if possible. A hole too close to the edge is likely to cause the edge to break.
Step 2
Secure the shell in a jeweler's vise, a vise clamp or an adjustable clamp so that the shell will remain stationary during drilling. Use extreme care when tightening the vise or clamp so as not to break or crack the delicate shell.
Step 3
Put on safety goggles and a respirator.
Step 4
Position the smallest drill bit above the mark. Turn on the tool and gently apply it to the mark. Don't press; let the tool make the hole. Exerting pressure can break the shell.
Step 5
Enlarge the hole for a thicker stringing material or jewelry use, if needed, by drilling the hole with the next largest drill bit. Repeat until the hole is the size you need.
Tip
Hardware and home improvement suppliers sell goggles, respirators and work gloves.
Use a new or sharp drill bit. A dull bit increases the risk of damage to the shell and physical injury. Bits sizes such as 1mm or 1.4mm create small holes suitable for jewelry and small shell craft projects.
It may not be possible to make a hole without a drill on heavy seashells such as conch shells.
Wash seashells thoroughly with warm water and dishwashing soap. If any of them show signs of a former occupant, clean them with alcohol or household disinfectant. Use a pipe cleaner to remove any residue.
Practice on broken shells to learn the right amount of pressure and the best spots for drilling before you start making holes in intact shells.
A piece of foam can protect fragile shells from the vise or clamp.
Clear monofilament fishing line works well for stringing shells for mobiles, wind chimes, sun-catchers, plant holders, ornaments and jewelery. These materials fit through tiny holes, so you don't have to spend as much time drilling and redrilling.
Some advanced and professional jewelry-makers and crafters drill stabilized shells in a shallow pan of water. Experience and full control is crucial for this method so that only part of the drill bit touches the water to prevent the risk of electrocution.
Warning
Do not hold a shell with your fingers when you're using any kind of power drill.
If a shell you're drilling slips in the vise or clamp, turn off the drill and re-clamp the shell.
For safety, use ceramic or diamond bits. Other drill bits may snap when drilling shells. Always wear safety goggles and work slowly and carefully.
Use a respirator approved by the National Institute for Occupational Safety and Health, NIOSH.
Video of the Day