Things You'll Need
Yardstick
Pencil
Scissors
Fabric for the inside and outside of the window quilt
Polyester batting
Pins
Sewing machine
Craft supplies: ribbon, lace, fabric scraps
Needle
Thread
Self-stick hook and loop tape
Making insulated window quilts is a moderately easy craft project that saves money and looks great too. Insulated window quilts are energy efficient, keeping the cold out and heat in. Add your own decorative touch to your window quilt with craft supplies or machine stitching. Follow these step-by-step instructions to make an insulated window quilt.
Step 1: Measure for Your Window Quilts
Measure the inside of the window frame. This will be the finished size of your insulated window quilt. Add 2 inches to all four sides of the window measurement for hemming allowance. Place both pieces of fabric on your work surface. Measure the fabric with the yardstick, adding the 2-inch hemming allowance to each side. With the yardstick and pencil, draw your cutting lines. Pin the two pieces of fabric together.
Video of the Day
Step 2: Cut the Fabric
Cut the fabric and set aside. Lay the batting on your work surface. Place your cut fabric on top of the batting and pin together. Cut the batting the same size as the pieces of fabric.
Step 3: Take Out the Pins
Remove the pins from the batting and fabric. Place one layer of fabric, right side facing down, on your work surface. Place the batting on top. Place the second piece of fabric on top of the batting, right side facing up. Pin all three pieces together.
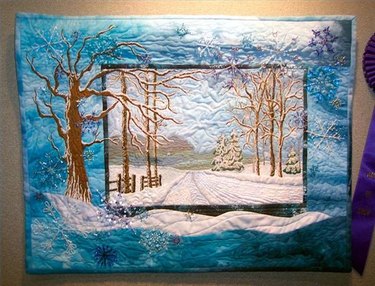
Step 4: Choose Your Embellishments
Decide how you would like to decorate your window quilt. Use ribbon, lace or fabric scraps to create the effect you want. Machine or hand stitch your decorative touches. You may choose to create simple machine stitching on the quilt.
Step 5: Trim to Reduce Bulk
When you have completed decorating the quilt, place the quilt on your work surface. The hem for this project is the 2-inch hem allowance you added to your window size. The hem is made from the quilt fabric that faces the outside, and this layer of fabric is not trimmed. Trim the top layer of the quilt and the batting 2-inches from each edge to eliminate bulkiness. The hem fabric facing the outside wraps around to the front side of the quilt.
Step 6: Sew the Hem
Fold the bottom piece of fabric in 1 inch, and fold over 1 inch again, overlapping the edge of the batting and the top layer of the quilt. Pin the hem into place on the top side of the quilt. Machine or hand stitch the hem.
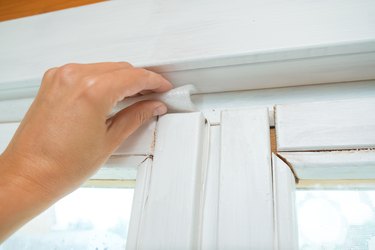
Step 7: Affix the Hook Section
Attach the hook section of the hook and loop fasteners across the top of the window. Attach the loop section of the hook and loop fasteners across the top of the quilt that will face the outside. Attach the quilt to the window.
Step 8: Cut and Pin
Cut eight 1-inch sections of hook and loop tape. Carefully measure and attach the hook and loop fasteners as described in Step 3. Pin the hook and loop fasteners first if you are unsure where you would like to place them.
Step 9: Finish Your Window Quilt
Space the hook and loop fasteners on the inside edge of the window frame and on the quilt. Try 1/4, 1/2 and 3/4 of the way down the inside edge of the window and on the corresponding locations on the quilt. Place hook and loop fasteners at the bottom of the inside edge of the window and at the bottom inside edge of the quilt. You can move the bottom of the quilt up and hook and loop it at different locations so you can see out the window.
Tip
Light fabric colors will keep the room light. The side of the insulated window quilt that faces the outside should be white or a light color. Find pictures of quilts for ideas, or create your own one-of-kind design. Fabric will slide and stretch during quilting. For this reason, adding 2 inches to all three layers of your quilt will give you some leeway when trimming and hemming your quilt. Folding over the back quilt layer to the front of the quilt is just one way to hem your quilt edges. Another option is to cut the fabric the same size as the window. Purchase binding tape to attach to your quilt. Binding tape will cover the front and back edges of the quilt. When you have completed decorating your quilt, pin the binding over the edges of the front and back of the quilt and sew into place. Pre-quilted fabric can also be used for window quilts.
Warning
Self-stick hook and loop may not stick to your fabric. If the hook and loop does not stick, tack or machine stitch in place. Cotton batting becomes lumpy when washed, unless heavily quilted. Remove pins as you machine stitch. The sewing machine needle can break if it hits a pin while stitching.
Video of the Day