Things You'll Need
2 pieces of fabric, 10-by-13 inches
2 cardboard pieces, 8-by-11 inches
10 sheets of specialty or colored paper, 8-by-11 inches
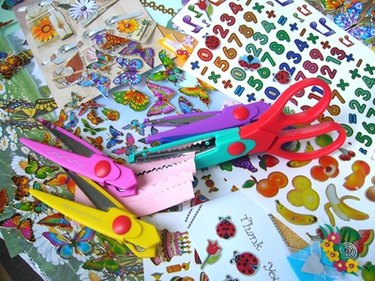
Paper edger scissors
Ruler
Pencil
Hole puncher
24-inch wired ribbon
Glue gun
Embellishments (buttons, stickers, tags, labels, ribbons)
Pictures
Colored, metallic or glitter markers
Scrapbooking is a more creative way of presenting photos and preserving memories than the traditional way of storing pictures in photo albums and boxes. A scrapbook album allows you to relate a story and an experience through pictures, postcards and souvenirs. In the past years, scrapbooking has become a popular hobby. Readily available materials such as scrapbook albums, stickers, labels, cards and many other embellishments help the novice create beautiful scrapbooks. Creating your own scrapbook album is an inexpensive and easy task that can add a personal touch to scrapbooking.
Step 1
Place the fabric on top of each piece of cardboard, allowing for an inch of fabric to hang around the edges of the cardboard. Press firmly and glue the fabric on top of each cardboard piece. Fold the fabric and glue around the edges of the cardboard.
Video of the Day
Step 2
Cut the edges of specialty or colored paper using a pair of paper edger scissors. See www.scrapbook.com for a variety of paper edger scissors.Take 10 pieces of the edged-cut paper and insert them between two fabric covered cardboard pieces.
Step 3
Measure and mark one inch from the top edge and a half inch from the left edge of the front cover. From the first mark, measure an inch below and mark it again. Continue this until you reach the bottom of the front cover.
Step 4
Punch a hole through each marked spot. Insert the wired ribbon into the first hole. When the ribbon is halfway through the hole, hold both ends of the ribbon and make a tight knot.
Step 5
Take one end of the ribbon and insert it over and into the second hole. Take the other end of the ribbon and insert it under and through the next hole. Continue this process alternating the ribbon until you reach the bottom hole.
Step 6
Take both ends of the ribbon and tightly tie a knot. Trim off any excess ribbon.
Step 7
Decorate your scrapbook album by gluing embellishments such as buttons, stickers, ribbons, photos and any other keepsakes on the front cover and inside pages. Add labels, drawings and other visuals to the scrapbook by using colored, metallic or glitter markers or by creating computer generated pictures and texts.
Tip
For more interest and visual appeal, add textures and layers to your scrapbook album. Glue photos, stickers, and other keepsakes on top of each other to create a layered effect and add texture. Freely use your imagination to create one-of-a-kind scrapbook albums.
Video of the Day