Knowing how to crochet basic shapes is useful for projects that you may encounter in the future. In particular, the oval shape is a feature in numerous patterns, including amigurumi, home decor and more.
Basic Idea
Think of an oval as two somewhat elongated half-circles separated by straight edges. This means the rounded ends of the oval must contain increases to create a round shape, while the sides stay consistent to maintain a straight edge, thus creating an oval. The length of the oval can be adjusted by the number of stitches in between the rounded ends.
Video of the Day
Video of the Day
Increasing Size
When crocheting a circle, patterns typically say to increase 6 stitches every round, which relates to pi, or 3.14. All this means to you is that to maintain a flat circle and increase evenly, each side of an oval or circle must increase by about three stitches to maintain shape without ruffling.
With this information, you can create an oval in any size -- simply keep the increases at around 3 per half, and if you notice one side looking a bit uneven, add an additional increase to account for the .14 portion of pi, or 3.14.
How to Crochet an Oval
Things You'll Need
Yarn
Crochet hook
Before you attempt an oval shape, you should know how to chain (ch), single crochet (sc), and work in the round.
Tip
To avoid holes in your oval, be sure to use a smaller hook for the yarn. In this tutorial, I have used a larger hook to emphasize the stitches.
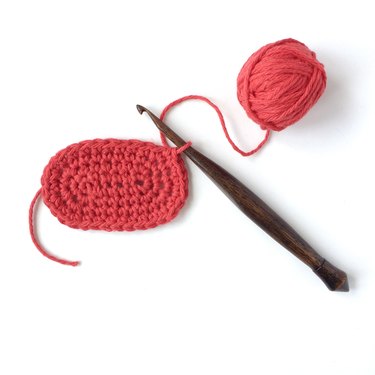
Crocheting an oval starts with a foundation chain. You crochet around the foundation chain, first along the top, then rotate the chain to work around the bottom to complete the round.
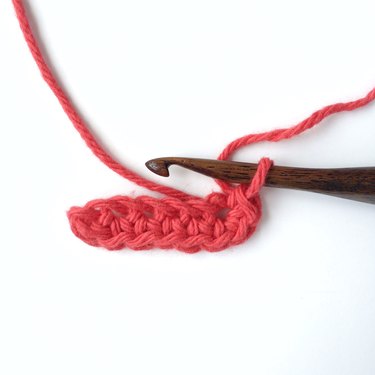
Step 1
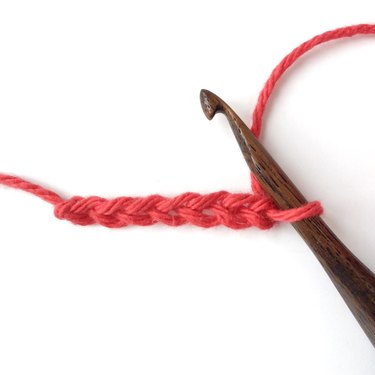
Begin by chaining a number of stitches (sts). The number chained determines the size of your oval. For this tutorial, I have chained seven.
Step 2
Round 1: Single crochet (sc) in the second chain (ch) from the hook, then sc 4.
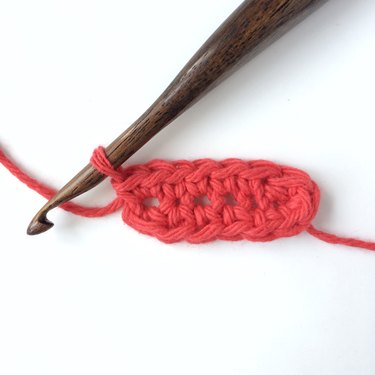
Step 3
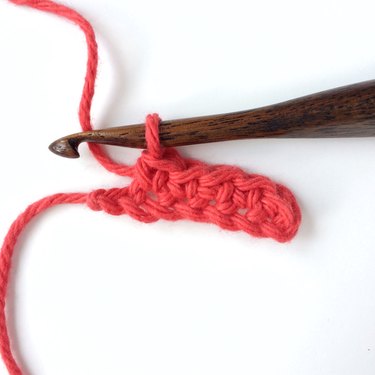
Crochet 3 sc in the last chain. Now rotate the work since you'll be working along the bottom of the foundation chain.
Step 4
Complete sc, 2 sc in the last chain at the position of the first sc of the previous round. Your first round is complete -- you now have 3 single crochets on each end separated by 4 on each side, for a total of 14 stitches.
Step 5
Round 2: Crochet 2 sc in the first stitch of the previous round; sc 4, 2 sc in each of the next three stitches, sc 4, 2 sc in the next 2 stitches. This now completes round 2 for a total of 20 sts.
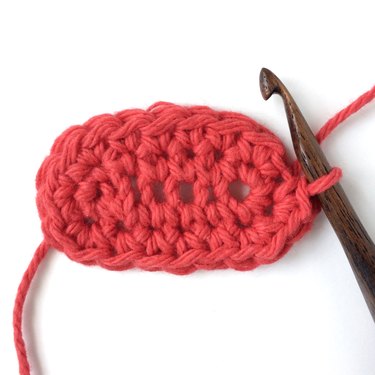
You now have created a base for your oval. To continue and make the oval larger, follow the guidelines: Increase 3 stitches on each end while maintaining your straight-edge stitches. As you increase on each end, space out the increases as evenly as possible to keep the rounded ends looking even.
Finishing Your Oval
How you finish the oval depends on what you are creating. Using some fancy edging, the oval could become a place mat or a tablecloth. If you continue to shape and use different crochet techniques such as decreases, you might create the head of a flying creature such as a dragon. Several patterns help get you started with your new oval-crochet knowledge.