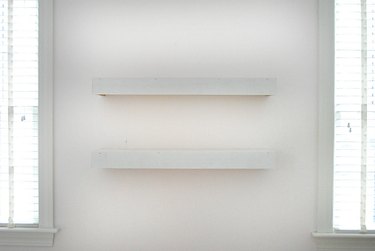
Floating shelves are a simple solution to add extra storage space on the walls while maintaining a clean, minimal look. They also add interest to a blank wall and can be used to display framed pictures or decorative objects.
Though they may look like the shelves are floating on air, there's actually a hidden support piece that mounts the shelf in place. This tutorial walks you through the simplest way to build your floating shelf -- using a support bracket that's finished on the top and sides to hide the support piece underneath.
Video of the Day
Video of the Day
Things You Will Need
This materials list is for two floating shelves around 36 inches long each:
- (2) 2 inch by 2 inch by 3 foot pine board
- (2) 1 inch by 4 inch by 6 foot poplar board
- (1) 1 inch by 6 inch by 6 foot poplar board
- 3-inch wood screws
- 1 1/2-inch finishing or pin nails
- Wood filler
- Sanding block
- Paint or stain
- Miter saw
- Stud finder
- Nail gun
- Electric screwdriver
Step 1: Choose Your Wood
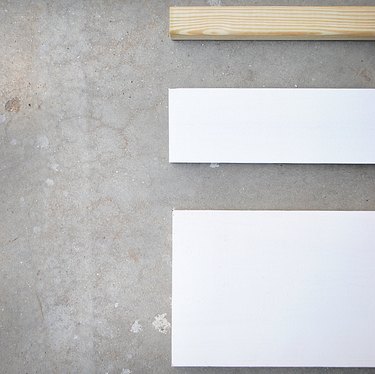
You'll need three different types of wood to make floating shelves - one for the support piece, one for the actual shelf, and one for the front and side facing. Pressure-treated pine was used for the supports because it's strong and inexpensive. Poplar was used for the shelves and the front and side facing. You may want something with more pronounced wood grain, like oak, if you're going to be staining your shelves instead of painting them.
Step 2: Hang Support Pieces
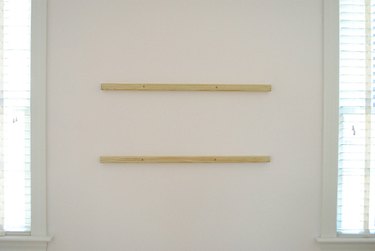
Cut the 2-by-2-inch pine to your desired length - the pine came in 36 inches long, which is the length used in this project. Use a stud finder to locate the studs behind the wall and mark those spots. Position the pine board along your markings and drive 3-inch screws through the pine, taking care to go into the studs, to attach it to the wall.
Step 3: Attach Shelves to Support Pieces

Cut the 1-by-6-inch poplar to the exact same length as your support piece. Position it on top of the support piece on the wall and attach it by driving 1 1/2-inch finishing nails through the top of the board into the support piece underneath. Space nails 6 to 9 inches apart across the whole length of the shelf.
Step 4: Attach Side Facing Pieces to Shelf
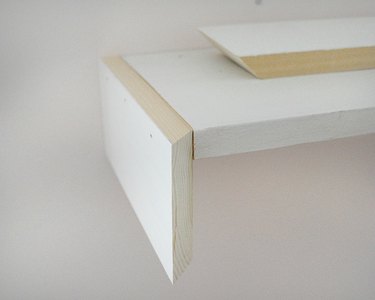
Measure the sides and front of the shelf and cut the 1-by-4-inch boards to those exact lengths. Use a miter saw to cut the corners at 45-degree angles. Remember that the length of the shelf should match the length of the facing pieces on the inside of the mitered corner, not the outside, pointier side. Attach to the shelf using 1 1/2-inch finishing or pin nails.
Step 5: Fill Nail Holes and Paint
Fill nail holes and any gaps at the corners with wood filler or spackle. Let them dry and then sand smooth and follow with two coats of paint. White semi-gloss latex paint was used in this project.
Step 6: Style Your Shelves

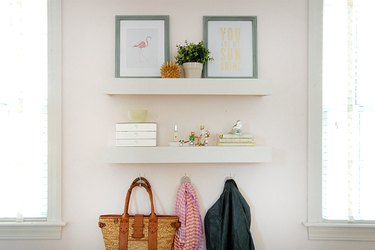
Once the paint has dried, it's time to decide how you want to use your new shelves! Here are a few inspirations: Bathroom: great for storing extra toilet paper rolls, towels or soaps. You can also use them to hold candles, a cute art piece or a mirror. Family room: used to add some extra punctuation to a gallery wall or jazzing up a blank space. Try adding a small plant, a family portrait or a stand-out object. * Bedroom: can be used for propping framed prints, jewelry storage or displaying decorative objects. If your room is on the smaller side, use the shelves for extra storage space.
Step 7: Add Any Extras Around the Shelves
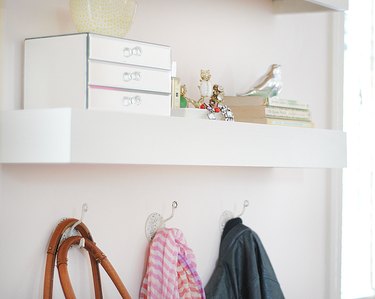
Don't forget to think about the areas around your new shelving. You could add a small bench underneath the bottom shelf and some hooks for hanging everyday items. This previously empty wall is now a perfect multi-function space!