Sometimes the soil that anchors plant roots and sustains plant growth harbors organisms that harm plants. Plants can die because of pathogens that lurk in the soil, or they can be choked by weeds that grow when dormant seeds germinate. By sterilizing container soil and ground soil in one of several ways, you can reduce the threat of diseases and weeds to your plants.
Conventional Oven
Video of the Day

You can use a conventional oven to sterilize garden soil. If, however, you use only garden soil, the oven's heat will harden it. Instead, make a mixture that is 50 percent garden soil and 50 percent peat moss or vermiculite, spread the mixture in a roasting pan and moisten it. Place the pan in an oven heated to 180 degrees Fahrenheit, and leave it in the oven at that temperature for one hour. The soil needs to cool thoroughly before it can be handled. Don't add perlite to the soil or sterilize a soil mixture that contains perlite, or else the oven's heat may release toxic fluoride, which may damage plants.
Video of the Day
Microwave Oven
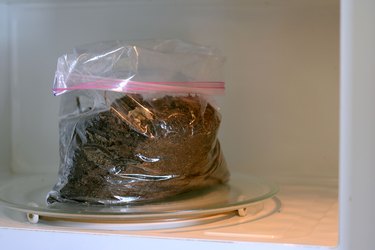
If you use a microwave oven to sterilize soil, don't place the soil in metal containers, and ensure plastic containers you use have no foil seal remnants still attached. The preparation for soil sterilization requires moistening a mixture that is 50 percent soil and 50 percent peat moss or vermiculite, placing the mixture in a plastic bag and keeping the bag open. Heat the soil in the open bag for 2 1/2 minutes on full power in a 650-watt microwave oven until a temperature probe registers 200 degrees Fahrenheit. Close or seal the plastic bag, and don't remove it from the oven until it and the soil are cool enough to handle.
Pressure Cooker
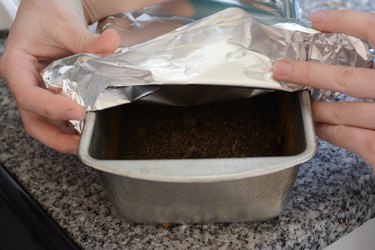
The pressure cooker soil sterilization method begins with filling shallow pans with no more than a 4-inch-thick layer of soil each and sealing the pans with aluminum foil. Place a cooking rack inside a pressure cooker, and add several cups of water below the rack. Arrange the shallow pans on the cooking rack by stacking them so that air can circulate around them. Place the lid on the pressure cooker, but do not cover the steam valve with the vent weight. The next step is to bring the water to a slow boil until steam escapes through the open steam valve. Then replace the vent weight, and heat the soil for 15 minutes at 10 pounds pressure. Remove the pressure cooker from the heat, and let it cool thoroughly before opening its lid and removing the pans of soil. The pans need to be kept sealed with the aluminum foil until you're ready to use the soil.
Solarization
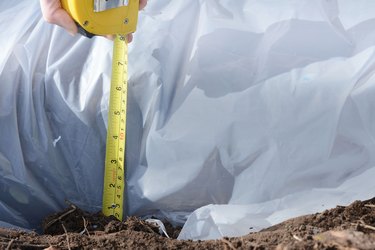
In order to kill weeds and sterilize the soil in a garden bed, till the soil to a depth of 6 to 8 inches. Raking the soil smooth then saturating the garden bed with water are the next parts of the process. Cover the soil with a 1- to 2-millimeter-thick, clear, plastic film; don't use black film. Bury the plastic film's edges 6 to 8 inches deep. Stretch the plastic film as tightly as possible so that it contacts the soil, and leave it in place for six to eight weeks. The plastic should stay in that position until you're ready to plant.