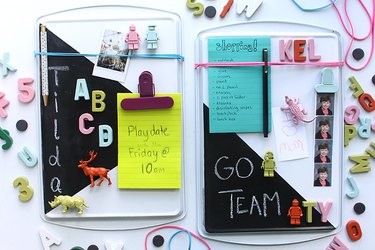
Make a stylish and functional memo board out of a cookie sheet -- you can customize each board to match any aesthetic. It's the perfect gift for any busy parent, teacher or student to encourage organization in a fun way.
Things You'll Need
Cookie sheet
Steel wool
Spray paint
Painter's tape
Chalkboard paint
Paintbrush
Chalk
Large rubber bands
Notepad
Magnet tape
Magnets
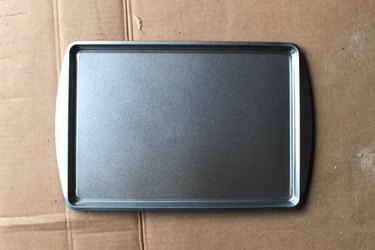
Step 1: Prepare the Cookie Sheet
Prepare the cookie sheet for painting by making sure it is clean and dry. Use steel wool to scuff the surface to allow the spray paint to adhere properly.
Video of the Day
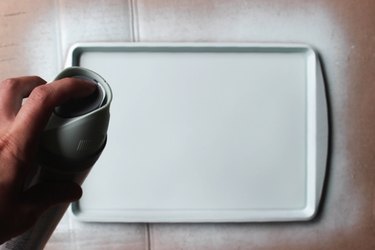
Step 2: Paint the Cookie Sheet
Spray paint the cookie sheet by holding the can 10 to 12 inches away, while making long, even strokes. Let the first side dry before turning the cookie sheet over to repeat the process.
Warning
Always spray paint in a well-ventilated area with protective material underneath the object being painted.
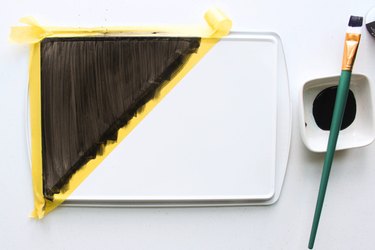
Step 3: Mask an Outline
Once the paint is dry, use painter's tape to create a straight, graphic line across the cookie sheet.
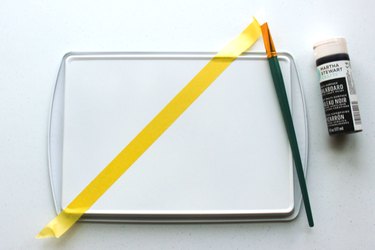
Step 4: Paint a Chalkboard
Use a paintbrush to paint one section of the cookie sheet with chalkboard paint. This process may take several coats of paint before it is ready for the next step.
Tip
Chalkboard paint can be found at most craft and hardware stores and comes in a variety of colors and forms, including spray paint, outdoor paint, craft paint and household paint.
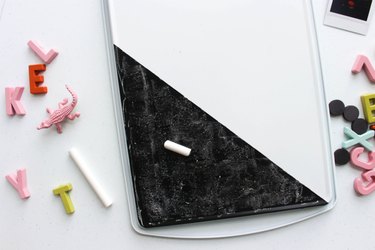
Step 5: Season the Chalkboard
Once the chalkboard paint is completely dry, it is important to lightly coat the surface in chalk. Then, simply wipe it off with a dry cloth or paper towel, and it is ready for writing.
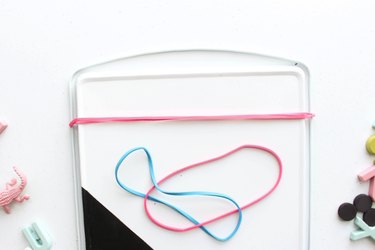
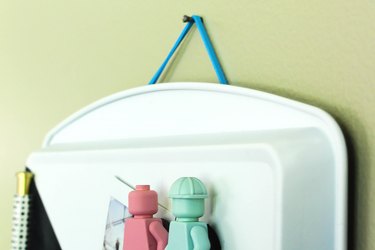
Step 6: Add a Rubber Band
Wrap one or two large rubber bands around the top of the memo board. This will be used to hang the board and hold extra items like pens, chalk, photos, or notes.
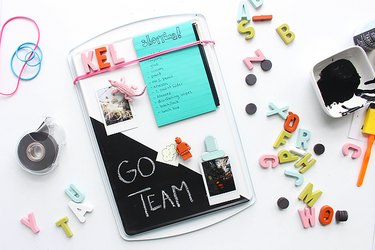
Step 7: Make Magnetic Notepads
Cut a strip of magnetic tape or add adhesive magnets to any notepad for an easy way to jot down notes, reminders and lists.

Step 8: Decorate and Customize
Add notepads as well as magnets in colors and shapes that will create an inviting area to hold accomplishments as well as important organizational information.
Step 9: Hang and Enjoy
Using the rubber band, hang the memo board in a prominent location in the home for easy access and quick reminders. Update the memo board regularly and stay organized year-round.
Video of the Day