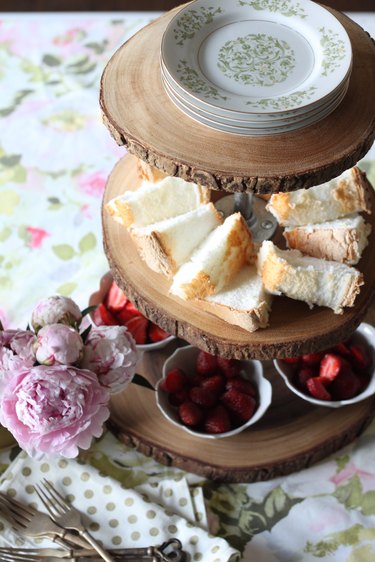
This easy-to-make, three-tiered serving tray, will instantly take your gatherings up a notch. It can be used for everything from parties and weddings to weekend get togethers. The rustic wood pairs nicely with the industrial piping to create a one-of-a-kind piece.

Things You'll Need
Three round wood slices (small, medium, and large)
Palm sander
Sandpaper
Clear varnish or polyurethane
Foam brush
Tape measure
(4) 3/8 inch galvanized floor flanges
(2) 3/8 inch by 6 inch galvanized steel pipe nipple
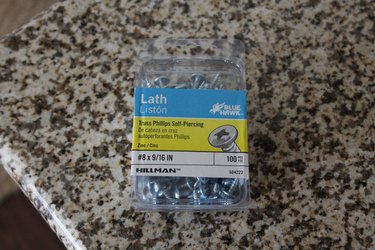
(16) 9/16 inch self piercing screws
Philips head screwdriver
Step 1:
Use a palm sander to rid the wood discs of any splinters or roughness.
Video of the Day

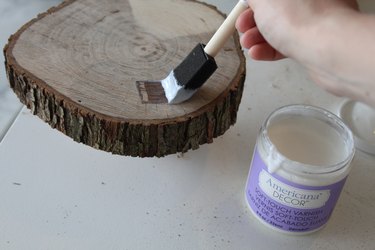
Step 2:
Using a foam brush, seal the surface of the wood with varnish or polyurethane. If you are worried about food safety, you can try using mineral oil or just leave the wood unfinished.
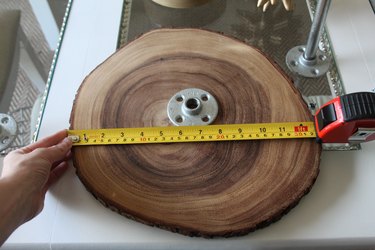
Step 3:
Most tree slices will not be perfectly circular in shape. Use a tape measure to roughly determine the center of the piece of wood.
Video of the Day
Step 4:
Screw one of the floor flanges in place in the center of the largest wood round. This will be your base. The screws should easily go into the wood. If they don't, or if the wood starts to crack, pre-drill your hole and try again. Repeat this process on the other two rounds. The middle round will have a flange in the center of the bottom and the top. The top round will only have a flange on the bottom. Make sure the screws you use have a large enough head so that they will not slip through the hole in the flange. The ones pictured below should work perfectly.

Step 5:
Thread the nipple into the floor flange on the largest round. Then, add the second layer by screwing the second tier onto the nipple. Add another nipple to the second layer. Lastly, screw the top layer onto the second nipple to create the top tier.

Once all the rounds are screwed into place you're done! When you are finished using it, you can easily separate the tiers by unscrewing the nipples to make for easier storage.