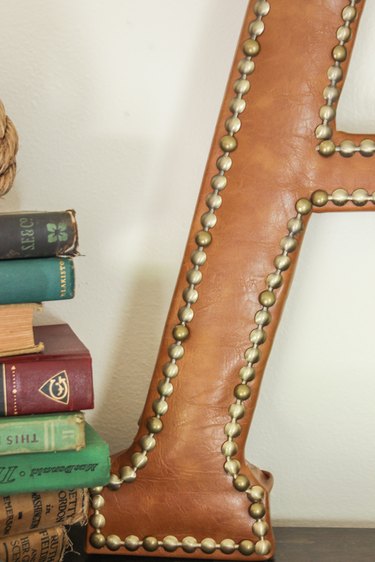
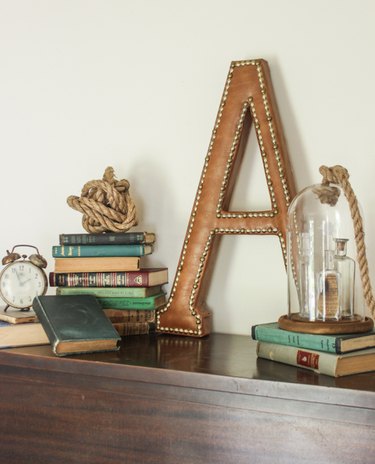
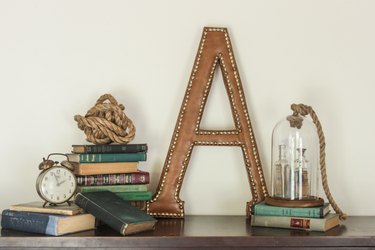
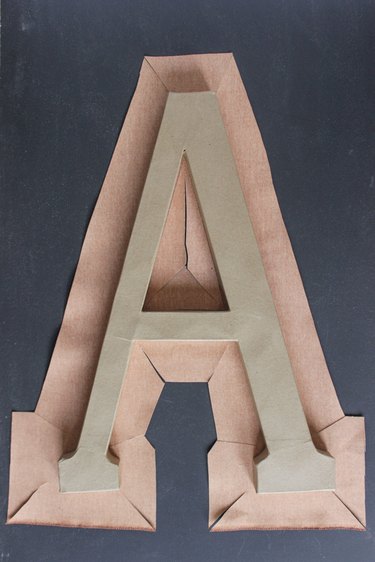
Monograms are a timeless piece of decor that can be stylishly incorporated into wall galleries, bookshelves, mantels and desks. Reminiscent of upholstered leather wing chairs, this version adds a bit of masculine flair with rich-looking leather and shiny brass nails, and would lend a bit of library chic to any space.
Video of the Day
Things You'll Need
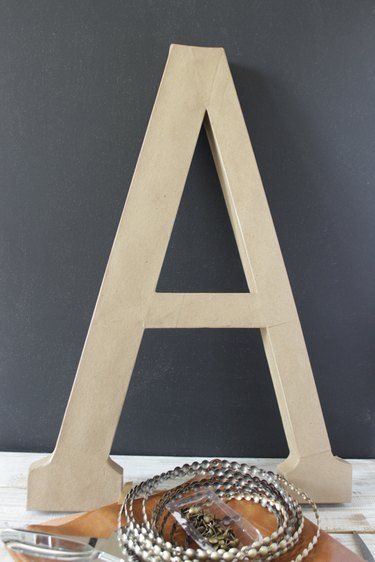
Large paper mache monogram, 23 1/2 inches tall
Faux leather fabric, 1/2 yard
Scissors
Measuring tape
Hot glue gun with hot glue sticks
Polyester batting, 1/2-inch thickness, low loft
Heavy duty staple gun with staples
Nailhead trim, 1 roll
Wire-cutting pliers
Needle-nose pliers
Hammer
Step 1:
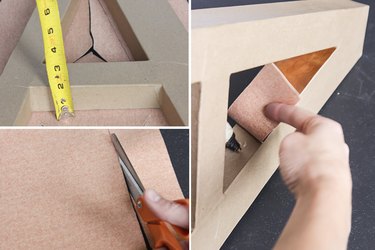
Lay the faux leather fabric with the underside facing up and place the paper mache monogram face down on top of it. Cut out the outline of the letter, allowing approximately a 2-inch clearance on all sides. At all of the corners and points of the letter, cut slits toward the center until you reach the edge of the paper mache letter. Be sure to cut slits in the center of the letter as well. This will allow you to pull the fabric over the sides later.
Video of the Day
Step 2:
Measure the thickness and length of the sides on the inside of the letter and cut out leather fabric strips according to size. Hot glue the fabric strips to the inside of the paper mache monogram.
Step 3:
Place the paper mache monogram on top of the batting and cut out the batting to the exact outline of the monogram.
Step 4:
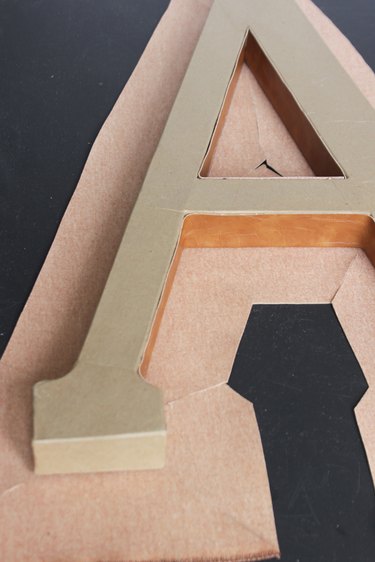
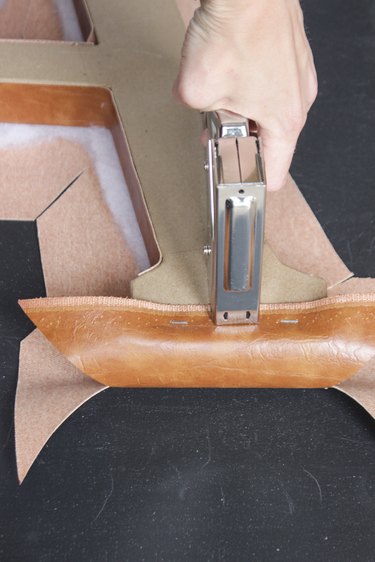
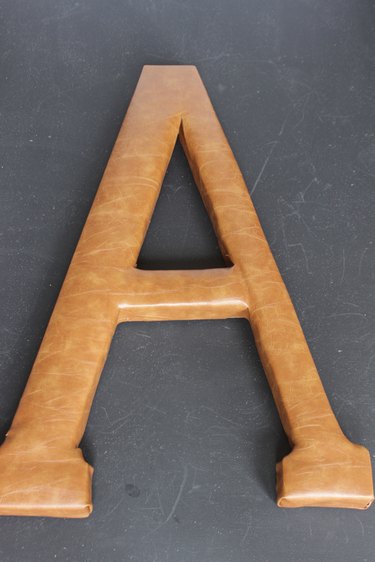
Place the batting letter face down on the leather and place the paper mache monogram face down on top of it. Make sure they are perfectly aligned. Pull up the sides of the leather tightly and securely staple the fabric on the back of the monogram. Repeat this process on all sides of the monogram, spacing staples about 1/2 inch apart. Leave the serif parts of the letter and corners for last, as these parts will require folding and tucking shown in the next step.
Step 5:
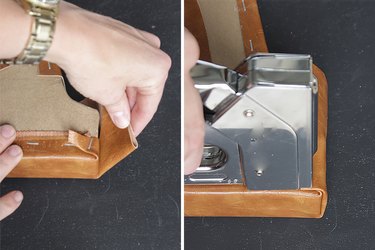
To hide the corner flaps of fabric around the serif parts of the monogram and create cleaner seams, fold the corner flaps in and then fold them over before stapling.
Step 6:
Repeat this process for the top of the monogram.
Step 7:
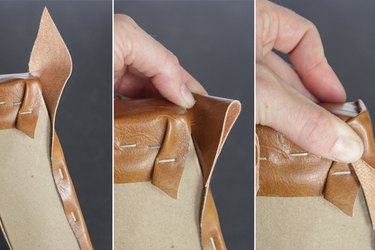
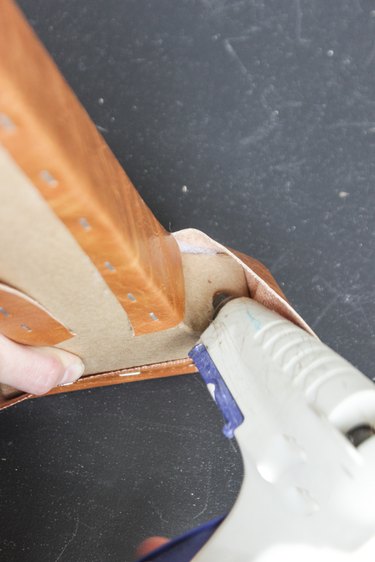
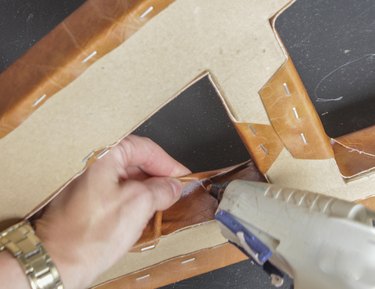
To attach fabric to any curved parts of the serif, hot glue the fabric flaps in place.
Step 8:
Hot glue any loose edges of fabric to the inside of the letter. Be sure to keep the edges as smooth and clean as possible from the glue so the seams are less visible.
Step 9:
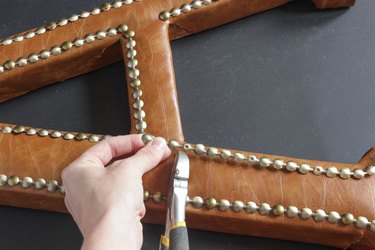
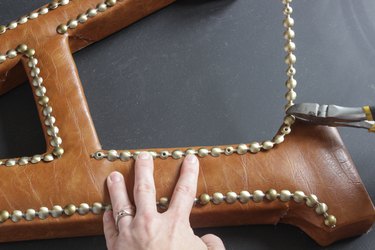
Measure along the sides of the upholstered monogram and cut strips of nailhead trim according to size using wire-cutting pliers.
Tip
To ensure secure placement of the nailhead trim, line up the trim so the point where the nail is driven in is at the corners of the letter and then cut to size with wire-cutting pliers. Use hands to flatten out the trim before attaching .
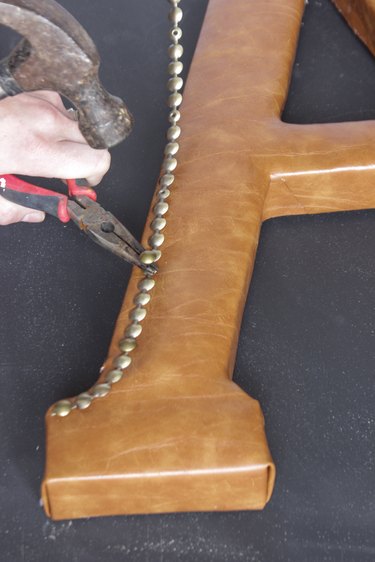
Step 10:
Attach the nailhead trim along the outer and inner edges of the monogram. Use needle-nose pliers to ensure a safe and secure hold on the nailhead while gently hammering the nails into place.
To coordinate with the decor and preference of the recipient, different colors of faux leather can be used as well as different finishes of nailhead trim. The finished product would be a bold addition to a man-cave, office, study or library.