Since the 1940s, most house chimneys have been built with a chimney liner -- often called a flue liner -- surrounded by a utilitarian "box" made from cement block or cheap, unattractive brick. Enclosing this box with an attractive, watertight exterior veneer or sheath is a common practice. Such an enclosure, when run up the outside of a house, is properly called a chimney chase.
Step 1
Build a footing that is adequate to support the chimney and its enclosure. Excavate around the preexisting chimney to determine that the footing used to support it will also support the enclosure. The footing should be a minimum of 6 inches larger all around than the maximum dimensions of the enclosure; anything less mandates that you extend the footing.
Video of the Day
Step 2
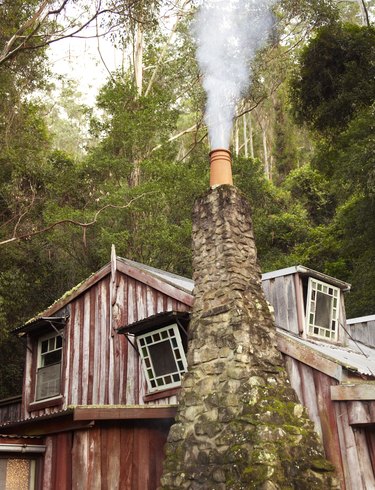
Choose an enclosure material that is suitable for the application and the environment. You can clad a preexisting chimney that has been properly made, with an insulation barrier that satisfies code compliance, in any material intended for exterior use. Siding is often made of flammable material, so if the preexisting chimney abuts siding, this is a good indication that the clearances between the preexisting chimney and the flue liner -- which can be heated by combustion gases -- is sufficient. If in any doubt, obtain confirmation from your local code compliance office. Once you make this determination, choose a material for the enclosure that suits the environment and the character of the home, perhaps a veneer of fieldstone for a primarily-masonry building, or decorative shingles for one with old-fashioned wooden features or siding.
Step 3
Ensure that the material used is entirely weatherproof. Chimneys are exposed to the environment on three of their four sides, so are extremely vulnerable to damage by the elements. Masonry enclosures must be properly pointed with the mortar mix recommended by the manufacturer of the brick, block or stone cladding; poor pointing allows moisture ingress and subsequent freeze-thaw damage. Timber enclosures must be coated regularly with the appropriate treatment to prevent disintegration and subsequent moisture entry, which in turn could cause damage to the liner.
Step 4
Make certain that the intersection between the roof and the chimney is watertight. Use flashing that extends at least 4 inches beneath the roof sheathing, whether tile, shingle or rubber-roll roofing. The flashing must also extend at least 4 inches up the sides of the chimney enclosure; if using a masonry enclosure, rake out a joint, insert the flashing then caulk the joint to entirely replace the raked-out mortar. Use prefabricated corner pieces to ensure the flashing is completely watertight.
Step 5
Fit a chimney cap of the correct size. Prefabricated chimney caps are available from most home improvement warehouses and builders' merchants, typically made from concrete or stone. The cap must extend at least 2 inches out from each face of the chimney enclosure to ensure good water run-off. If the fabric of the cap and the flue liner are incompatible -- for instance if the cap is stone and the liner is clay -- the two materials will expand and contract at different rates. Leave a small gap between the two, and fill it with a heat-resistant, highly elastic caulk.
Warning
As with any project that involves working at heights, use all proper precautions and observe the manufacturer’s instructions applicable to the ladders or the scaffold. Best practice suggests an assistant be close by, especially when lifting heavy construction materials above the ground.
Video of the Day