Things You'll Need
Stud finder
2-by-4 boards
Utility knife
Reciprocating saw
Safety goggles
Tape measure
Pressure-treated 2-by-4 boards
Circular saw
Galvanized screws
Drill
Hammer
Nails
Assistant
Drywall screws
Drywall
Flexible corner beads
Stapler
Staples
Joint compound
Putty knife
Drywall tape
Fine-grit sandpaper
Clean, dry rag
Latex-based primer
Paintbrushes
Paint
Molding
Finishing nails
When you're remodeling your home, building an interior wall allows you to divide a larger room into two smaller rooms, which can meet your changing needs. If the room where you're building the wall has carpeted floors, you must first remove the carpet where the wall is being installed. Doing this enables you to connect the wall to the subfloor, providing a firmer base while making it easier to remove the rest of the carpet in the future.
Step 1
Choose the location for the wall by using a stud finder to locate the studs in the intersecting walls that the new wall will be attached to. Attaching the end studs of the new wall to the studs of the existing walls can strengthen it.
Video of the Day
Step 2
Lay 2-by-4 boards on the floor where the wall is being built. Cut into the carpet and padding with a utility knife, using the 2-by-4s as a guide. Lift the boards out of the way, and remove the carpet and padding to expose the subfloor.
Step 3
Cut the molding away from the base of the intersecting walls with a reciprocating saw.
Step 4
Mark the location of the doorway onto the subfloor, and measure the distances from the ends of the doorway to the walls. Cut pressure-treated 2-by-4s that match these distances to be the sill plates upon which the wall framing will sit.
Step 5
Attach the sill plates to the floor with galvanized screws every 6 inches.
Step 6
Cut a non-pressure-treated 2-by-4 that is the same length as each sill plate. These will be the bottom plates for the frame. Cut a third board that measures the length of the entire wall, which will be the top plate.
Step 7
Cut the wall studs out of non-pressure-treated 2-by-4 boards. Calculate the height of the wall studs by subtracting the thickness of two 2-by-4s from the distance between the ceiling and the top of the sill plates.
Step 8
Nail a stud into each end of the bottom plates, then nail studs in between the two end studs, keeping the studs spaced no further than 16 inches apart.
Step 9
Nail the top plate to the tops of the studs.
Step 10
Lift the frame into place on top of the sill plates with an assistant's help. Nail the frame to the sill plates, and attach it to the studs in the intersecting walls and the ceiling with drywall screws.
Step 11
Cut two 2-by-4s that are the same height as the door, and nail them to the end studs in the doorway. These studs are called the jack studs, and the end studs are called the king studs.
Step 12
Cut the header for the doorway from a 2-by-4. The header is the same length as the distance between the two king studs.
Step 13
Nail the header to the top of the jack studs. Nail a stud between the header and top plate. This is called the cripple stud. If there is more than 16 inches between the cripple stud and the king studs, use multiple cripple studs.
Step 14
Measure and cut drywall sheets to fit on the wall. Attach them to the framing with drywall screws every 16 inches.
Step 15
Staple flexible corner beads to the edges of the doorway, using one staple every 3 inches.
Step 16
Apply joint compound to the joints between the sheets of drywall and over the corner beads with a putty knife. Place drywall tape over the joint compound, and run the putty knife over the tape to press it into the joint compound. Allow it to dry overnight.
Step 17
Sand the joints with fine-grit sandpaper, and wipe the dust off the wall with a clean, dry rag. Add two more applications of joint compound and drywall tape, allowing each coat to dry overnight and sanding it smooth.
Step 18
Coat the walls with latex-based primer and allow it to dry.
Step 19
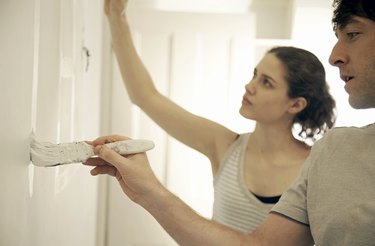
Paint the walls with two coats of paint, allowing each coat to dry.
Step 20
Nail molding to the base of the wall with finishing nails.
Warning
Wear safety goggles when sawing the wood.
Video of the Day