Things You'll Need
Baby-sized clothing hanger
Air-soluble fabric marker
Yardstick
Scissors
54-inch wide fabric, 1 yard
Pins
Iron
Coordinating thread
9-by-12-inch piece of cardboard
Pinking shears

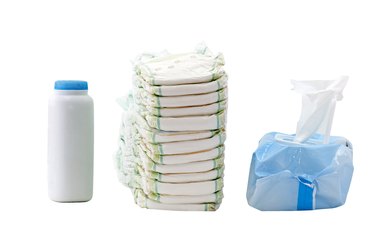
Speed is the key in changing diapers. The faster you are able to get to the supplies and get the baby changed, the quicker you can calm the baby, and everyone can get back to sleep during late-night changes. Diaper stackers enable the diapers to be easily accessible to the changing table. Custom diaper stackers can be made to match the decor of the nursery, making it fashionable and functional.
Cutting the Fabric
Step 1
Fold the fabric under so that it is double layered. Place the hanger at the non-folded end. Trace around the hanger with the fabric marker. Skip the neck of the hanger; leave this section an open gap.
Video of the Day
Step 2
Draw a line 5/8 inches long at the opening of each side of the gap. Connect the two lines horizontally. The piece should resemble a turtleneck and shoulders. Cut the pieces.
Step 3
Cut a piece of fabric 22 inches long by 54 inches wide for the body.
Step 4
Cut two 10-by-13-inch pieces for the bottom of the stacker.
Sewing and Assembly
Step 1
Fold the opening pieces down -- the turtleneck -- of the top hanger piece and iron. Hem them using a straight stitch.
Step 2
Place the two top hanger pieces, right-sides-together, and pin. Sew the sides of the pieces together using a ¼-inch seam allowance. Follow the curves by lifting your presser foot and pivoting. Clip the corners as you go. Leave the bottom and top open. Flip the piece right-side-out and press flat with the iron.
Step 3
Turn the side edges of the body piece 2 ½ inches and pin. Iron flat, and hem using a straight stitch with a ¼-inch seam allowance.
Step 4
Fold a 5 ½-inch box pleat at the center back of the body piece. Pin it. Fold a 3 ¼-inch box pleat on the body piece at each spot where it will adjoin the side seam of the top hanger piece. You will make two spots. Pin. Sew all of the pleats in place with a straight stitch.
Step 5
Place the right sides of the body and the top hanger piece together. Match up the side seams and center back. Pin in place and stitch together using a straight stitch and a ½-inch seam allowance. Turn the piece right-side-out and iron flat.
Step 6
Lay the bottom pieces wrong-sides-together. Pin them together and sew around three sides using a straight stitch with a ¼-inch seam allowance.
Step 7
Slide the piece of cardboard in the open side and in between the two pieces of fabric. Sew the side shut.
Step 8
Line the center of the back of the body piece with the center of a long side of the bottom. Pin right-sides-together. Pin all sides together from there to attach the bottom to the body piece. Sew together using a zigzag stitch and a 5/8-inch seam allowance. Use the pinking shears on the seams to prevent fraying.
Step 9
Insert hanger and hang in nursery.
Tip
Hangers from retail baby stores work well and are readily available from purchases or shower gifts.
Front edges will overlap to prevent the diapers from falling out.
The back of a notebook or notepad is the correct size for the cardboard. It is rigid and saves you from having to cut out a piece.
Video of the Day