Things You'll Need
Measuring tape
Worsted-weight yarn
5 millimeter crochet hook
Yarn needle (optional)
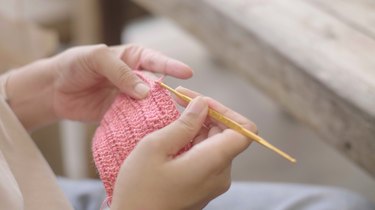
Arm covers are used to protect the areas of your couch that are most vulnerable to soiling. Skin oils and dirt on the hands are transferred to the arms of the couch and may be difficult to clean. A simple solution is to cover the arms. The crochet chair arm cover is a rectangular crocheted piece, with or without pockets for items such as tissues and a remote control. A decorative border may be added to embellish the cover. This simple project, requiring only three basic stitches, is well suited to novice crocheters.
Simple Arm Cover
Step 1: Calculate Measurements for Your Crochet Armrest Covers
Measure and note the length of the couch arm, from its back to front border. Subtract 2 inches from that dimension to calculate the length of the arm cover. The width of the arm cover is a matter of personal preference. To prevent the cover from sliding, the crochet chair arm cover should wrap over the top of the couch arm and drape a few inches on each side.
Video of the Day
Step 2: Crochet the Chain
Crochet a chain to the length of the arm cover. Chain one and turn to begin the first and consecutive stitch rows. Do one single crochet stitch in each chain, until you reach the end of the chain. Chain one and turn. Do one single-crochet stitch in each stitch from the previous row, until you reach the end of the row.
Step 3: Add Rows of Single Crochet Stitches
Continue adding rows of single crochet stitches until the arm cover reaches the desired width. At this point you can fasten off and weave in loose threads to finish the plain couch arm cover or you can add pockets and a finished edge or a decorative border.
Adding Pockets and a Finished Edge
Step 1: Measure the Width and Add Rows
Measure the width of the arm cover. Add rows of single crochet stitches to increase the width of the cover by 8 inches. Fold the lengthened cover 4 inches from the edge that you just crocheted. With one loop still on the hook, begin joining the folded edges to form the pocket.
Step 2: Single Crochet on the Doubled Edge
Single crochet in each pair of stitches on the doubled edge. When you reach the first corner, do three single crochet stitches in the hole closest to the corner. Continue the single crocheted border, working across the folded edge. Do three single crochet stitches in each corner. Continue crocheting until you reach the starting point.
Step 3: Join and Fasten Off
Join the beginning and ending stitches with a slip stitch in the first stitch. Fasten off the last stitch. If desired, the pocket may be separated into two or more compartments. Using yarn and a yarn needle, sew a running stitch seam vertically from the top to the bottom of the pocket. Weave in loose threads.
Tip
Drape the crochet Chair arm cover over the sofa arm. Twist pins may be used to hold the arm cover in place.
Video of the Day