Things You'll Need
Measuring tape
Christmas lights
Shingle tabs
Ladder
Extension cord
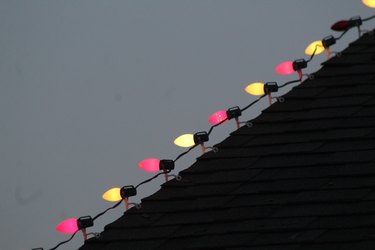
Hang Christmas lights along your roof's ridges to add a finishing touch to your festive decorations this holiday season. Christmas lights must be hung with proper attention to the preparations, power recommendations and homeowner safety. Instead of hanging lights randomly, install enough working lights to properly cover your entire roof's ridges the first time with shingle tabs. You can hang Christmas lights on the roof peak in less than three hours.
Step 1: Measure and Prepare Materials to Install Christmas Lights
Measure the area you are decorating by placing the end of your measuring tape at one corner of your home's foundation, and then walking it down to the other end. Most Christmas lights packages come in either 25-foot, 50-foot or 100-foot lengths, which can be divided into the number of feet you have measured to find the number of strings needed to cover the entire roof ridge. For example, if your measurements show that you have 200 feet of roof ridge, you would need four 50-foot light strings.
Video of the Day
Step 2: Locate the Best Electrical Outlet
Decide which outlet works best for providing power to your Christmas lights on the roof peak. Locate an electrical outlet close to your starting point on the outside of your home, then look for ones closest to that point on the inside of your home. Open a window slightly if you are forced to use in indoor outlet.
Step 3: Test the Light Strings
Test each Christmas light string to make sure each light works by plugging each string into an electrical outlet and inspecting each bulb. Replace bulbs that are not working properly or replace the entire string.
Step 4: Prepare Bulbs and Tabs
Remove each bulb by unscrewing them one at a time, place the shingle tab in between the bulb and socket, and then screw the bulb back into place. Repeat for each bulb in your set. There should now be a bulb and socket on either side of each shingle tab.
Step 5: Position Your Ladder Safely
Set your ladder to match the height of your roof ridge. Slide the ladder's two sections apart from each other to extend its length, allowing the latch to catch the ladder's leg when you have reached the roof's ridge. Verify that all four legs are securely set to the ground, and that you have enough room to reach your roof's ridge without standing on the very top of the ladder.
While setting up the ladder, always follow the 4-to-1 ladder rule: For every 4 feet the leader reaches upward, set the base one foot out from the wall. Count the rungs to help you estimate distance as they are about one foot apart. Fully open the stepladder, and don't try to use a folding ladder that isn't completely unfolded.
Step 6: Set Up Extension Cord
Plug in an extension cord and route it to the starting point for your lights. Slide the extension cord through the cracked window nearest the roof ridge, and then set it at the base or corner of your home. Plug in the first string of Christmas lights but do not turn on their power.
Step 7: Hang Light Strings
Install the Christmas lights on the house. Lift the closest shingle at the corner of the roof ridge and insert the first shingle tab underneath with the other hand. The weight of the shingle will hold the shingle tab into place when you release it from your grip. Continue placing the shingle tabs under the shingles, until you reach the end of the light string.
Step 8: Adding Light Strings
Plug another string into the end of the Christmas lights string you have already hung. Slide the first shingle tab under the roof's shingles, repeating until you reach the other edge of the roof's ridge.
Warning
Use the Three Points of Contact Rule, which reduces your chances of slipping and falling off the ladder. During the entire time you're climbing up, climbing down and working you must face the ladder with one foot, two hands (or two feet and one hand) in contact with the ladder rungs, steps and/or side rails. This way, even if you slip while climbing you're not likely to become unstable and fall. Never carry anything that will interfere with your grip on the ladder, or you won't be able to maintain the Three Points of Contact. This could result in falling if your hand or foot slips.
Video of the Day